!3
]
,
guide
printhead | ibbon |
1
J |
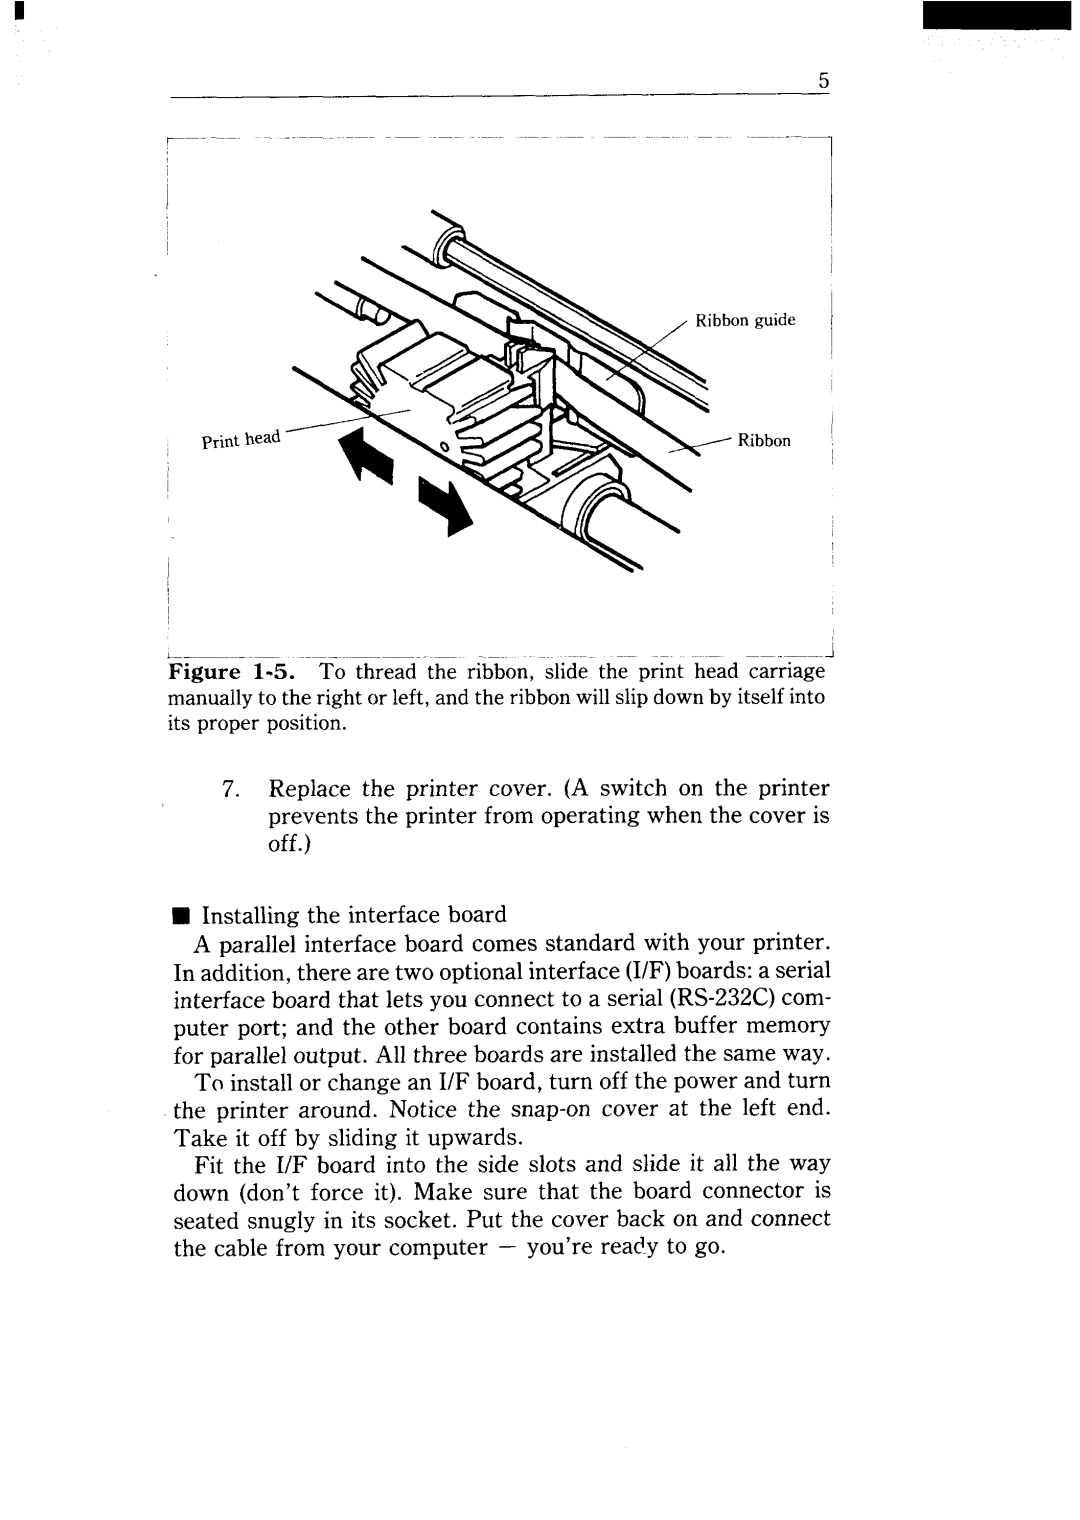
Figure 1-5. To thread the ribbon, slide the print head carriage
manually to the right or left, and the ribbon will slip down by itself into its proper position.
7.Replace the printer cover. (A switch on the printer prevents the printer from operating when the cover is off.)
9 Installing the interface board
A parallel interface board comes standard with your printer. In addition, there are two optional interface (1/F)boards: a serial interface board that lets you connect to a serial
To install or change an I/F board, turn off the power and turn the printer around. Notice the
Fit the I/F board into the side slots and slide it all the way down (don’t force it). Make sure that the board connector is seated snugly in its socket. Put the cover back on and connect the cable from your computer – you’re ready to go.