4220 Flow Meter
Section 6 Maintenance and Service
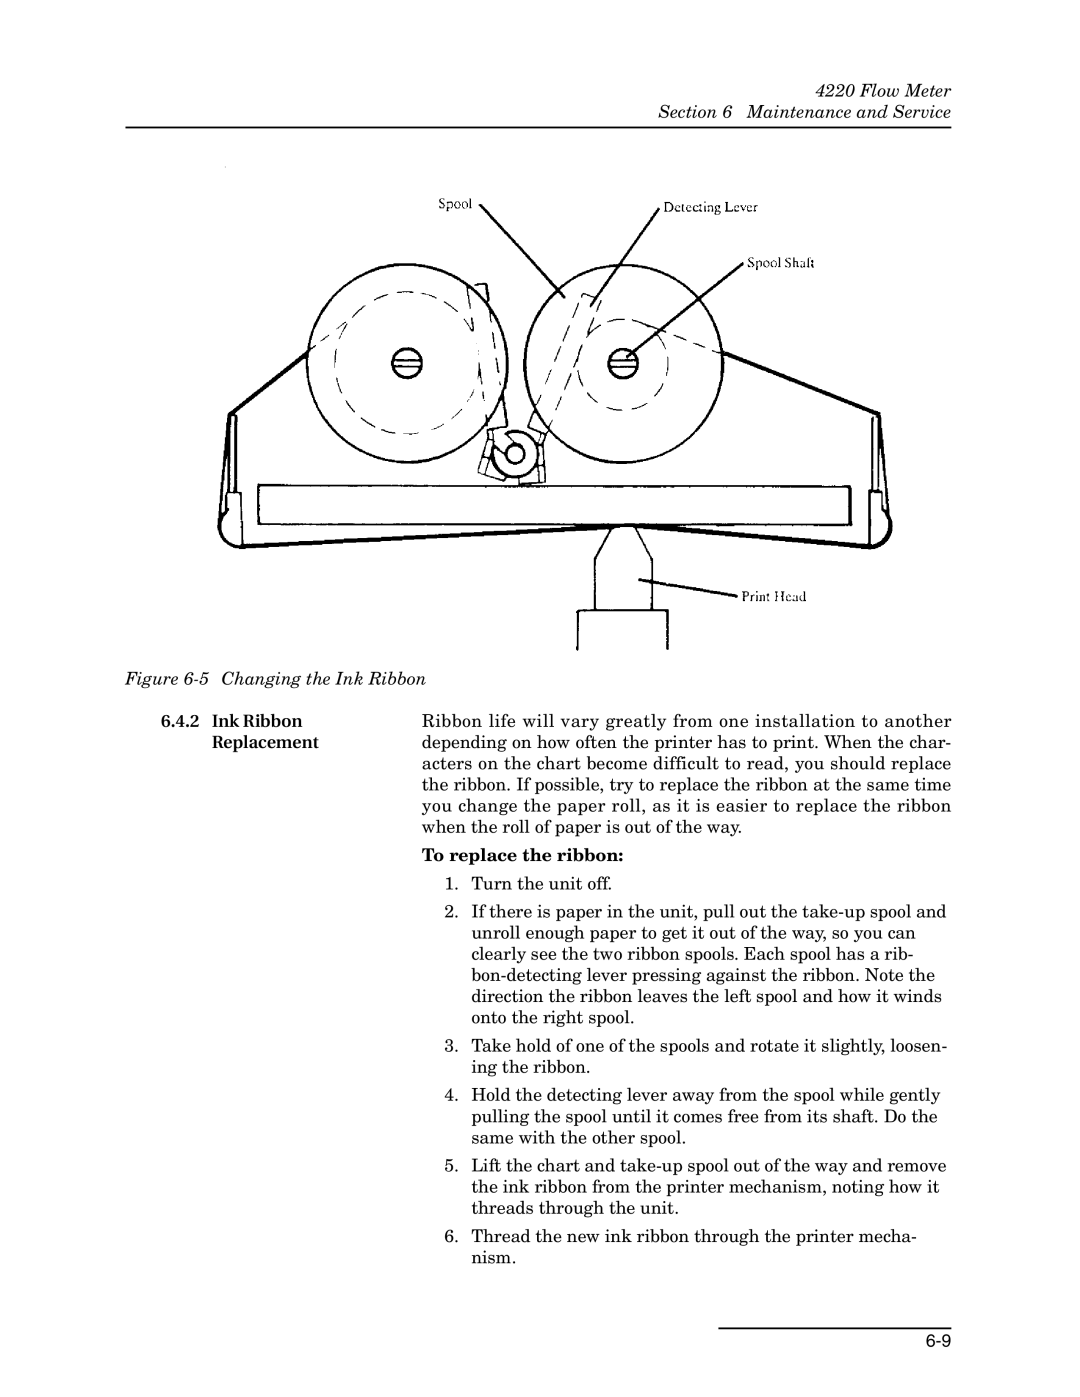
Figure 6-5 Changing the Ink Ribbon
6.4.2 Ink Ribbon | Ribbon life will vary greatly from one installation to another |
Replacement | depending on how often the printer has to print. When the char- |
| acters on the chart become difficult to read, you should replace |
| the ribbon. If possible, try to replace the ribbon at the same time |
| you change the paper roll, as it is easier to replace the ribbon |
| when the roll of paper is out of the way. |
| To replace the ribbon: |
1. Turn the unit off.
2. If there is paper in the unit, pull out the
3. Take hold of one of the spools and rotate it slightly, loosen- ing the ribbon.
4. Hold the detecting lever away from the spool while gently pulling the spool until it comes free from its shaft. Do the same with the other spool.
5. Lift the chart and
6. Thread the new ink ribbon through the printer mecha- nism.