Toshiba manual Setting up the GA-1040 on a NetWare 5.x network, List of Printer Agents appears

Models: GA-1040

1 122
Download 122 pages 8.4 Kb
Page 93
Image 93

55-3 GA-1040 on a NetWare 5.x network with NDPS

Setting up the GA-1040 on a NetWare 5.x network

Depending on the security needs at your organization, you can set up the GA-1040 as a Public Access printer or a Controlled Access printer. The following procedure describes setting up a Public Access printer. You can then convert this type of printer to Controlled Access if necessary. For more information, see your NetWare documentation.

NOTE: In the following procedure, “Atlas” is an example of an NDPS Manager name; “Aero” is an example of a Printer Agent name.

TO SET UP THE GA-1040AS A PUBLIC ACCESS PRINTER

1.In NetWare Administrator, double-click the NDPS Manager object you have created.

2.In the Details window for the NDPS Manager object, click the Printer Agent List button.

The list of Printer Agents appears.

3.Click New.

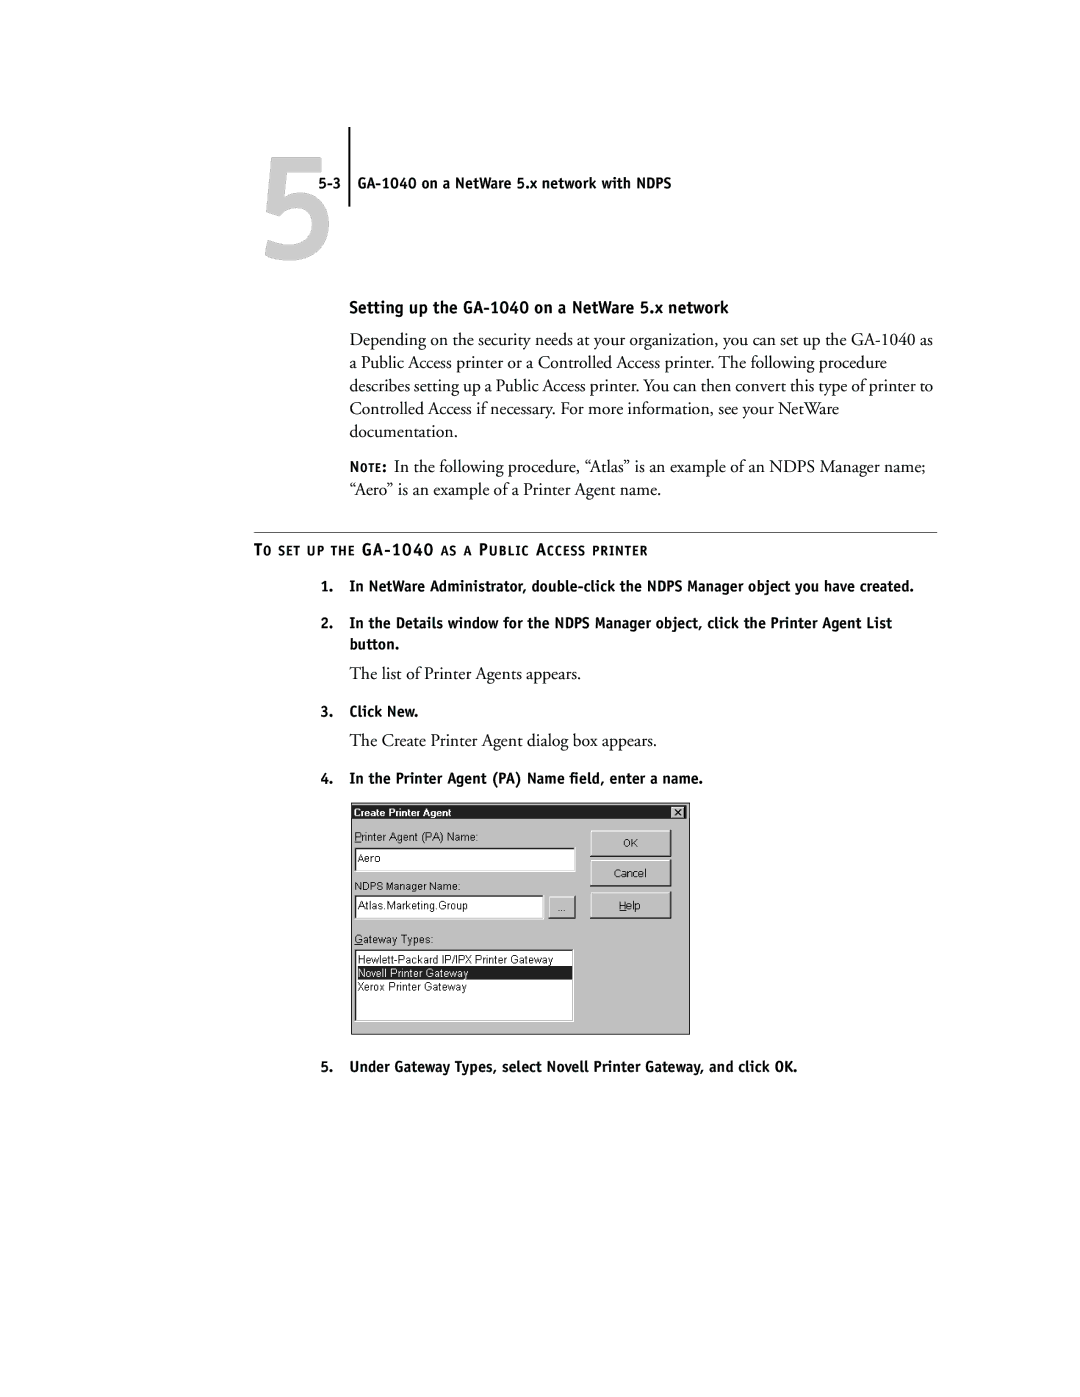
The Create Printer Agent dialog box appears.

4.In the Printer Agent (PA) Name field, enter a name.

5.Under Gateway Types, select Novell Printer Gateway, and click OK.

Page 93
Image 93
Toshiba manual Setting up the GA-1040 on a NetWare 5.x network, List of Printer Agents appears, Click New