Version
Page
Copyright
Page
Contents
Managing jobs
Variable data printing jobs
Glossary 153
Printing this guide
Getting started
System overview
Hardware and software components
Supported formats
EPS
Overview of the Workspace
Getting started
Turning on the CX print server
Requirements
Turning off the CX print server
Setting up your computer overview
Setting up your
Computer for printing
Printing Methods
ProcessStore
Print Driver software
ProcessPrint
SpoolStore
Setting up printing on a Windows computer
Adding a network printer to your Windows computer
Printer Tasks area, select Add a printer
Enable enhanced user interface, list select off
Loading the Print Driver software for the first time
Deactivating the Print Driver software
DEXUninstaller.exe, and select Run as Administrator
DEXUninstaller.exe
Removing the Print Driver software
Downloading fonts
Installing the Print Driver software in Mac OS
Setting up printing in Mac OS
Click Change Install Location
Click Continue
Click Utility
Defining a printer with the Print Driver software in Mac OS
Removing the Print Driver software
Calibration overview
Calibration
Calibration
Requirements
Click Calibrate
Page
Order they appear in the icons Cyan Magenta Yellow Black
See also
Mapping jobs to calibration tables
Calibration
Printing a file
Using a hot folder to print
Windows and Mac OS
Printing a file to the CX print server
Password protect jobs
Secure printing overview on Preferences window on
Printing a file in Windows and Mac OS
Server
Printing from the color
Importing and printing a job
Click Import
Editing a job overview
Deleting a page from a job
Moving a page in a job
Merging one or more pages into a job
Next
Click Merge Jobs
Replacing pages
Finding the Cmyk values of a specific area
Verifying the content of the job
Preflight Report
Preflight Check
Page
Performing a preflight check
Preflight Report window
Viewing and printing a preflight report
HiRes
Spot Colors
Proofing the job using color sets
Photos of people
Assigning a color set to your job
Outdoor photos
Corporate documents
Secure printing overview
Managing jobs
Archival and retrieval of jobs
Archiving a job
Retrieving a job
Forwarding a job to another CX print server
From the File menu, select Retrieve from archive
Click Retrieve
Duplicating jobs
Resubmitting a job
Printing copies of a job
Accounting Viewer overview
Job Reports
Job Report overview
Ensuring proper billing
InSite jobs
Printing a job in black and white
Cmyk area, select Preserve black color
Job
Exporting a job as an InSite job
Page
Managing jobs
Managing color
Color tools overview
Managing color and profiles
Creating a destination profile
Managing color and profiles
Click Create Profile
Importing a destination profile
Importing a source profile
Resource list, select Profile Manager
Select Source Profile tab
Mapping media using the Media and Color Manager tool
Resource Center, select Media and Color Manager
Managing calibration tables
Calibrations window
Calibration table list
Info Data
Output Density
Properties
Info Graph
Adding an entry to a calibration table
Separations
Input %
Resource list, select Calibrations
Managing spot colors
Managing color
Adding a spot color
Editing a spot color
Printing a spot color chart
Deleting a spot color
Spot dictionary list, select Custom Dictionary
Click Test Print
Spot color variations overview
Selecting a spot color variation
From the Tools menu, select Spot Color Editor
Printing a spot color variation
Click Print Variations
Protecting specific spot colors
Defining a gray color as a spot color
Defining an RGB color as a spot color
Defining a Cmyk color as a spot color
Color adjustment with the Gradation Tool
Creating a new gradation table
Previewing a job
Editing a gradation table
Exposure and color cast
Correcting an image using Photo Touch-up
Shadows and highlights
Image noise
Red-eye
Jpeg artifacts
Managing color
Production workflows
Print using imposition
Imposition overview
Imposition methods
Previewing an imposition layout
Imposition layout Preview window
Conflict indications
Printing a business card job
For Trim Size, select Custom
Imposition Method list, select Step & Repeat
Click Spacing & Marks
Printing a saddle stitch job
Imposition Template Builder Tool
Imposition Template Builder overview
Creating an imposition template
Imposition method Saddle Stitch Columns Rows
Imposition template viewer window
Binding Left
From the Tools menu, select Imposition Template Builder
Both
Editing an imposition template
Select the Apply changes to front and back check box
Print with exceptions
Adding exceptions to your job
Simulating a job with your template
Deleting exceptions from your job
Dynamic page exceptions and setpagedevice commands
Click Advanced Options
Click Save or Submit
Select the Support dynamic page exceptions check box
Printing dynamic page exceptions
Tabs Size
Tabs plug-in overview Tabs plug-in window
Type
Orientation
Top Offset
Text
Bottom Offset
Length
Bold
Color
Italic
Underline
Direction
Text on both sides
Creating tabs
Page
Changing the location of a tab
Managing tabs
Replacing a page with a tab
Saving the tab settings
Inserting a tab before or after a specific
Removing a page or tab from the file
Deleting saved tab settings
Jobs
Variable data printing
Variable Data Printing jobs
About VDP document formats
Booklet
About Variable Print Specification
Sub-job
Reusable Elements
Managing VDP elements
Select General Defaults
About Ppml
Selecting to Cache Global VDP Elements
Archiving VDP elements
Retrieving VDP elements
Resource list, select Cached VDP Elements
Deleting VDP Elements
100
Print tab in the Job Parameters window
Job parameters
Layout
Print tab in the Job Parameters window 103
Imposition tab in the Job Parameters window
Set and apply imposition settings to your job
Imposition tab in the Job Parameters window 105
106
Imposition overview on
Quality tab in the Job Parameters window
Quality tab in the Job Parameters window 109
Cmyk
Color tab in the Job Parameters window
Color tab in the Job Parameters window 111
112
Color tab in the Job Parameters window 113
Cmyk RGB
Photo touch-up tab in the Job Parameters window
Finishing tab in the Job Parameters window
Apply these settings to specify how to finish your job
Exceptions tab in the Job Parameters window
Services tab in the Job Parameters window
Services tab in the Job Parameters window 119
APR/OPI
Services tab in the Job Parameters window 121
122
Preferences window
Setting up your color Server
Processed
Preferences window 125
Password protect jobs on page 24 Secure printing overview on
Setting up a virtual printer
Virtual printers
Adding and editing a virtual printer
Maintaining your settings
Backing up the configuration
Removing a virtual printer
Preferences window, select Configuration Backup
Restoring the configuration
Configuration backup area, click Start Backup
Click Start Restore
Tools for maintaining your system
Creo Remote Site Manager
Working with color server tools on your computer
Remote Site Manager overview
Activating remote tools
Installing the Remote Site Manager in Windows
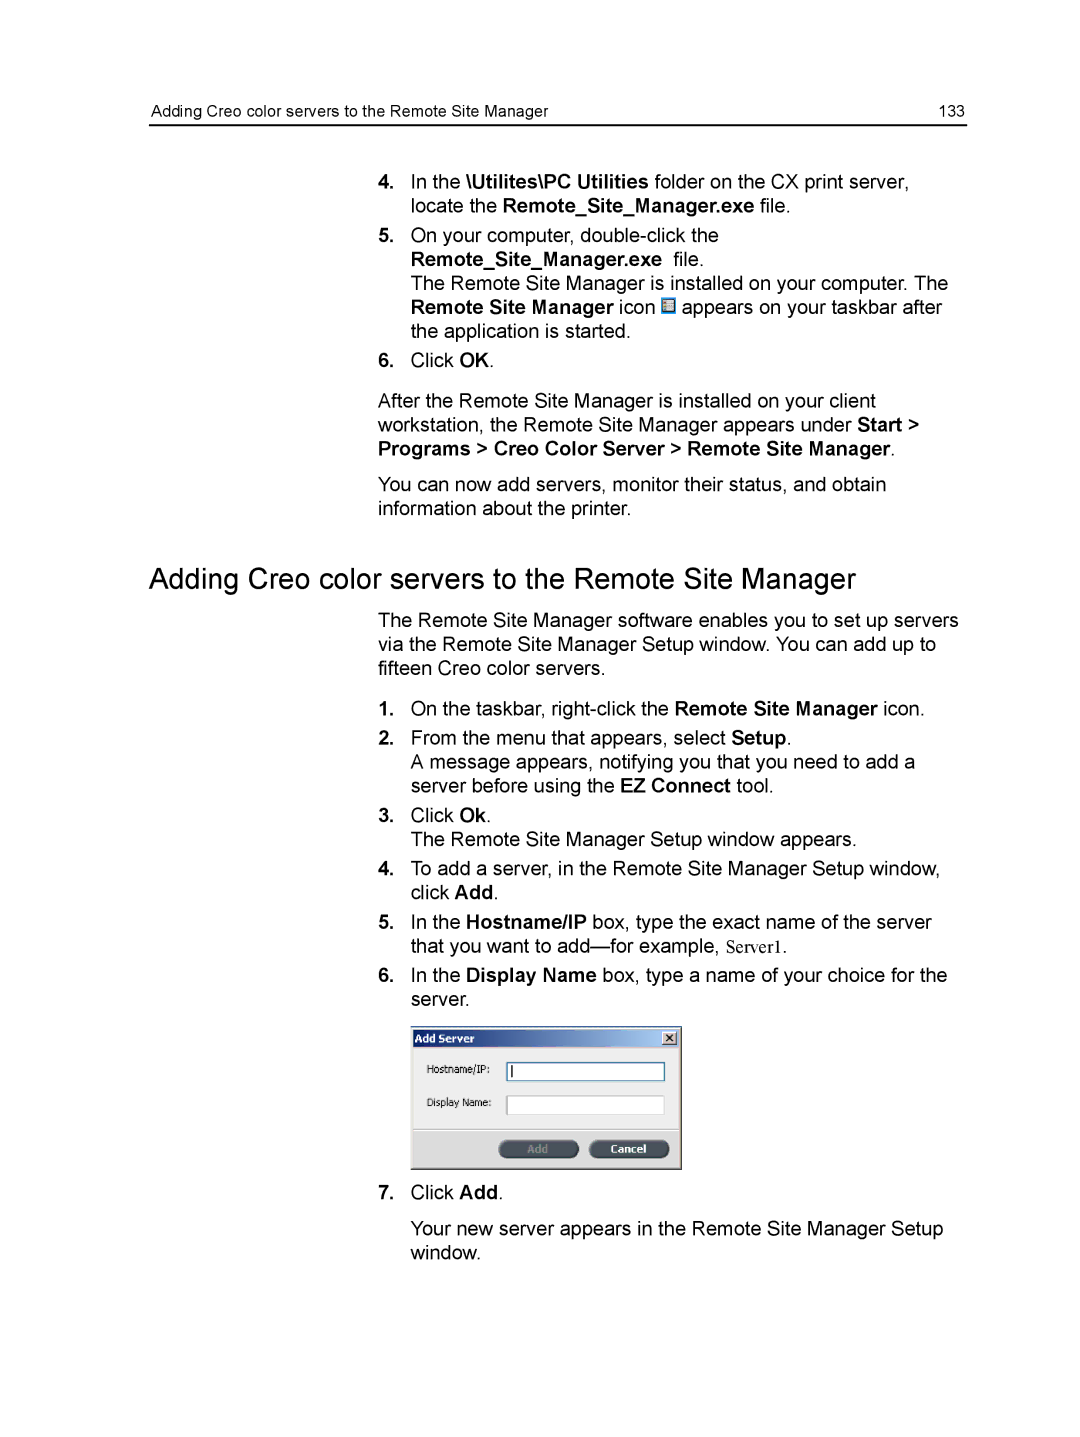
Adding Creo color servers to the Remote Site Manager
Connecting to the workspace from your computer
Viewing the printer status
Remote Workspace overview
Using the Web Center
Connecting to the Web Center
Overview of the Web Center
Office Hot Folder tool
Installing the Office Hot Folder tool
Creating a hot folder
Using the Office Hot Folder tool to print
Click Create HF
Ppt Doc Xls Pub
Language settings
Creo Color Server Job Ticket software
Creo Color Server Job Ticket overview
Creating and managing job tickets
Creating a job ticket in Windows
Double-click the CreoColorServerJobTicket.exe file
From the Tools menu, select Use JT Settings From
Loading job parameters from a selected server
Submitting a job ticket for printing
Creator tool
Easy VDP File Creator tool
142
Selecting an Easy VDP File Creator template
Click Continue to add data records Next
Adding records manually to your variable data job
Adding records from a database to your variable data job
Creating and printing the variable data job
148
Job History window
Troubleshooting
Handling alerts and frozen jobs
Aborting a job
Alerts window
Resume printing
Click Print List
Printing system messages
Glossary
Bounding box
Booklet
Brightness
Brisque Imposition Job
Cache
Brisque
Calibration curve
Click charge
Color channel
Color cast
Color correction
Color gamut
Color profile
Color match verb
Color rendering dictionary CRD
Color set
Contrast
Composite mode
Conventional screening
Creep
Database
CT file format
DCS desktop color separation
Densitometer
Density range
Density
Device
Device-independent color space
Device type
Device profile
Dot area
Dot gain
Frequency-modulated FM screening
Gray component replacement GCR
Frozen job
Gravure printing
Halftone screen
Grayscale
Head-to-head
Imposition Job Job flow
Line work
Job ticket template JTT
Long-edge first LEF
Lookup table LUT
LW file format
New line work NLW file format
Normalize PPD PostScript Printer Description
Process
Pre-separated file Printer description file Priority
Process colors
PSImage
Render
Relative colorimetric
Rich black
RTP ready-to-print job
Shadows
Screen angle
Sheet
Short-edge first SEF
Source profile
Smooth scaling
Spine trim size
Spot color
Substrate
Stochastic screening
Tint
Tonal calibration
Trapping
Variable print specification
Variable information VI job
Vector drawing
172
Index
Storage area 5 Supported formats 2 system messages