******************************************************************* | |||
****************** |
| 3Com CORPORATION | ****************** |
|
|
| |
| Update Distribution Kit | Copyright 199X 3Com Corporation |
|
This Update Distribution Kit will start ProCommso you can download new software to your 3Com device. Make sure you follow the instructions carefully to avoid downloading the wrong file to your device. Downloading the wrong file may damage the device.
*******************************************************************
Enter the Source Drive : a
Enter the ProCcomm Drive : c
Start Procomm
Press ENTER to accept the current drive selections and start ProComm.
, TAB: Next Field |
| : Previous Filed Enter: Accept ESC: Quit |
| ||
|
|
|
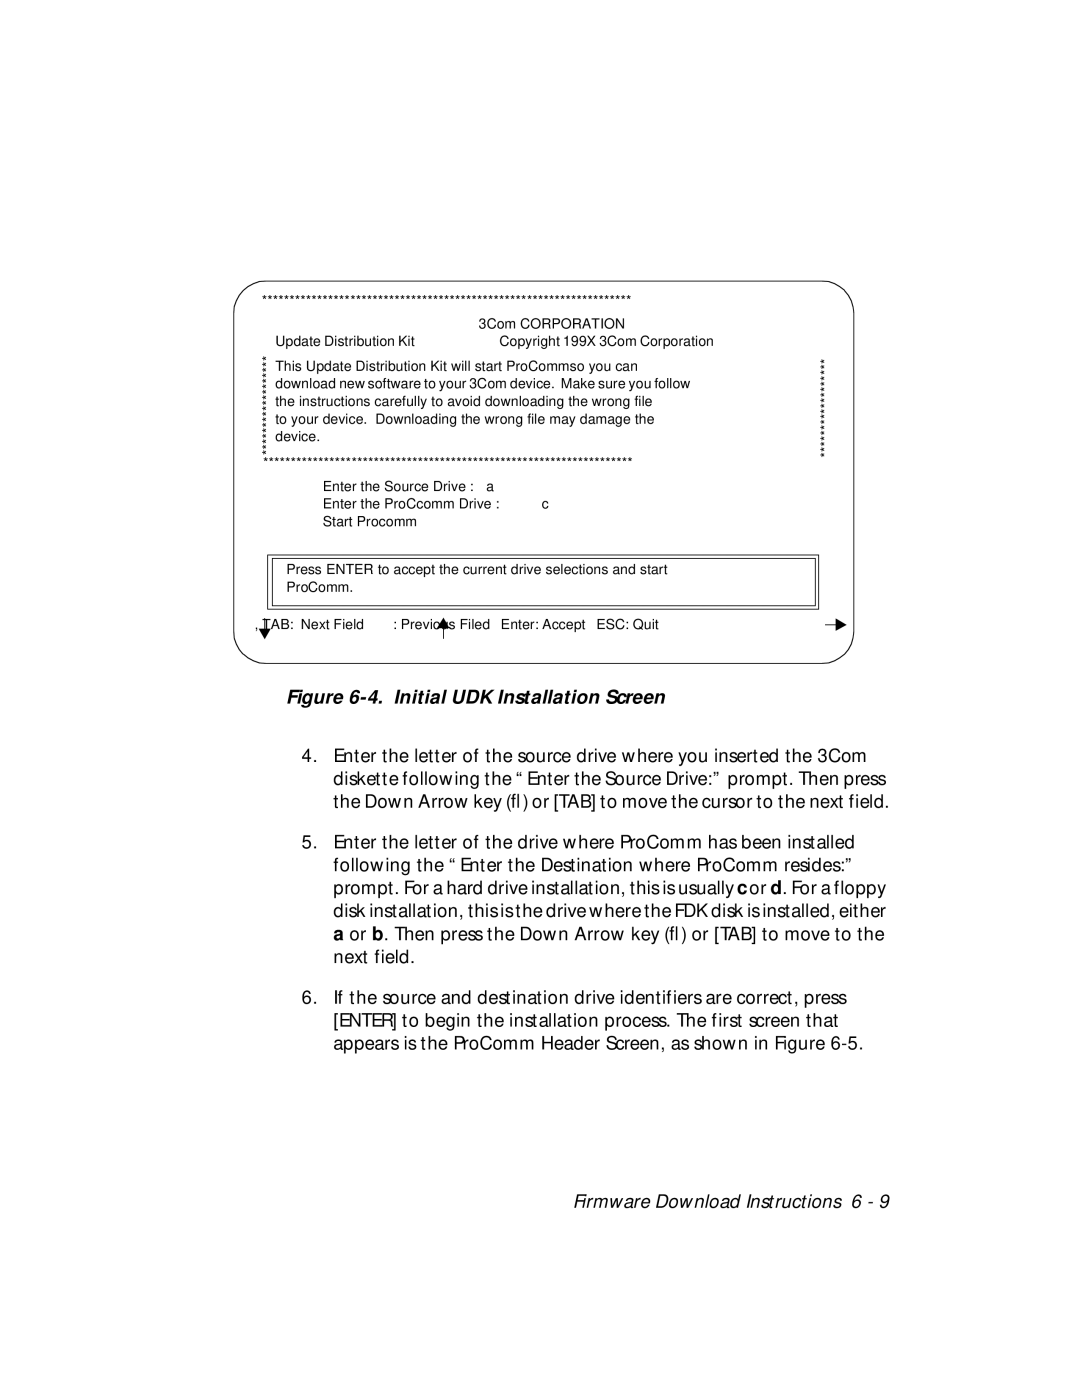
Figure 6-4. Initial UDK Installation Screen
4.Enter the letter of the source drive where you inserted the 3Com
diskette following the “Enter the Source Drive:” prompt. Then press the Down Arrow key (↓) or [TAB] to move the cursor to the next field.
5.Enter the letter of the drive where ProComm has been installed following the “Enter the Destination where ProComm resides:” prompt. For a hard drive installation, this is usually c or d. For a floppy
disk installation, this is the drive where the FDK disk is installed, either a or b. Then press the Down Arrow key (↓) or [TAB] to move to the next field.
6.If the source and destination drive identifiers are correct, press [ENTER] to begin the installation process. The first screen that appears is the ProComm Header Screen, as shown in Figure
