April 14, 2006 | Chapter 7: Implementing a |
Step | Action |
2 | In the IP address box, enter 10.0.0.2. |
| Note: Any device (such as a PC) connecting to the modem LAN interface loses its connection |
| when the modem LAN IP address is changed. After the IP address is changed, you need to |
| specify this new address in the Web browser to reconnect a device. |
|
|
3 | Click Apply to activate the changes. The connection to the Web interface will be lost because the modem |
| now has a new LAN IP address. |
|
|
4 | In the Web browser address field (see “Accessing the Modem Web Pages” on page |
| http://10.0.0.2 to reconnect. |
|
|
5 | Click Save Changes on the menu bar to prevent losing the configuration after restoring communication |
| with the modem. |
|
|
You are now finished with the Quick Installation. To verify connectivity, refer to “Verify Connectivity” on page
COMPLETE A CUSTOM CONFIGURATION
If you implement custom configuration where you do not use factory default parameters for your modems, you will need to make changes to the configuration on both the Remote and the
Configure the Remote Modem
To configure the remote modem, you need to change the following settings:
•Operating mode for the modem, (see “Configure the Remote Operating Mode” on page
•WAN parameters, (see “Configure the Remote WAN” on page
•LAN parameters, (see “Configure the Remote LAN” on page
Configure the Remote Operating Mode
Step | Action |
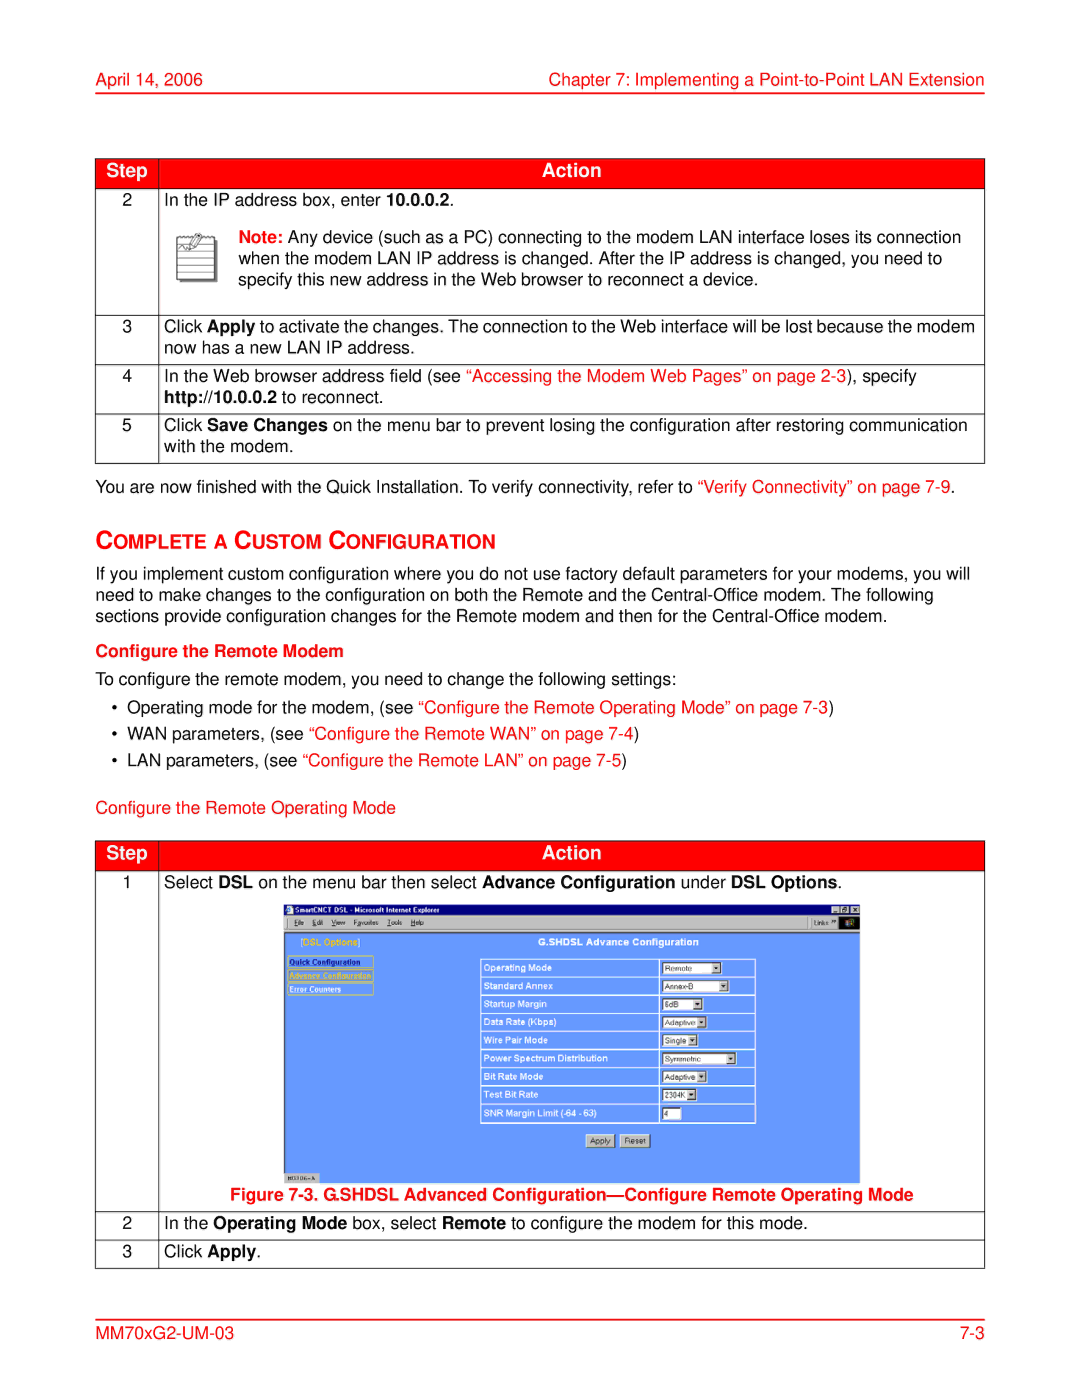
1 Select DSL on the menu bar then select Advance Configuration under DSL Options. | |
Figure 7-3. G.SHDSL Advanced Configuration—Configure Remote Operating Mode
2In the Operating Mode box, select Remote to configure the modem for this mode.
3Click Apply.
