Chapter 2: Accessing the Web Interface for Modem Management | April 14, 2006 |
Step | Action |
4 | The modem can be set up to serve IP addresses to devices on the LAN (DHCP server feature). Do one of |
| the following: |
| • If DHCP server has not been enabled on the modem (default setting), select Specify an IP address. |
| • If DHCP server has been enabled on the modem, select Obtain an IP address automatically and go |
| to Step 6. |
|
|
5 | Enter an IP Address and Subnet Mask that places the management PC on the same subnet as the |
| modem. Use an IP address in the range of 10.0.0.2 to 10.0.0.254. |
|
|
6 | Click OK to close the TCP/IP Properties dialog. |
|
|
7 | Click OK to close the Network dialog. |
|
|
8 | Click OK to restart the computer. |
|
|
SET UP THE WEB BROWSER
To access and view the modem Web pages, set up features for the Web browser. The Web browser must have cache settings enabled to allow the Web browser to compare its cached Web page against the modem Web page every time it is accessed, providing current information. Also, it is preferable to disable proxies. (The example below shows setup for the Internet Explorer Web browser; instructions for other Web browsers may differ slightly.)
Step | Action |
1Open the Web browser.
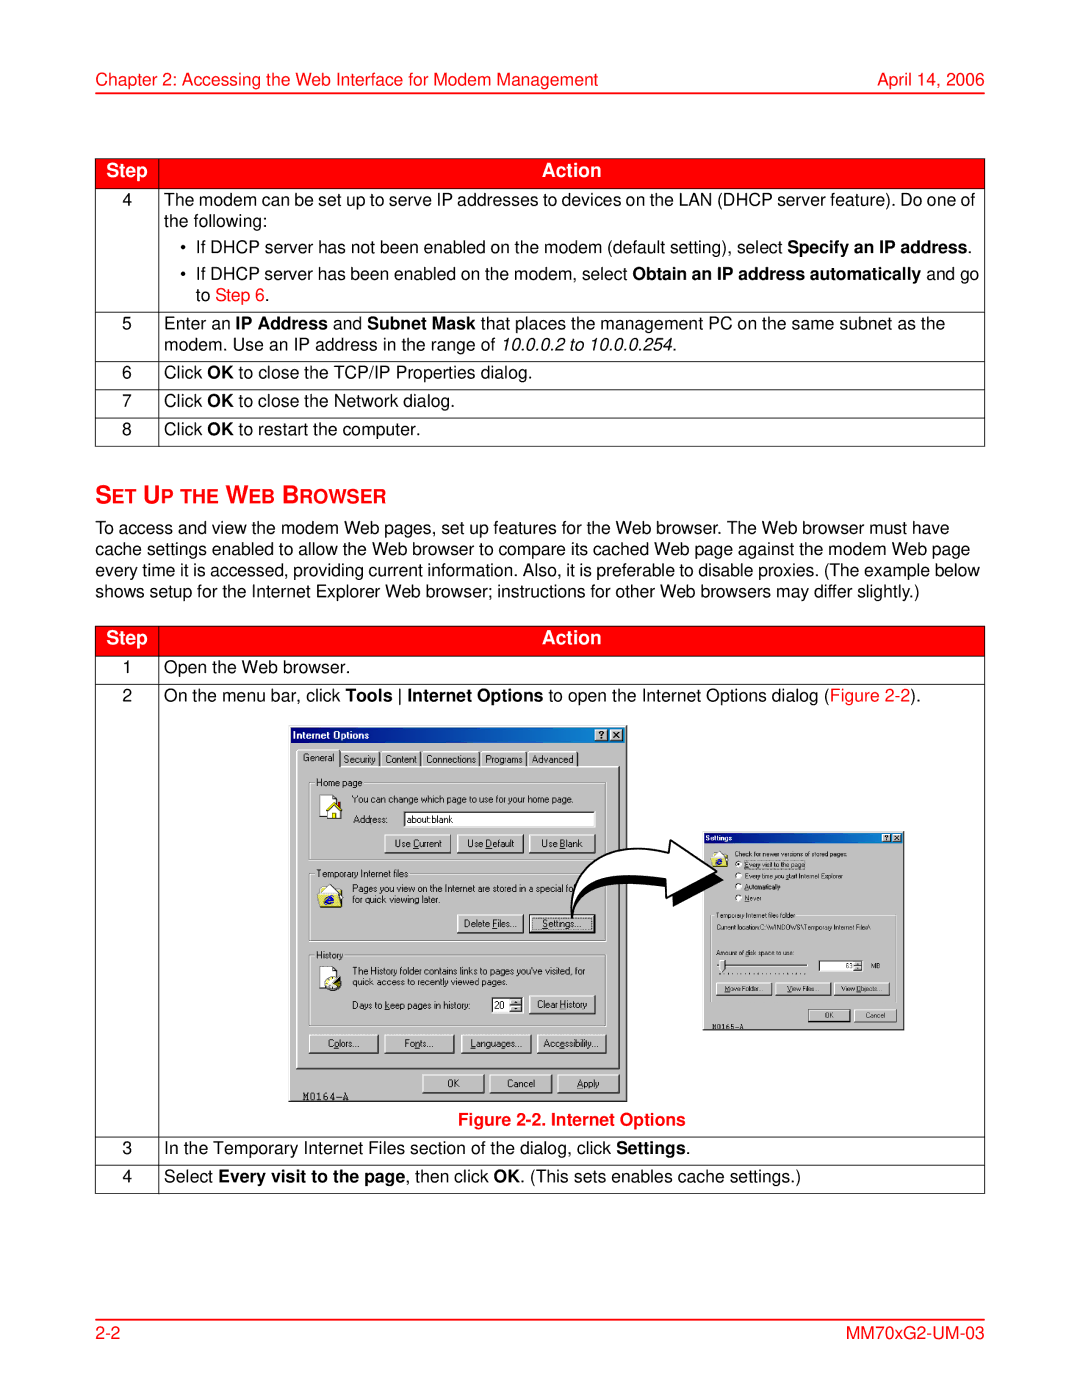
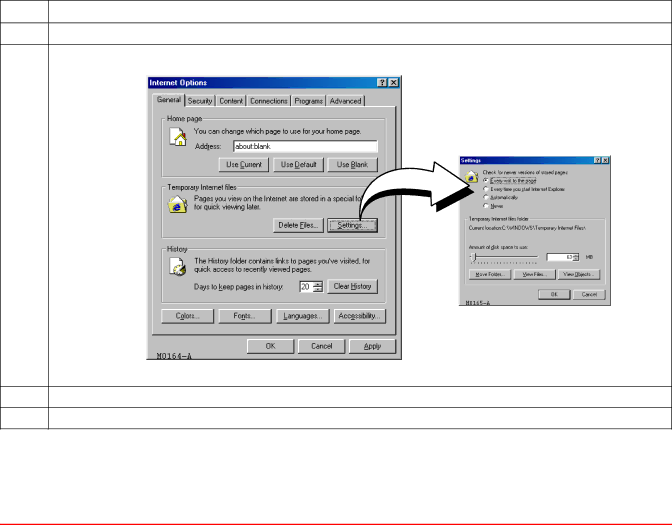
2On the menu bar, click Tools Internet Options to open the Internet Options dialog (Figure
Figure 2-2. Internet Options
3In the Temporary Internet Files section of the dialog, click Settings.
4Select Every visit to the page, then click OK. (This sets enables cache settings.)