Controller Installation
10.Enter a new unique LUN mapping for this user. Options are shown in Table
Table
Option | Description |
|
|
G.1 | GROUP.LUN number |
P | |
R | |
N | Clear current assignment |
<cr> | No Change |
E | EXIT |
? | Display detailed help text. |
11.Connect user 2 and repeat steps
-For active host port (step 6), enter port 2 only.
-For LUN mapping:
External LUN 0 is mapping to internal LUN: R1
External LUN 1 is mapping to internal LUN: 1
External LUN 2 is mapping to internal LUN: q
NOTE : In this scheme, users 1 and 2 have their own custom LUN identification scheme. The internal LUN 1 that is shared by the users needs to be managed by SAN management software. The individual dedicated LUN appears to the user as local storage and does not require external management software.
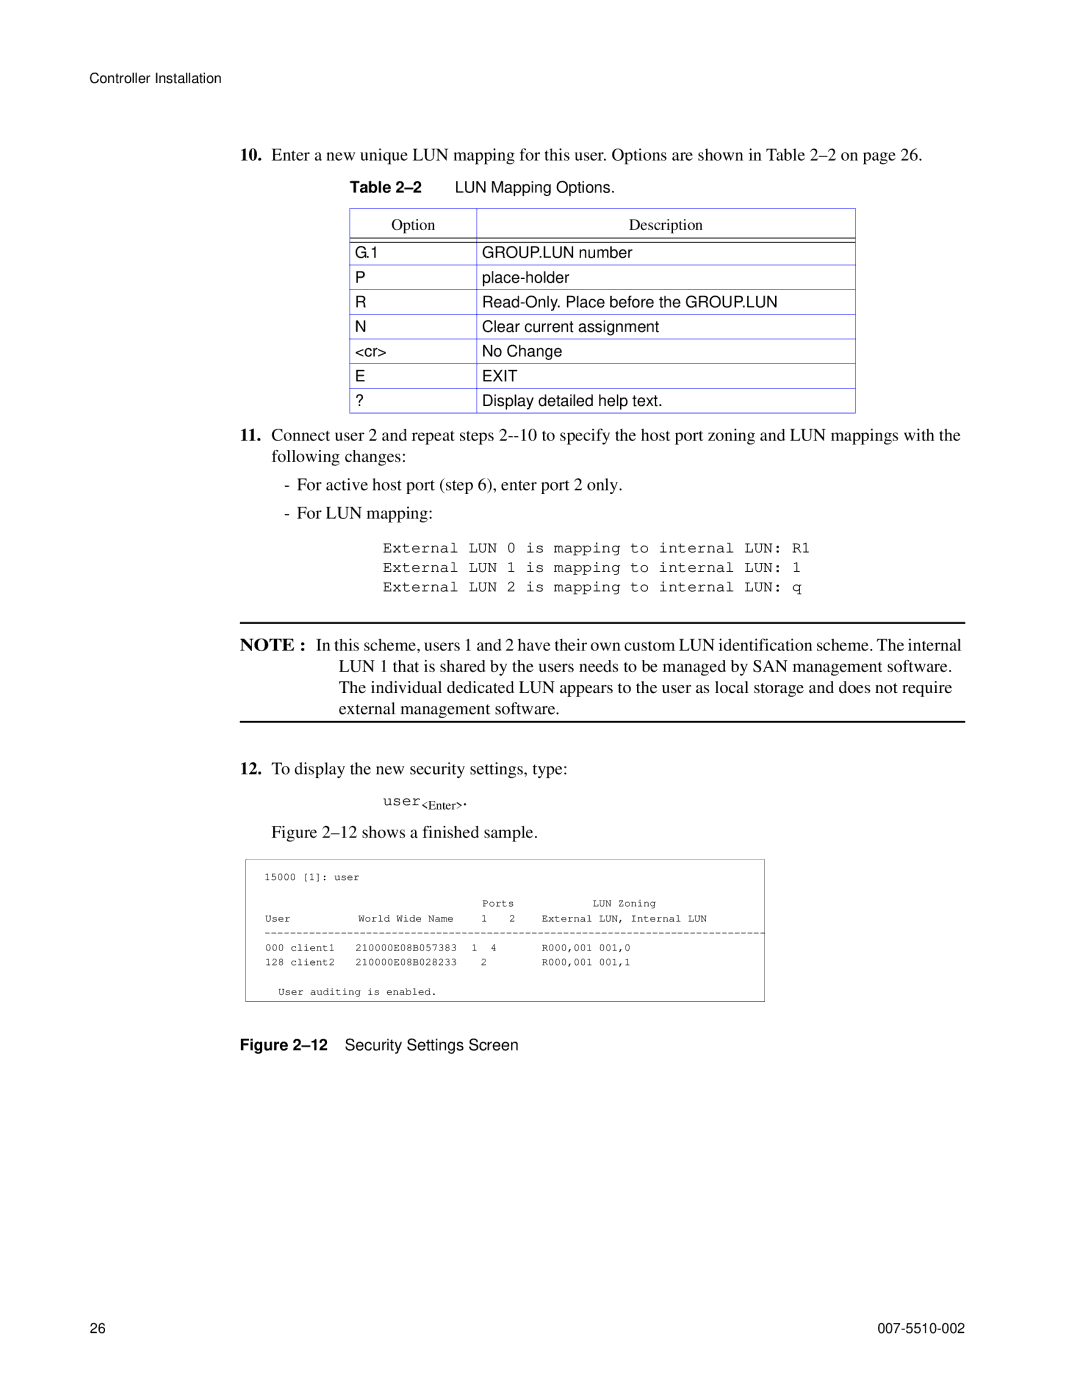
12.To display the new security settings, type:
user<Enter>.
Figure 2–12 shows a finished sample.
15000 [1]: user |
|
|
|
| ||
|
|
| Ports |
| LUN Zoning | |
User |
| World Wide Name | 1 | 2 | External LUN, Internal LUN | |
000 | client1 | 210000E08B057383 | 1 | 4 | R000,001 | 001,0 |
128 | client2 | 210000E08B028233 | 2 |
| R000,001 | 001,1 |
User auditing is enabled. |
|
|
|
| ||
Figure 2–12 Security Settings Screen
26 |