Controller Installation
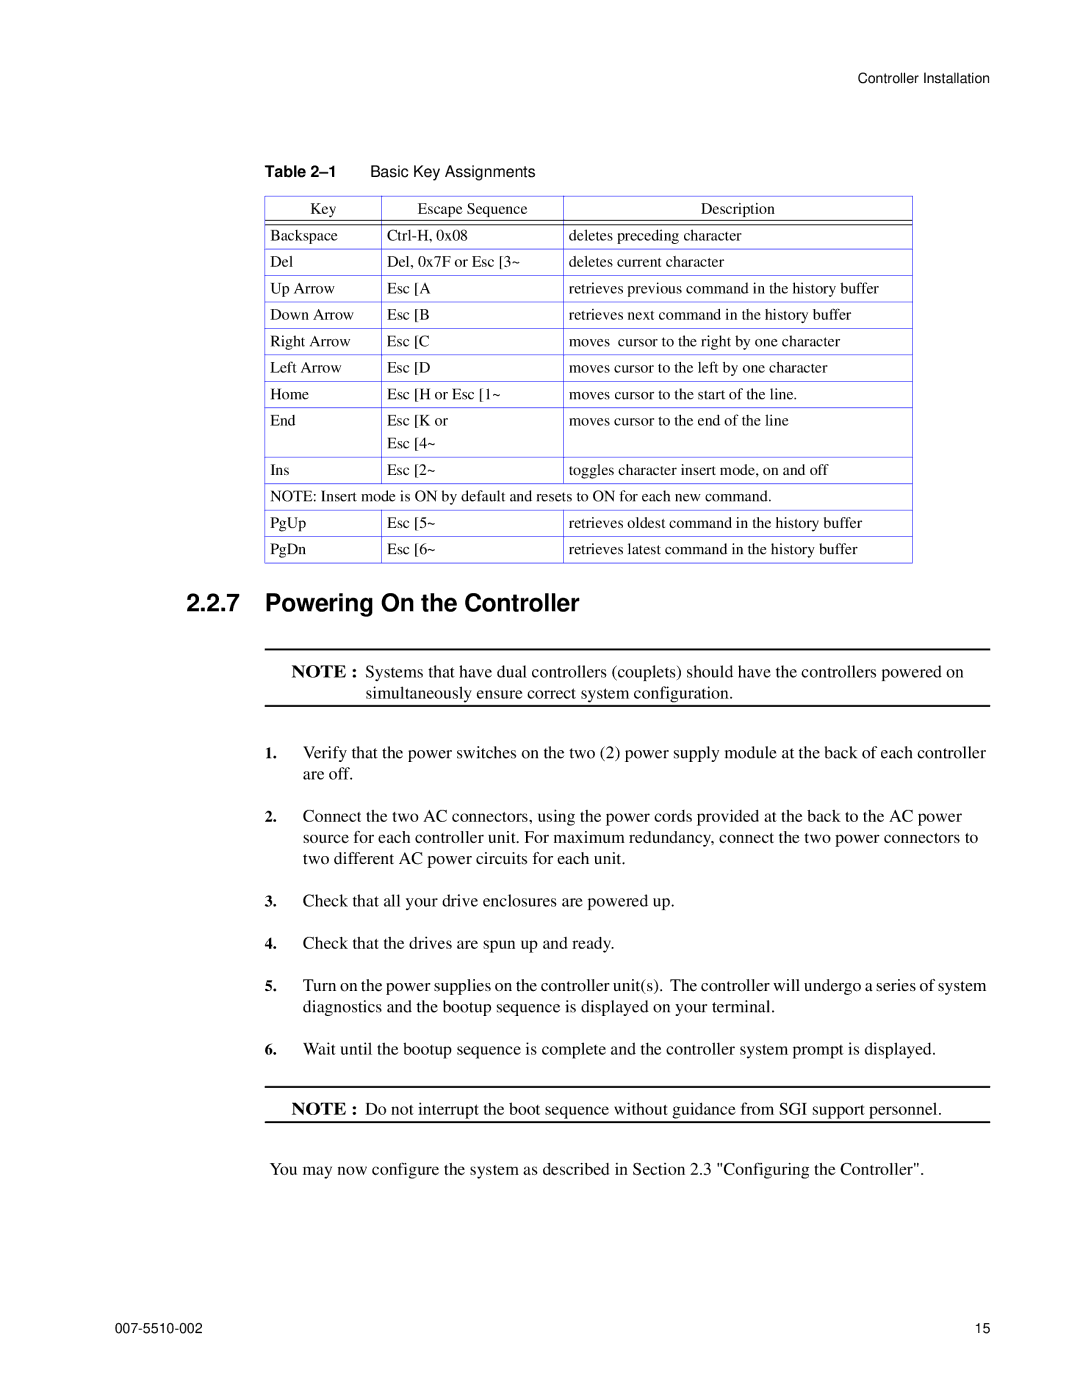
Table | Basic Key Assignments |
|
| |
|
|
|
|
|
Key |
| Escape Sequence | Description | |
|
|
|
|
|
Backspace |
| deletes preceding character | ||
|
|
|
| |
Del |
| Del, 0x7F or Esc [3~ | deletes current character | |
|
|
|
| |
Up Arrow |
| Esc [A | retrieves previous command in the history buffer | |
|
|
|
| |
Down Arrow |
| Esc [B | retrieves next command in the history buffer | |
|
|
|
| |
Right Arrow |
| Esc [C | moves cursor to the right by one character | |
|
|
|
| |
Left Arrow |
| Esc [D | moves cursor to the left by one character | |
|
|
|
| |
Home |
| Esc [H or Esc [1~ | moves cursor to the start of the line. | |
|
|
|
| |
End |
| Esc [K or | moves cursor to the end of the line | |
|
| Esc [4~ |
|
|
|
|
|
| |
Ins |
| Esc [2~ | toggles character insert mode, on and off | |
|
|
|
| |
NOTE: Insert mode is ON by default and resets to ON for each new command. | ||||
|
|
|
|
|
PgUp |
| Esc [5~ | retrieves oldest command in the history buffer | |
|
|
|
| |
PgDn |
| Esc [6~ | retrieves latest command in the history buffer | |
|
|
|
|
|
2.2.7Powering On the Controller
NOTE : Systems that have dual controllers (couplets) should have the controllers powered on simultaneously ensure correct system configuration.
1.Verify that the power switches on the two (2) power supply module at the back of each controller are off.
2.Connect the two AC connectors, using the power cords provided at the back to the AC power source for each controller unit. For maximum redundancy, connect the two power connectors to two different AC power circuits for each unit.
3.Check that all your drive enclosures are powered up.
4.Check that the drives are spun up and ready.
5.Turn on the power supplies on the controller unit(s). The controller will undergo a series of system diagnostics and the bootup sequence is displayed on your terminal.
6.Wait until the bootup sequence is complete and the controller system prompt is displayed.
NOTE : Do not interrupt the boot sequence without guidance from SGI support personnel.
You may now configure the system as described in Section 2.3 "Configuring the Controller".
15 |