Lexmark C790 manual Installing an Internal Solutions Port

Models: C790

1 234
Download 234 pages 50.03 Kb
Page 29
Image 29
Installing an Internal Solutions Port

Notes:

The entire length of the connector on the card must touch and be flush against the system board.

Be careful not to damage the connectors.

5Reattach the system board cover.

Installing an Internal Solutions Port

The system board supports one optional Lexmark Internal Solutions Port (ISP).

Note: This task requires a flathead screwdriver.

CAUTION—SHOCK HAZARD: If you are accessing the system board or installing optional hardware or memory devices sometime after setting up the printer, then turn the printer off, and unplug the power cord from the wall outlet before continuing. If you have any other devices attached to the printer, then turn them off as well, and unplug any cables going into the printer.

Warning—Potential Damage: System board electronic components are easily damaged by static electricity. Touch something metal on the printer before touching any system board electronic components or connectors.

1Access the system board.

For more information, see “Accessing the system board” on page 23.

2Unpack the ISP and plastic tee.

Note: Avoid touching the components on the card.

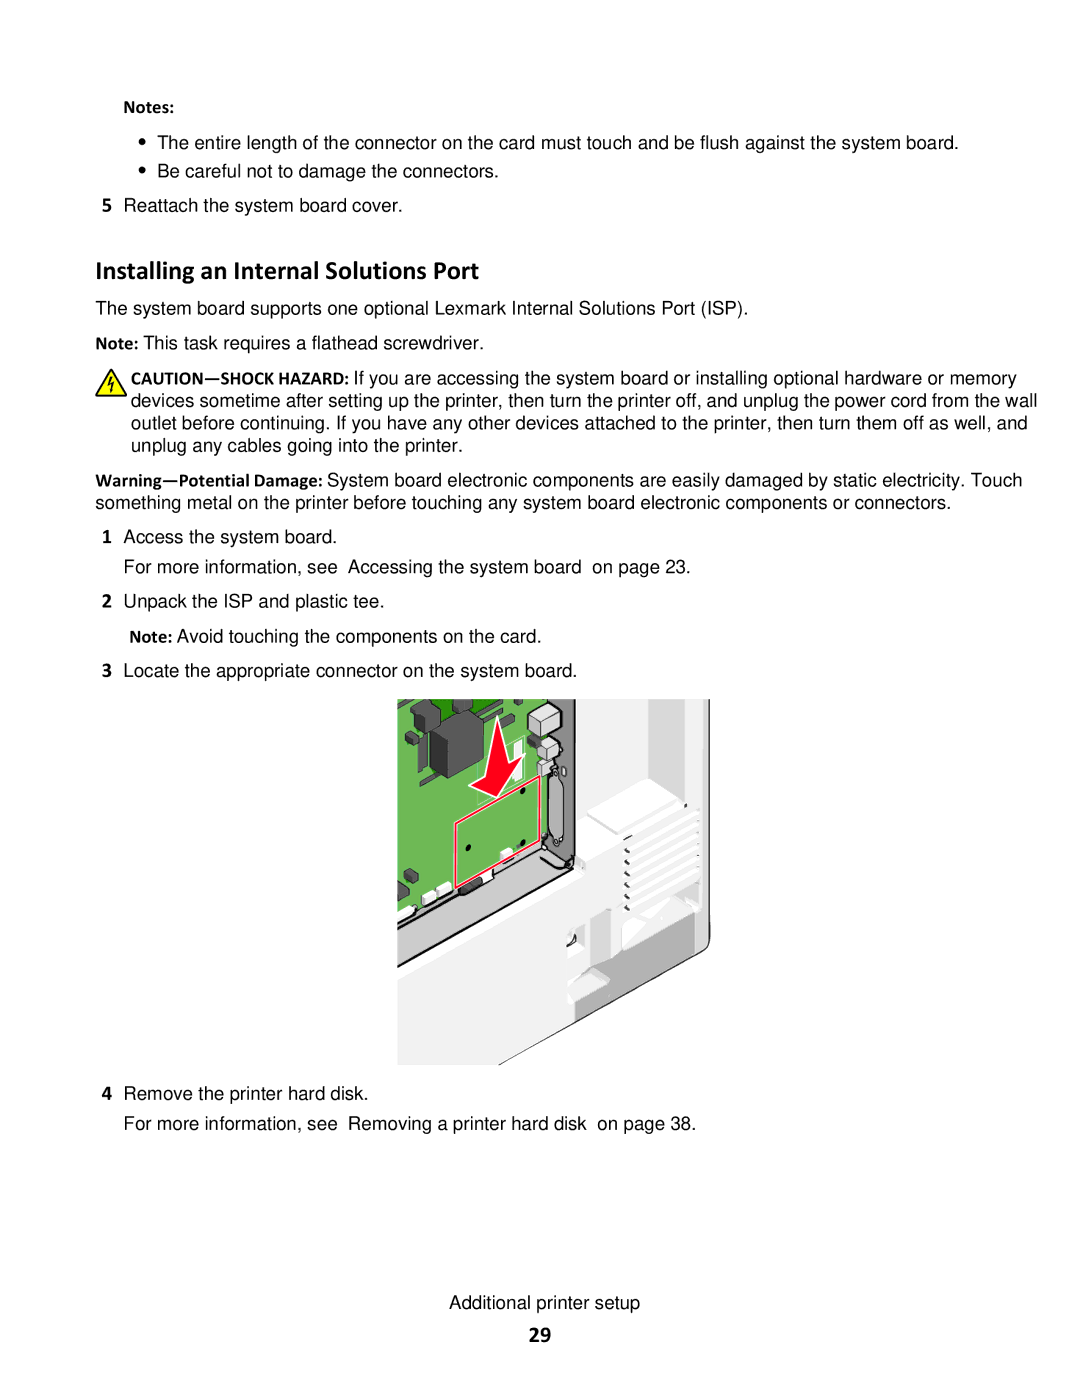
3Locate the appropriate connector on the system board.

4Remove the printer hard disk.

For more information, see “Removing a printer hard disk” on page 38.

Additional printer setup

29

Page 29
Image 29
Lexmark C790 manual Installing an Internal Solutions Port