Installing the Upgrade
The steps to install the firmware upgrade are described below and illustrated below and on the facing page.
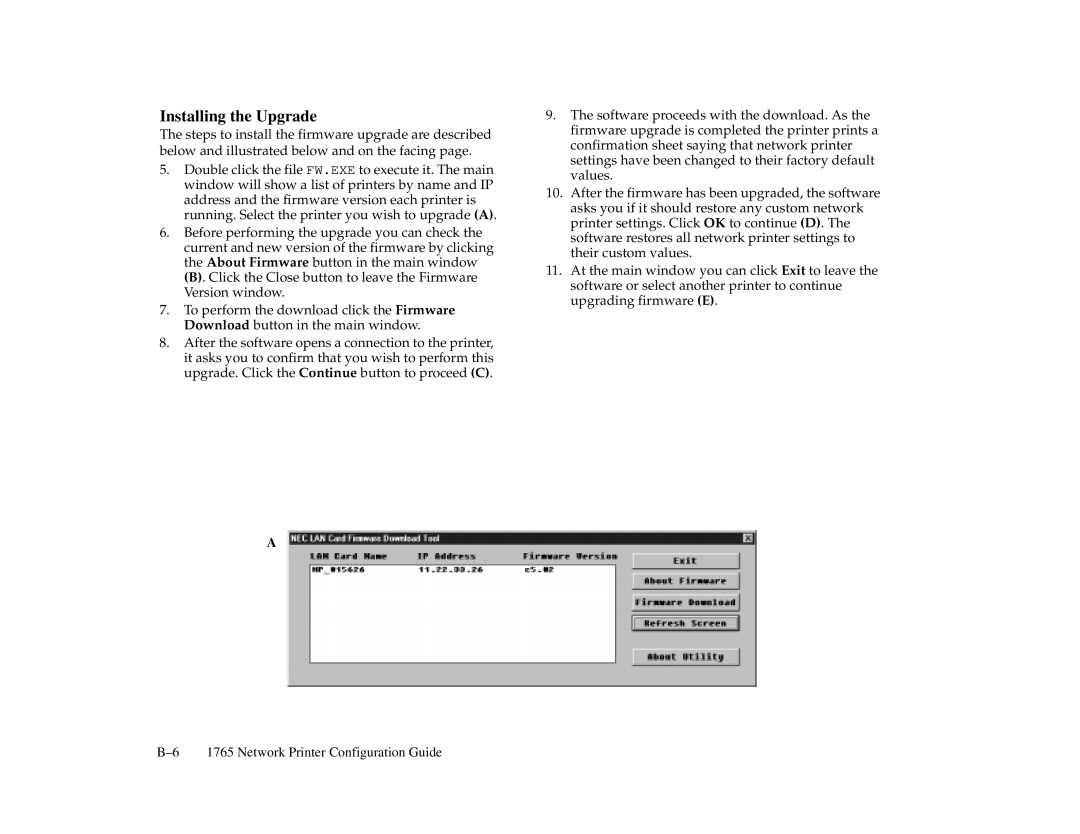
5.Double click the file FW.EXE to execute it. The main window will show a list of printers by name and IP address and the firmware version each printer is running. Select the printer you wish to upgrade (A).
6.Before performing the upgrade you can check the current and new version of the firmware by clicking the About Firmware button in the main window
(B). Click the Close button to leave the Firmware Version window.
7.To perform the download click the Firmware Download button in the main window.
8.After the software opens a connection to the printer, it asks you to confirm that you wish to perform this upgrade. Click the Continue button to proceed (C).
A
9.The software proceeds with the download. As the firmware upgrade is completed the printer prints a confirmation sheet saying that network printer settings have been changed to their factory default values.
10.After the firmware has been upgraded, the software asks you if it should restore any custom network printer settings. Click OK to continue (D). The software restores all network printer settings to their custom values.
11.At the main window you can click Exit to leave the software or select another printer to continue upgrading firmware (E).
1765 Network Printer Configuration Guide |