Chapter 10 Routing table administration 145
Changing a routing table
Note: You can add steps to a routing table only when you set it up. After you set up the table, you cannot add or delete steps. You can modify steps.
You must disable a skillset before you can change its routing table. For how to disable a skillset, refer to “Disabling a skillset” on page 48.
To | Follow the procedure |
|
|
Review steps | “Reviewing Routing Table steps” on page 145 |
|
|
Modify steps | “Modifying Routing Table steps” on page 146 |
|
|
Erasing a routing table | “Erasing a Routing Table” on page 147 |
|
|
Reviewing Routing Table steps
Log:
QUIT RETRY OK
Admin
MBOX AA OTHR
Admin
GLIST CCR CC
CC Admin
AGENT SKILL OTHR
Skillset:
RETRY QUIT OK
Status: xxxxxx
CHNGNEXT
Skill mbox pswd
RESET NEXT
Skillset Admin
PARM AGENT OTHR
Skillset Admin
ROUTE OVFLW UNCF
Route Table
DAY NIGHT QUIT
Day routing
VIEW ERASE INS
1: xxxxx
CHNGNEXT
End table
ADDQUIT
Route Table
DAY NIGHT QUIT
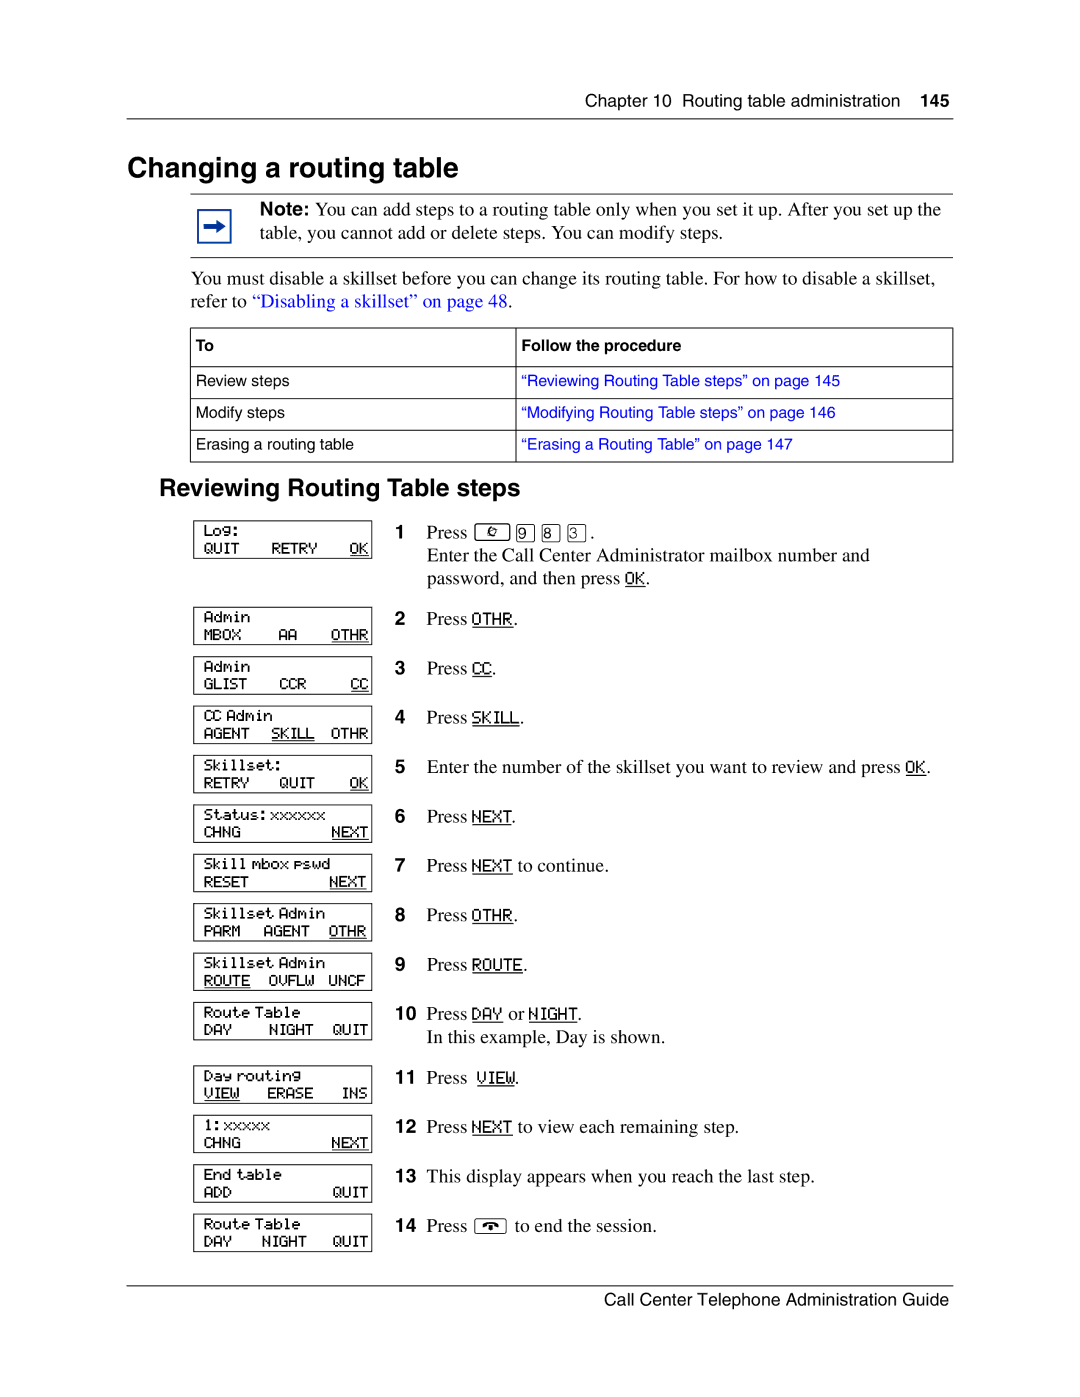
1Press ≤·°‹.
Enter the Call Center Administrator mailbox number and password, and then press OK.
2Press OTHR.
3Press CC.
4Press SKILL.
5Enter the number of the skillset you want to review and press OK.
6Press NEXT.
7Press NEXT to continue.
8Press OTHR.
9Press ROUTE.
10Press DAY or NIGHT.
In this example, Day is shown.
11Press VIEW.
12Press NEXT to view each remaining step.
13This display appears when you reach the last step.
14Press ®to end the session.
Call Center Telephone Administration Guide