INITIAL SCREEN OF SCANNER MODE
The condition setting screen of scanner mode is displayed by pressing the [SCAN] key (refer to the operation manual for copier) while the copy mode, print mode, fax mode, or job status screen appears in the touch panel. If user authentication is enabled, the initial screen will appear after authentication. (p.69)
In the explanations that follow, it is assumed that the initial screen that appears after pressing the [SCAN] key is the condition setting screen (shown below). If you have set the display to show the address book screen (following page) when the [SCAN] key is pressed, touch the [CONDITION SETTINGS] key in the address book screen to display the condition setting screen.
• The administrator setting "DEFAULT DISPLAY SETTINGS" can be used to set the display to show either the
Note condition setting screen (shown below) or the address book screen (following page) when the [SCAN] key is pressed (refer to "6. SYSTEM SETTINGS (ADMINISTRATOR)").
•For information on the parts of the machine and the operation panel that are used for network scanning, refer to the operation manual for copier.
Condition settings screen
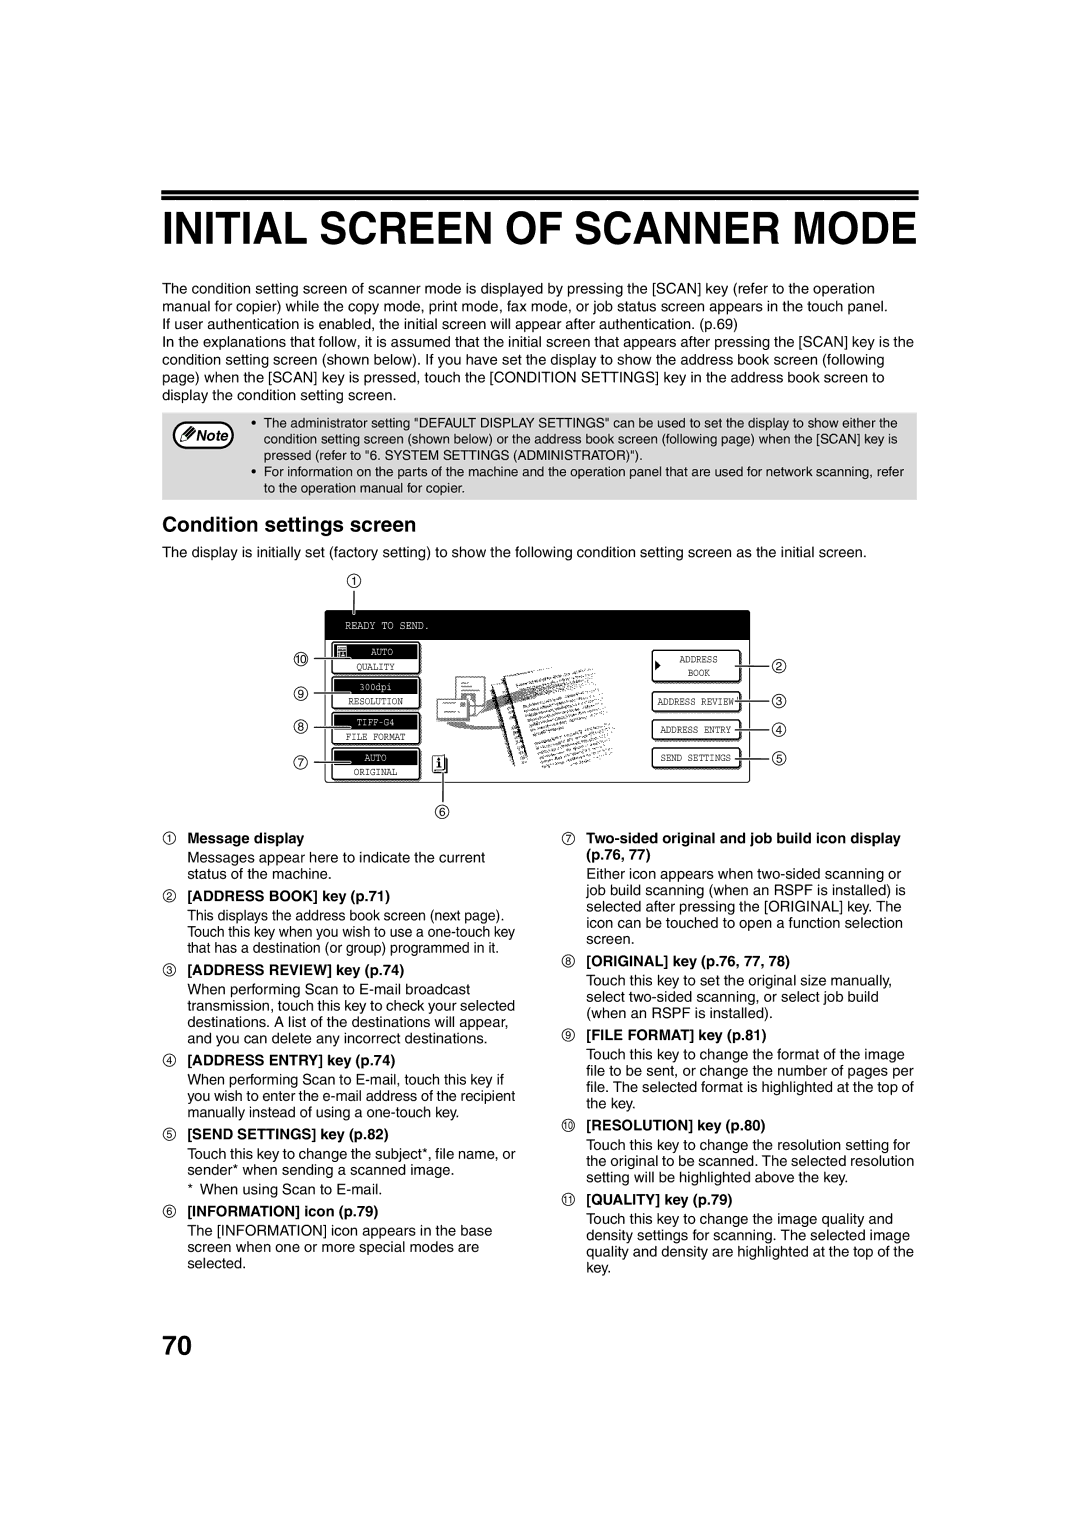
The display is initially set (factory setting) to show the following condition setting screen as the initial screen.
1
READY TO SEND.
10
AUTO
ADDRESS
QUALITY
9
300dpi
BOOK
2
RESOLUTION
8
FILE FORMAT
7AUTO
ORIGINAL
6
1Message display
Messages appear here to indicate the current status of the machine.
2[ADDRESS BOOK] key (p.71)
This displays the address book screen (next page). Touch this key when you wish to use a
3[ADDRESS REVIEW] key (p.74)
When performing Scan to
4[ADDRESS ENTRY] key (p.74)
When performing Scan to
5[SEND SETTINGS] key (p.82)
Touch this key to change the subject*, file name, or sender* when sending a scanned image.
*When using Scan to
6[INFORMATION] icon (p.79)
The [INFORMATION] icon appears in the base screen when one or more special modes are selected.
ADDRESS REVIEW  3
3
ADDRESS ENTRY  4
4
SEND SETTINGS  5
5
7Two-sided original and job build icon display (p.76, 77)
Either icon appears when
8[ORIGINAL] key (p.76, 77, 78)
Touch this key to set the original size manually, select
9[FILE FORMAT] key (p.81)
Touch this key to change the format of the image file to be sent, or change the number of pages per file. The selected format is highlighted at the top of the key.
10[RESOLUTION] key (p.80)
Touch this key to change the resolution setting for the original to be scanned. The selected resolution setting will be highlighted above the key.
11[QUALITY] key (p.79)
Touch this key to change the image quality and density settings for scanning. The selected image quality and density are highlighted at the top of the key.
70