CHAPTER 39: Configuring L2TP Server Settings
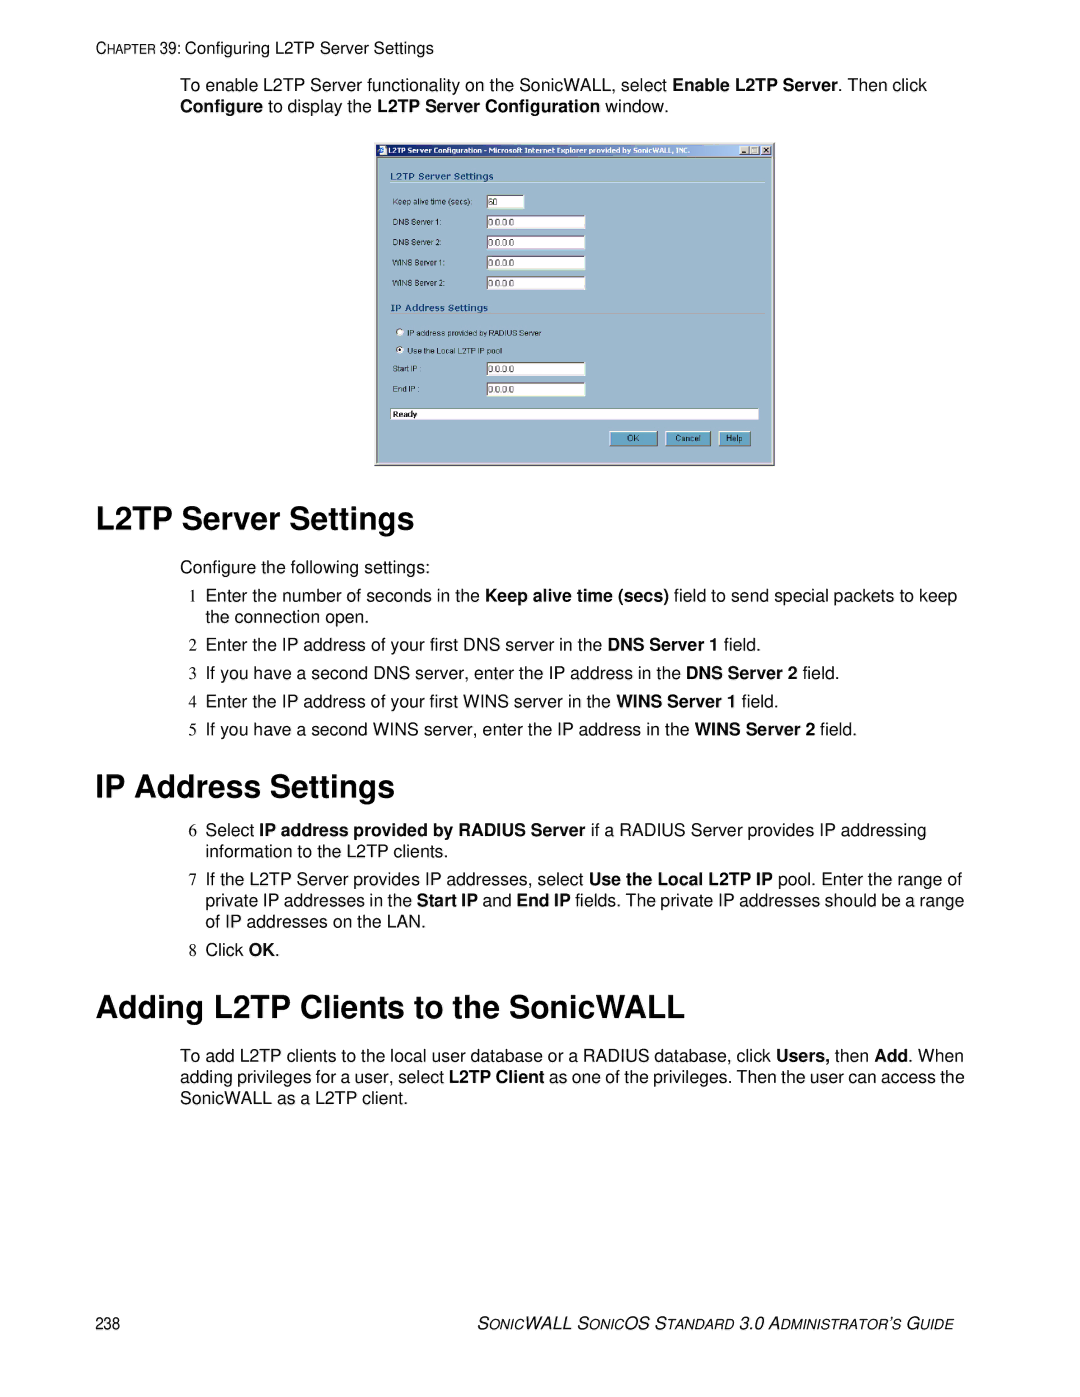
To enable L2TP Server functionality on the SonicWALL, select Enable L2TP Server. Then click Configure to display the L2TP Server Configuration window.
L2TP Server Settings
Configure the following settings:
1Enter the number of seconds in the Keep alive time (secs) field to send special packets to keep the connection open.
2Enter the IP address of your first DNS server in the DNS Server 1 field.
3If you have a second DNS server, enter the IP address in the DNS Server 2 field.
4Enter the IP address of your first WINS server in the WINS Server 1 field.
5If you have a second WINS server, enter the IP address in the WINS Server 2 field.
IP Address Settings
6Select IP address provided by RADIUS Server if a RADIUS Server provides IP addressing information to the L2TP clients.
7If the L2TP Server provides IP addresses, select Use the Local L2TP IP pool. Enter the range of private IP addresses in the Start IP and End IP fields. The private IP addresses should be a range of IP addresses on the LAN.
8Click OK.
Adding L2TP Clients to the SonicWALL
To add L2TP clients to the local user database or a RADIUS database, click Users, then Add. When adding privileges for a user, select L2TP Client as one of the privileges. Then the user can access the SonicWALL as a L2TP client.
238 | SONICWALL SONICOS STANDARD 3.0 ADMINISTRATOR’S GUIDE |
