Gateway—How to Configure Network Address Translation (NAT)
This screen displays the IP addresses specified in the WAN screen (Network Configuration --> WAN from the left menu). Up to eight WAN addresses can be associated with the switch. The NAT screen enables the administrator to set of the type of translation and port forwarding required.
2.For each of the addresses, the select the NAT type.
•Select 1 to 1 from the pull-down menu to map a WAN IP address to a single local (subnet) IP address. This selection is useful in situations in which users require dedicated IP addresses or when public-facing servers are connected to the switch.
•Select 1 to Many from the pull-down menu to map a WAN IP address to a range of local IP addresses. Use this option when there are fewer public IP address on the WAN than there are users on the LAN. 1 to Many NAT allows a single IP address to handle traffic from multiple private LAN IP addresses.
•Select None from the pull-down menu when the administrator sets up routable IP addresses (set on the Network Configuration --> Routing screen).
3.If the NAT type is 1 to 1, the Outbound Mappings field allows the administrator to specify a single IP Address. This address specifies the 1 to 1 mapping between the WAN IP address the specified LAN IP address.
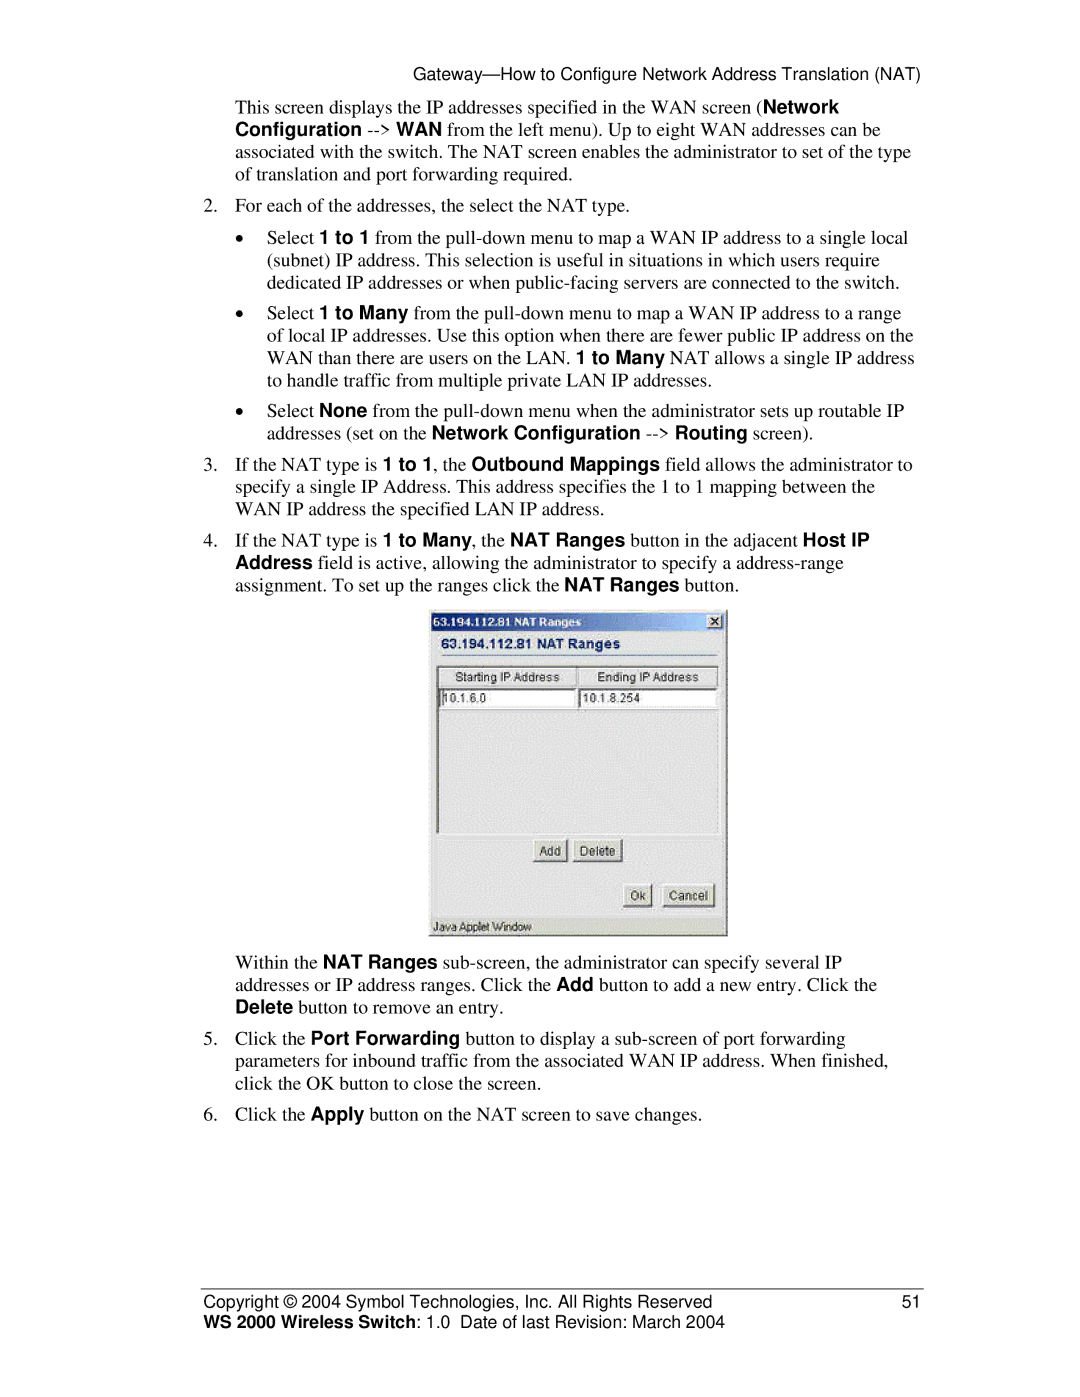
4.If the NAT type is 1 to Many, the NAT Ranges button in the adjacent Host IP Address field is active, allowing the administrator to specify a address-range assignment. To set up the ranges click the NAT Ranges button.
Within the NAT Ranges sub-screen, the administrator can specify several IP addresses or IP address ranges. Click the Add button to add a new entry. Click the Delete button to remove an entry.
5.Click the Port Forwarding button to display a sub-screen of port forwarding parameters for inbound traffic from the associated WAN IP address. When finished, click the OK button to close the screen.
6.Click the Apply button on the NAT screen to save changes.