| Retail Use Cases | |
And for each subnet: |
|
|
|
|
|
192.168.**.1 | The subnet itself |
|
|
|
|
192.168.**.2 to 192.168.**.10 | Static IP addresses |
|
|
|
|
192.168.**.11 to 192.168.**.254 |
| |
|
|
|
With this plan, she can begin to configure the individual subnets
Configuring POS Subnet
Clarisa selects the first subnet from the LAN menu items in the left menu.
Clarisa renames this subnet “POSsn”, and then gives it an IP address of 192.168.0.1 and a subnet mask of 255.255.255.0. The devices on this subnet are:
•Everything on the POS WLAN: wireless POS terminals and wireless handheld terminals
•One wired POS terminal on port 4 and one on port 5
•One
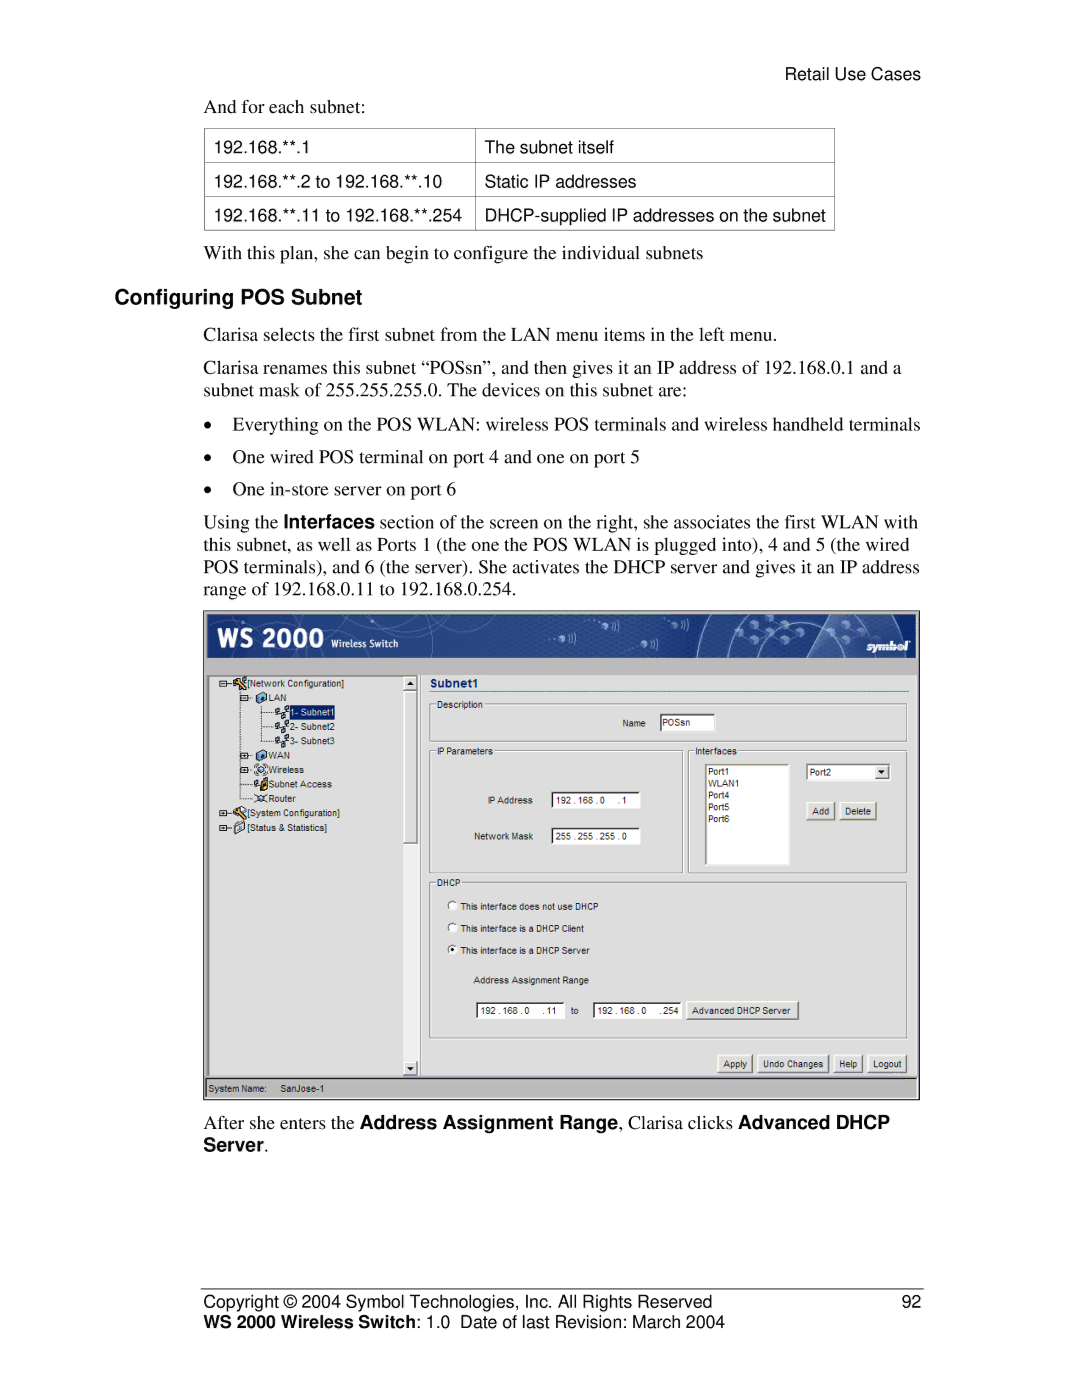
Using the Interfaces section of the screen on the right, she associates the first WLAN with this subnet, as well as Ports 1 (the one the POS WLAN is plugged into), 4 and 5 (the wired POS terminals), and 6 (the server). She activates the DHCP server and gives it an IP address range of 192.168.0.11 to 192.168.0.254.
After she enters the Address Assignment Range, Clarisa clicks Advanced DHCP Server.
Copyright © 2004 Symbol Technologies, Inc. All Rights Reserved | 92 |
WS 2000 Wireless Switch: 1.0 Date of last Revision: March 2004 |
|