Step 4: Enable Wireless LANs (WLANs)
Wireless Summary Area
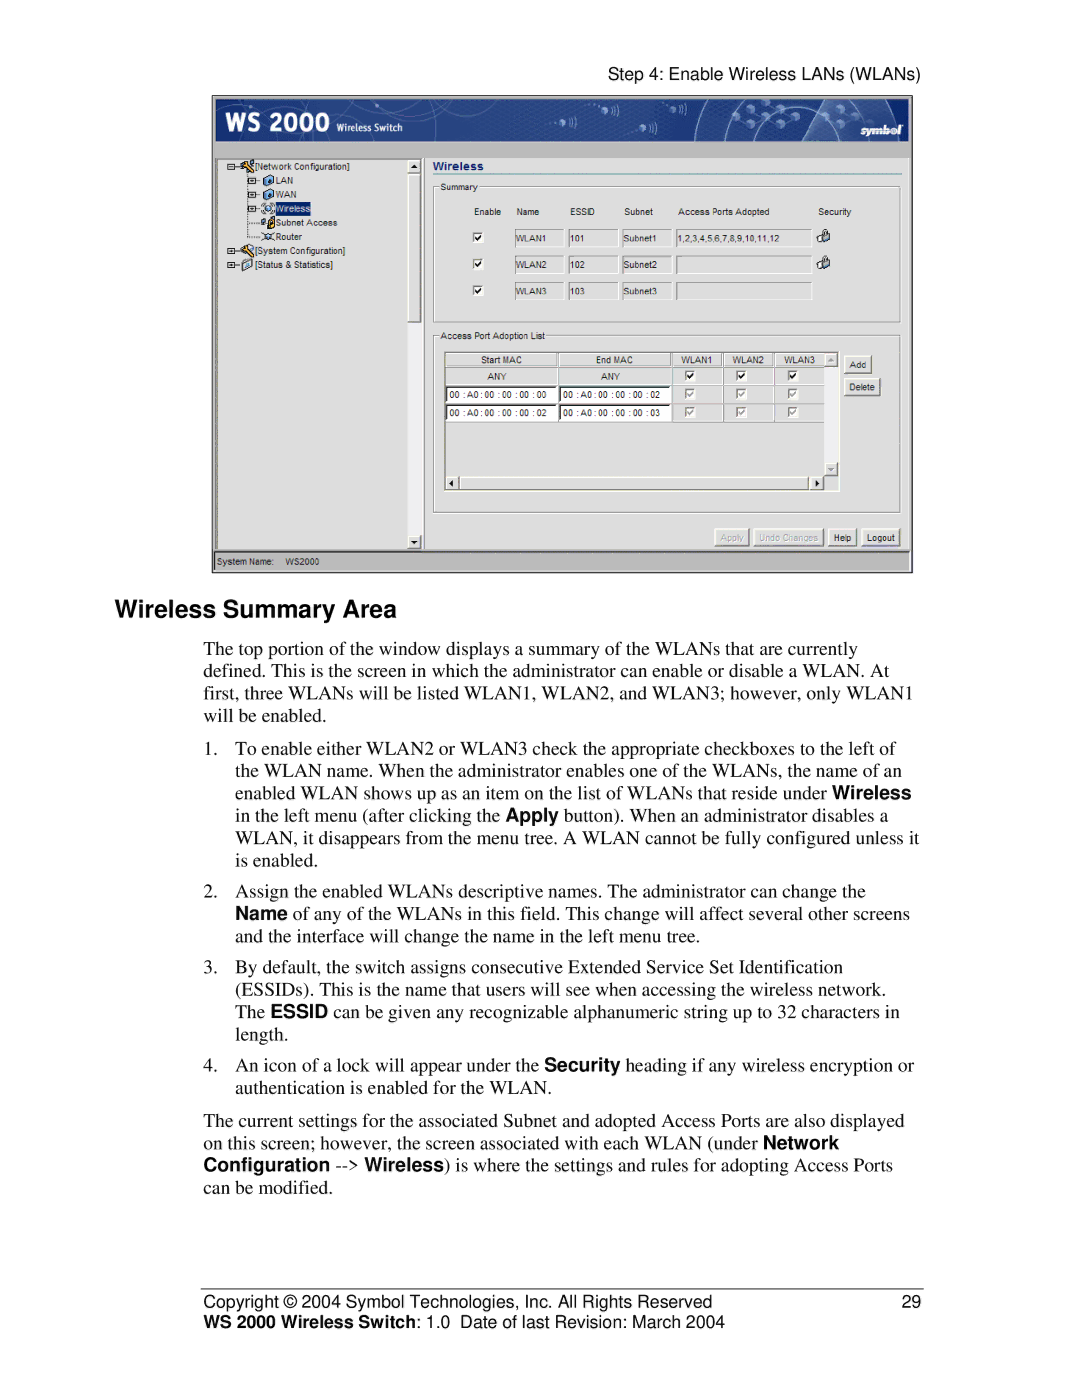
The top portion of the window displays a summary of the WLANs that are currently defined. This is the screen in which the administrator can enable or disable a WLAN. At first, three WLANs will be listed WLAN1, WLAN2, and WLAN3; however, only WLAN1 will be enabled.
1.To enable either WLAN2 or WLAN3 check the appropriate checkboxes to the left of the WLAN name. When the administrator enables one of the WLANs, the name of an enabled WLAN shows up as an item on the list of WLANs that reside under Wireless in the left menu (after clicking the Apply button). When an administrator disables a WLAN, it disappears from the menu tree. A WLAN cannot be fully configured unless it is enabled.
2.Assign the enabled WLANs descriptive names. The administrator can change the Name of any of the WLANs in this field. This change will affect several other screens and the interface will change the name in the left menu tree.
3.By default, the switch assigns consecutive Extended Service Set Identification (ESSIDs). This is the name that users will see when accessing the wireless network. The ESSID can be given any recognizable alphanumeric string up to 32 characters in length.
4.An icon of a lock will appear under the Security heading if any wireless encryption or authentication is enabled for the WLAN.
The current settings for the associated Subnet and adopted Access Ports are also displayed on this screen; however, the screen associated with each WLAN (under Network Configuration
Copyright © 2004 Symbol Technologies, Inc. All Rights Reserved | 29 |
WS 2000 Wireless Switch: 1.0 Date of last Revision: March 2004 |
|