A Field Office Example
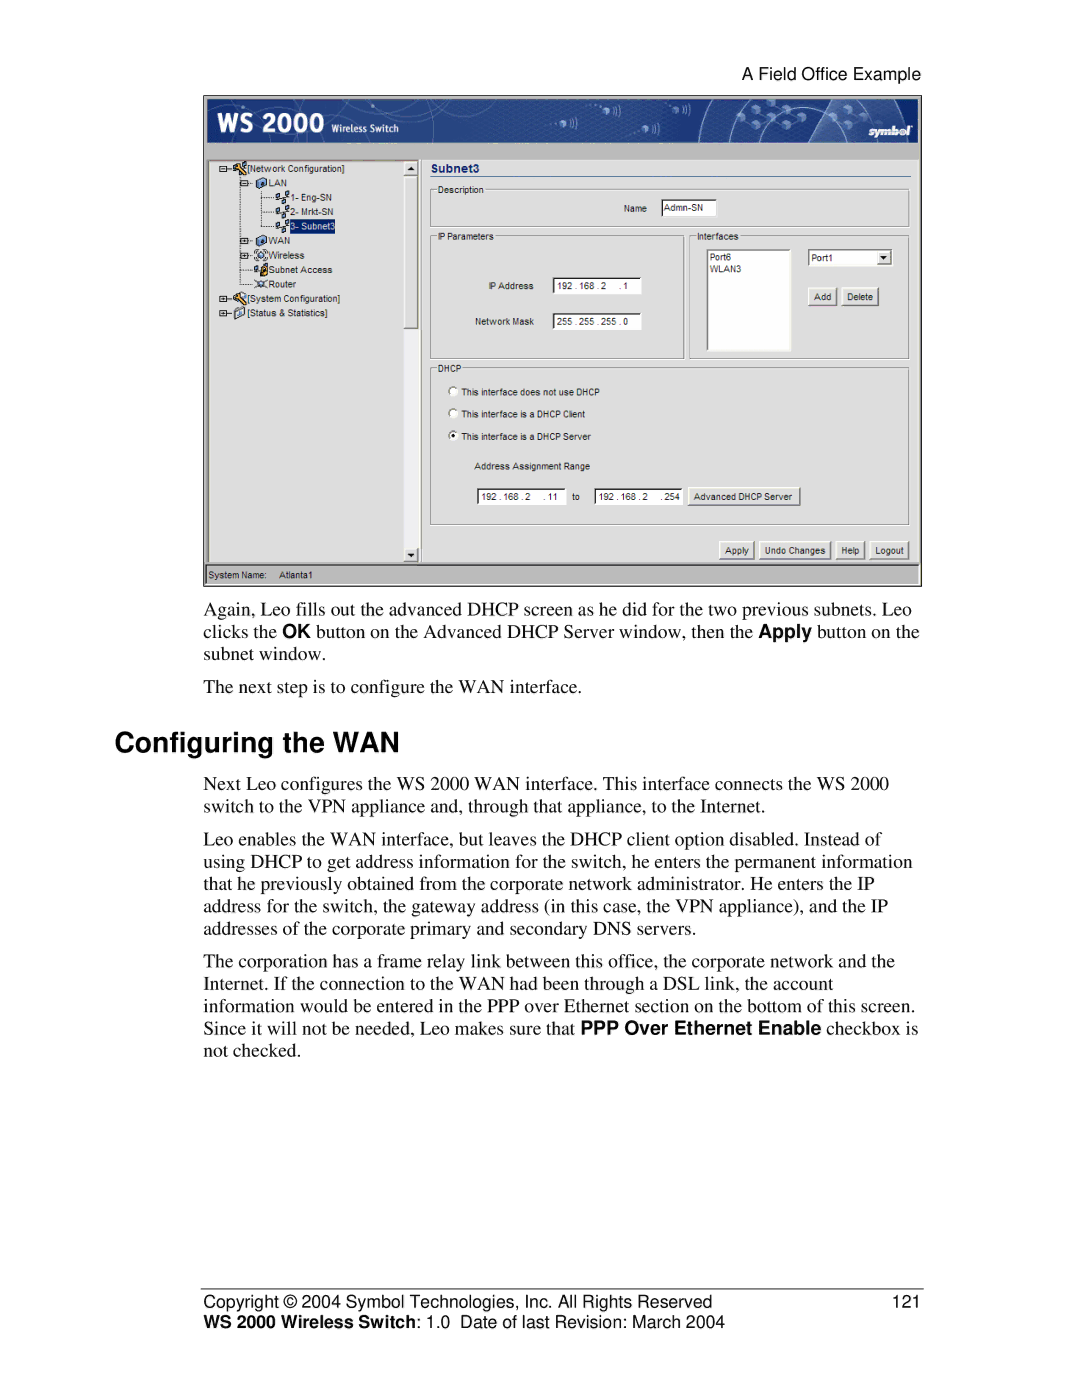
Again, Leo fills out the advanced DHCP screen as he did for the two previous subnets. Leo clicks the OK button on the Advanced DHCP Server window, then the Apply button on the subnet window.
The next step is to configure the WAN interface.
Configuring the WAN
Next Leo configures the WS 2000 WAN interface. This interface connects the WS 2000 switch to the VPN appliance and, through that appliance, to the Internet.
Leo enables the WAN interface, but leaves the DHCP client option disabled. Instead of using DHCP to get address information for the switch, he enters the permanent information that he previously obtained from the corporate network administrator. He enters the IP address for the switch, the gateway address (in this case, the VPN appliance), and the IP addresses of the corporate primary and secondary DNS servers.
The corporation has a frame relay link between this office, the corporate network and the Internet. If the connection to the WAN had been through a DSL link, the account information would be entered in the PPP over Ethernet section on the bottom of this screen. Since it will not be needed, Leo makes sure that PPP Over Ethernet Enable checkbox is not checked.
Copyright © 2004 Symbol Technologies, Inc. All Rights Reserved | 121 |
WS 2000 Wireless Switch: 1.0 Date of last Revision: March 2004 |
|