Retail Use Cases
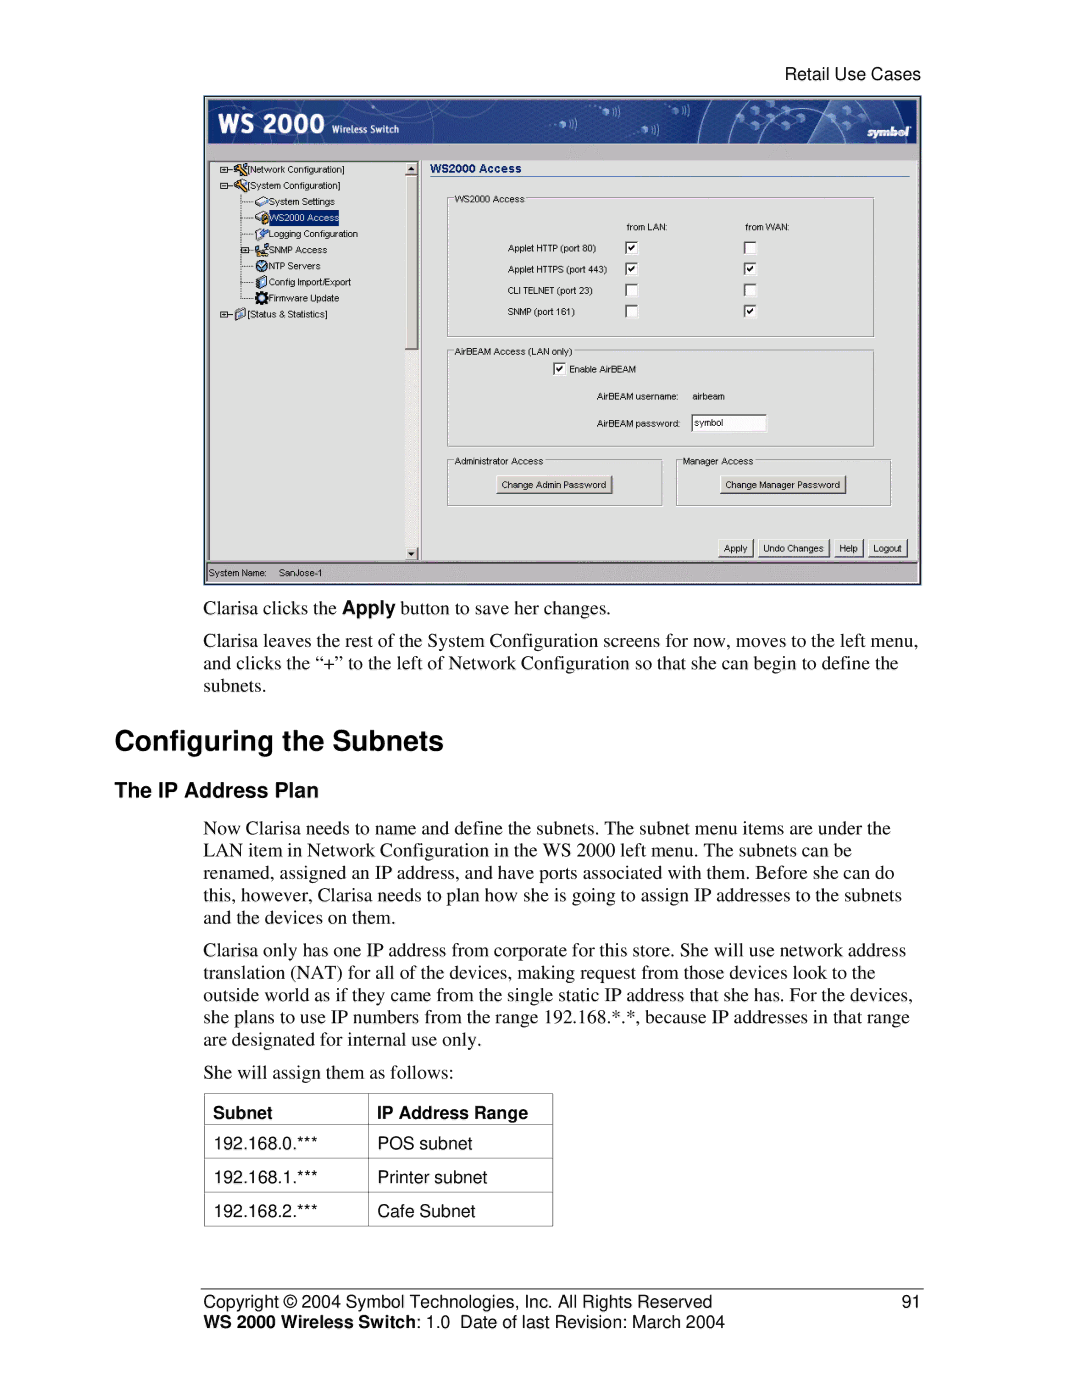
Clarisa clicks the Apply button to save her changes.
Clarisa leaves the rest of the System Configuration screens for now, moves to the left menu, and clicks the “+” to the left of Network Configuration so that she can begin to define the subnets.
Configuring the Subnets
The IP Address Plan
Now Clarisa needs to name and define the subnets. The subnet menu items are under the LAN item in Network Configuration in the WS 2000 left menu. The subnets can be renamed, assigned an IP address, and have ports associated with them. Before she can do this, however, Clarisa needs to plan how she is going to assign IP addresses to the subnets and the devices on them.
Clarisa only has one IP address from corporate for this store. She will use network address translation (NAT) for all of the devices, making request from those devices look to the outside world as if they came from the single static IP address that she has. For the devices, she plans to use IP numbers from the range 192.168.*.*, because IP addresses in that range are designated for internal use only.
She will assign them as follows:
Subnet | IP Address Range |
192.168.0.*** | POS subnet |
|
|
192.168.1.*** | Printer subnet |
|
|
192.168.2.*** | Cafe Subnet |
|
|
Copyright © 2004 Symbol Technologies, Inc. All Rights Reserved | 91 |
WS 2000 Wireless Switch: 1.0 Date of last Revision: March 2004 |
|