6. Main screen operations
6.8 QA
Take the steps below to adjust the images.
1
2
Select the image.
Click the thumbnail image.
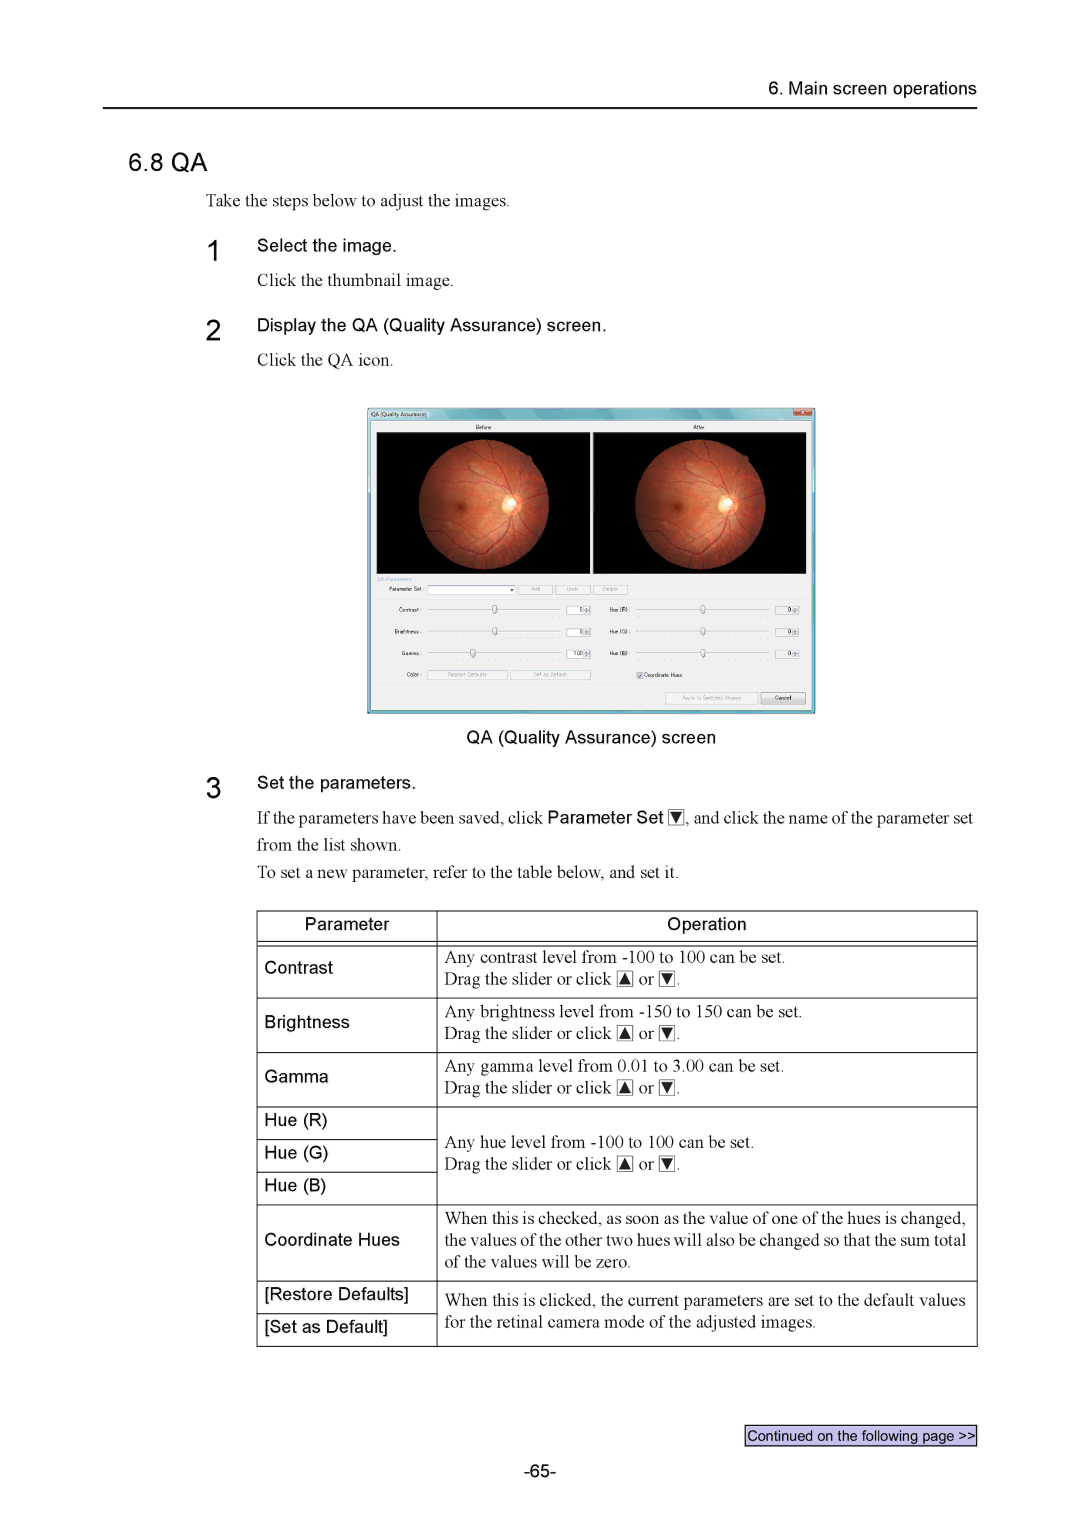
Display the QA (Quality Assurance) screen.
Click the QA icon.
QA (Quality Assurance) screen
3 | Set the parameters. |
|
|
|
|
|
|
|
|
|
|
|
|
|
|
| |
| If the parameters have been saved, click Parameter Set |
|
| , and click the name of the parameter set | ||||
|
|
| ||||||
| from the list shown. |
|
|
|
|
|
|
|
| To set a new parameter, refer to the table below, and set it. | |||||||
|
|
|
|
|
|
|
|
|
| Parameter |
|
|
| Operation | |||
|
|
|
|
|
|
|
| |
|
|
|
|
|
|
|
| |
| Contrast | Any contrast level from | ||||||
| Drag the slider or click |
| or |
|
| . | ||
|
|
|
| |||||
|
|
|
| |||||
|
|
|
|
|
|
|
|
|
| Brightness | Any brightness level from | ||||||
| Drag the slider or click |
| or |
|
| . | ||
|
|
|
| |||||
|
|
|
| |||||
|
|
|
|
|
|
|
|
|
| Gamma | Any gamma level from 0.01 to 3.00 can be set. | ||||||
| Drag the slider or click |
| or |
|
| . | ||
|
|
|
| |||||
|
|
|
| |||||
|
|
|
|
|
|
|
|
|
| Hue (R) | Any hue level from | ||||||
|
| |||||||
| Hue (G) | |||||||
| Drag the slider or click |
| or |
|
| . | ||
|
|
|
| |||||
|
|
|
| |||||
| Hue (B) |
|
|
|
|
|
|
|
|
|
|
|
|
|
|
| |
| Coordinate Hues | When this is checked, as soon as the value of one of the hues is changed, | ||||||
| the values of the other two hues will also be changed so that the sum total | |||||||
|
| of the values will be zero. |
|
|
|
|
| |
|
|
|
|
|
|
|
| |
| [Restore Defaults] | When this is clicked, the current parameters are set to the default values | ||||||
|
| for the retinal camera mode of the adjusted images. | ||||||
| [Set as Default] | |||||||
|
|
|
|
|
|
|
|
|
Continued on the following page >>