4With the lever on the hard drive carrier open, slide the hard drive into the drive bay until the carrier contacts the backplane. See Figure
5Close the handle to lock the drive in place.
Removing a Hard Drive From a Hard-Drive Carrier
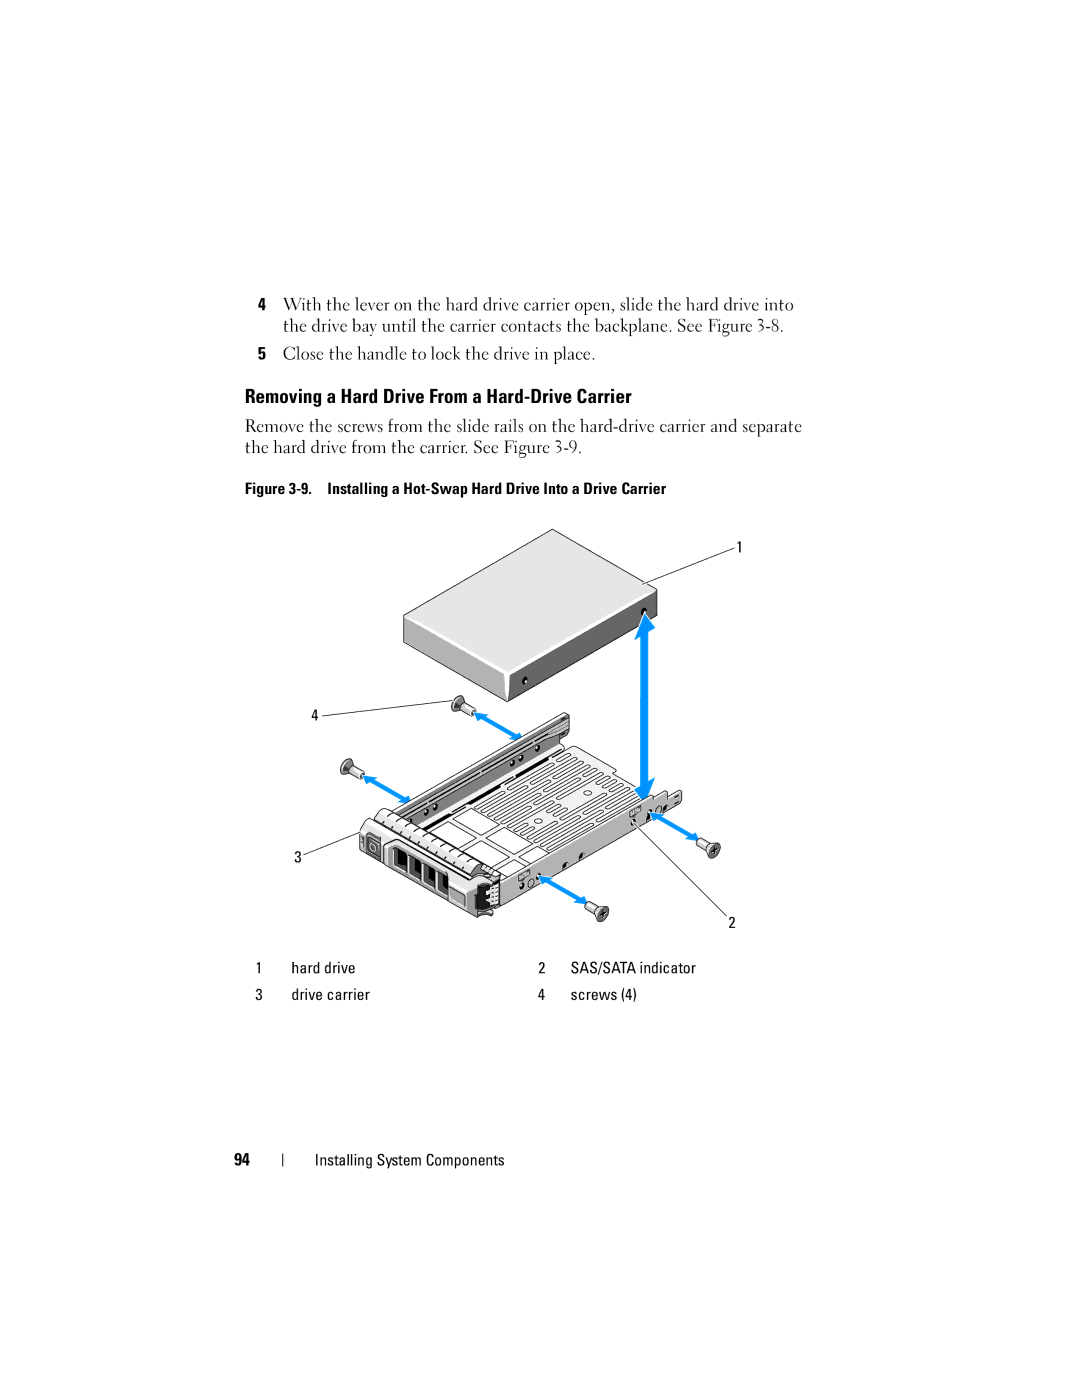
Remove the screws from the slide rails on the
Figure 3-9. Installing a Hot-Swap Hard Drive Into a Drive Carrier
1
4 ![]()
![]()
3
2
1 | hard drive | 2 | SAS/SATA indicator |
3 | drive carrier | 4 | screws (4) |
94
