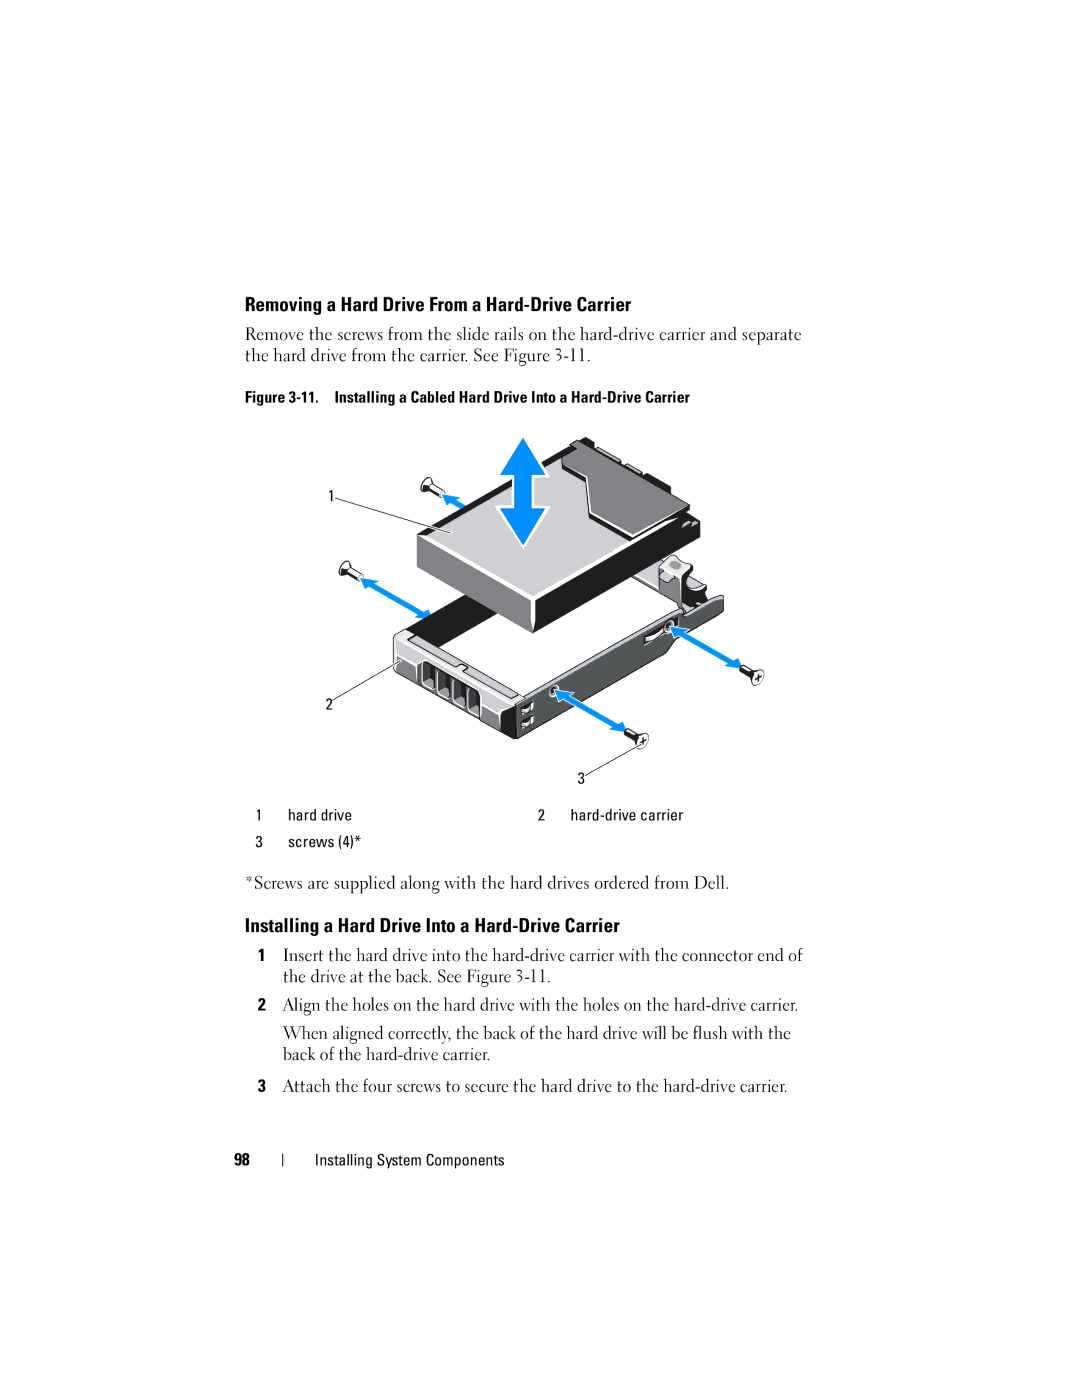
Removing a Hard Drive From a Hard-Drive Carrier
Remove the screws from the slide rails on the
Figure 3-11. Installing a Cabled Hard Drive Into a Hard-Drive Carrier
1
| 2 |
|
|
|
|
| 3 |
1 | hard drive | 2 |
|
3 | screws (4)* |
|
|
*Screws are supplied along with the hard drives ordered from Dell.
Installing a Hard Drive Into a Hard-Drive Carrier
1Insert the hard drive into the
2Align the holes on the hard drive with the holes on the
When aligned correctly, the back of the hard drive will be flush with the back of the
3Attach the four screws to secure the hard drive to the
98
