7.2.3Automatic Tool Length Offset Measurement
7.2.3 Automatic Tool Length Offset Measurement
Tool length offsets can also be measured automatically, provided the machine is mounted with a tool offset sensor. Select screen F4 T LENG MEASURE (tool length measurement) in screen menu of F5 OFFSETS.
Switch control to JOG mode, than change the tool to be measured. Move the tool tip near to the tool sensor by the use of jog buttons.
The length offset register in which the size of the tool is to be stored must be specified after the action menu button is pressed. Press softkey F3 OFS NO SEARCH (offset number search). The number of the offset register to be used for the tool measurement must be written at address N in the data input line than the data input must be terminated by means of button
![]() or
or ![]()
![]()
. In case parameter 1353 OFFSNL is set to 1 the cursor moves automatically to
the offset register the number of which corresponds to the number of tool activated. Press softkey F3 AUTO MEAS after the action menu is pressed.
Touch the tool sensor by moving axis with the appropriate jog button. In this case the speed of movement is always the value defined at parameter 8022 G37FD independent of the override switch state. Even 0% state of the override switch is ineffective, the jog button must be released in order to stop.
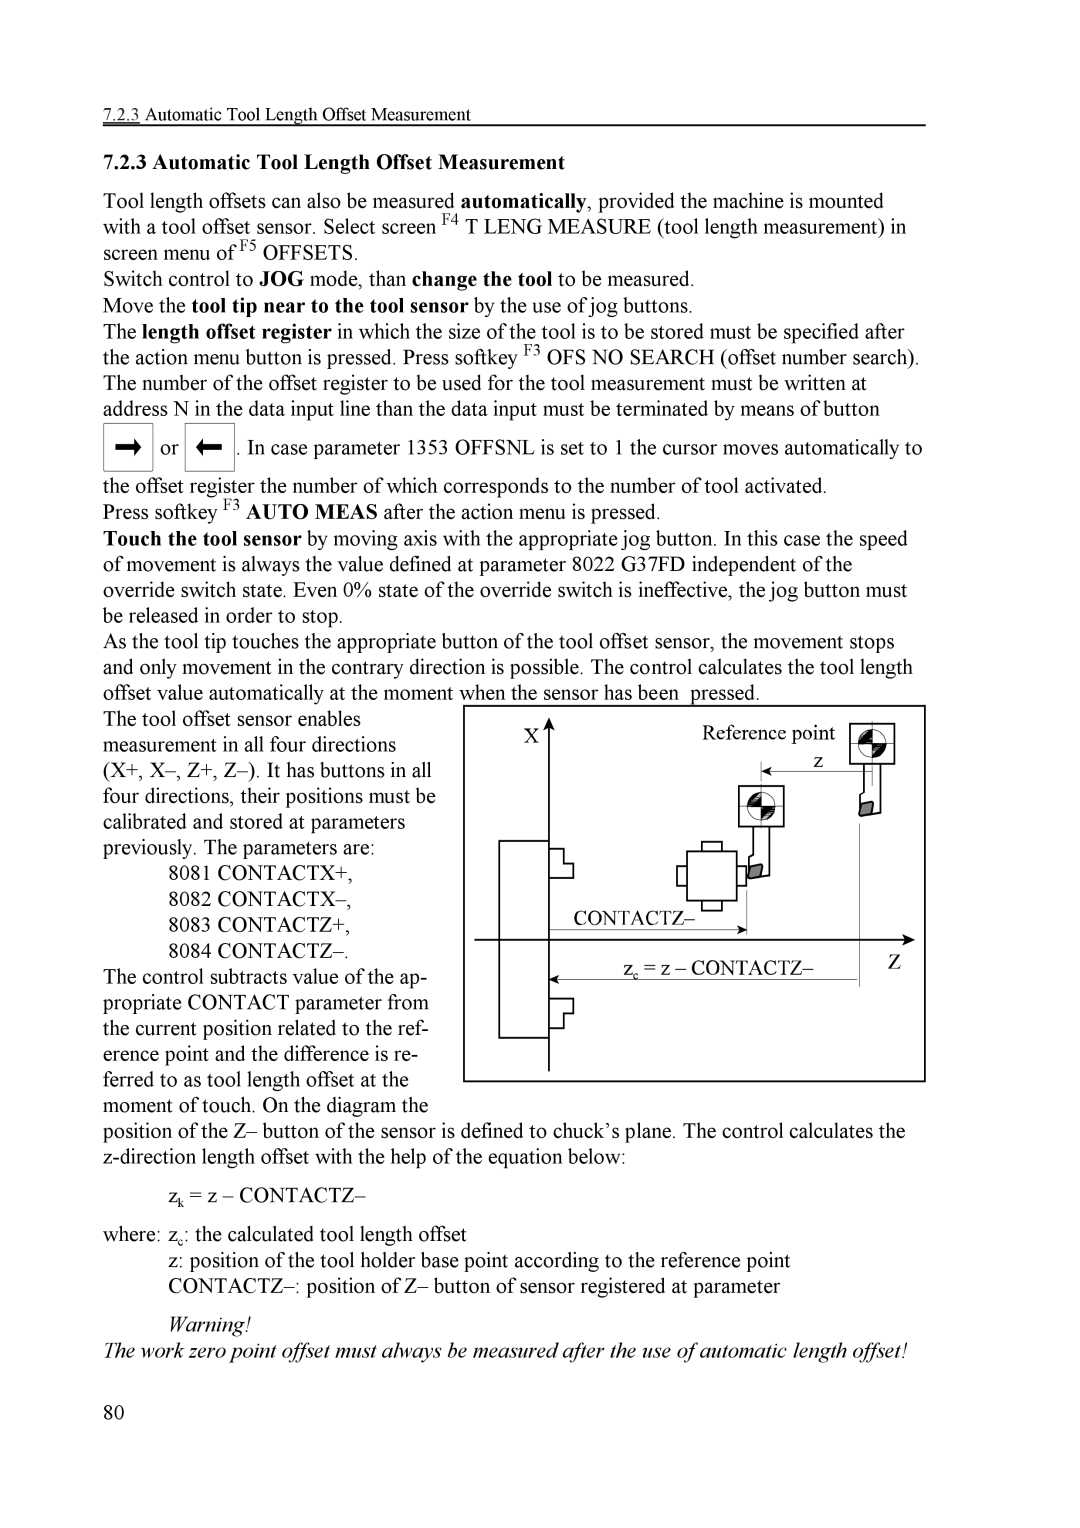
As the tool tip touches the appropriate button of the tool offset sensor, the movement stops and only movement in the contrary direction is possible. The control calculates the tool length offset value automatically at the moment when the sensor has been pressed.
The tool offset sensor enables
measurement in all four directions (X+,
four directions, their positions must be
calibrated and stored at parameters previously. The parameters are:
8081 CONTACTX+,
8082 CONTACTX–,
8083 CONTACTZ+,
8084
the current position related to the ref- erence point and the difference is re- ferred to as tool length offset at the moment of touch. On the diagram the
position of the Z– button of the sensor is defined to chuck’s plane. The control calculates the
zk = z – CONTACTZ–
where: zc: the calculated tool length offset
z:position of the tool holder base point according to the reference point
Warning!
The work zero point offset must always be measured after the use of automatic length offset!
80
