!WARNING
If the system was running, any processor and heat sink installed is hot. To avoid the possibility of a burn, let the components cool for 10 minutes before continuing with these procedures.
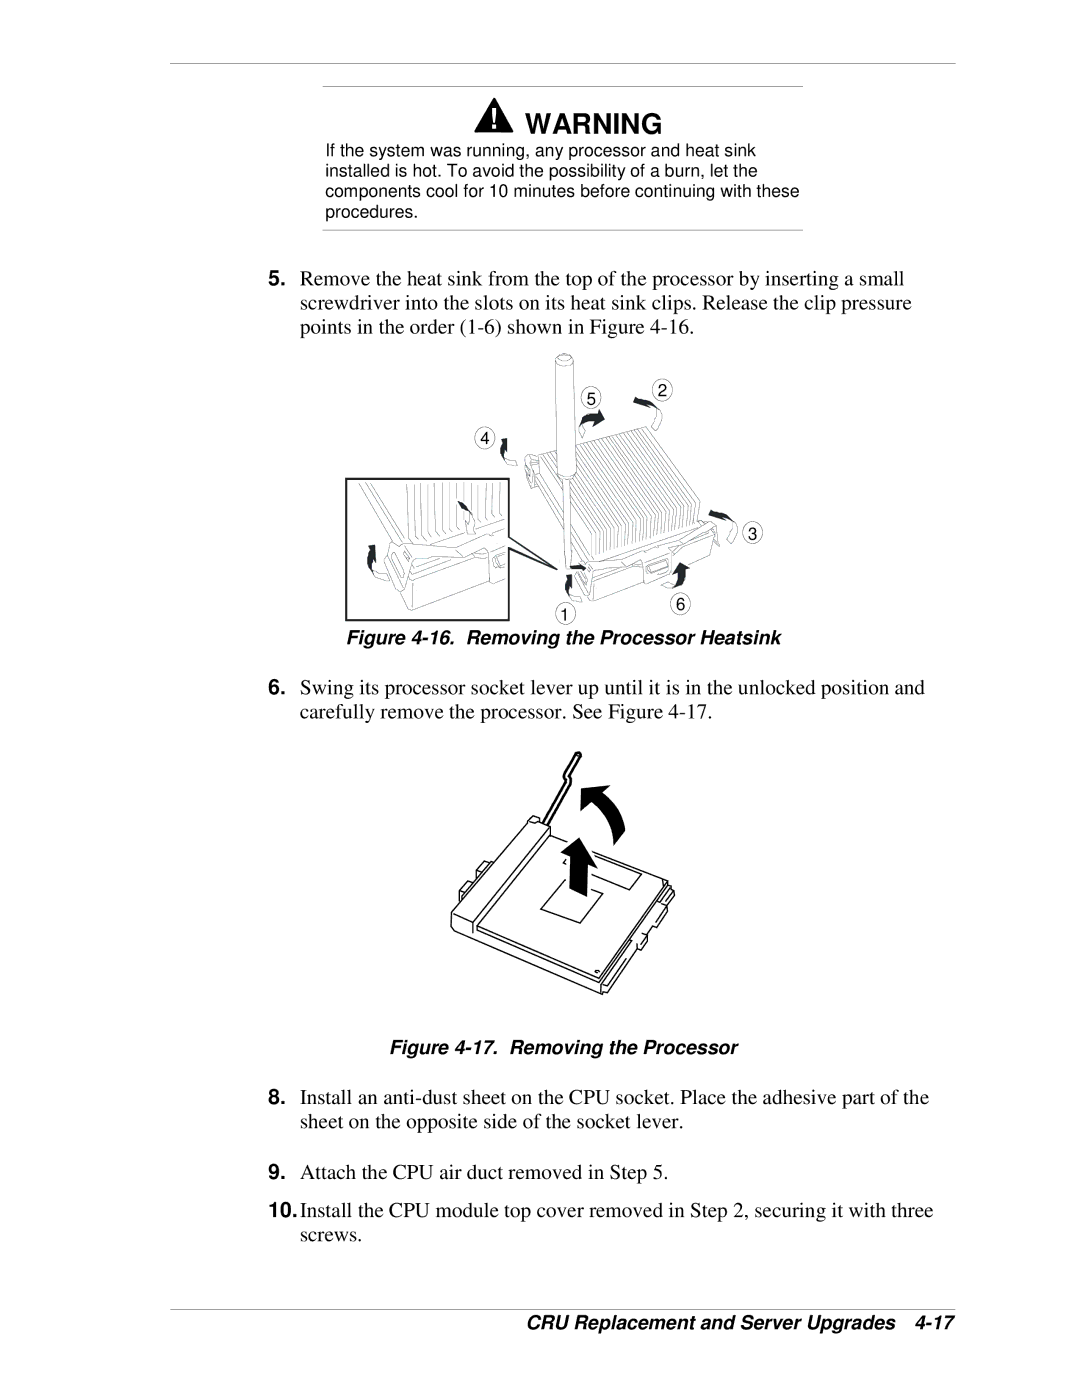
5.Remove the heat sink from the top of the processor by inserting a small screwdriver into the slots on its heat sink clips. Release the clip pressure points in the order
5 2
4
3
16
Figure 4-16. Removing the Processor Heatsink
6.Swing its processor socket lever up until it is in the unlocked position and carefully remove the processor. See Figure
Figure 4-17. Removing the Processor
8.Install an
9.Attach the CPU air duct removed in Step 5.
10.Install the CPU module top cover removed in Step 2, securing it with three screws.