MUX
[PANASONIC MODELS] (PS·DATA)
This section will describe what you should take notice when using a PS·Data system controller.
The same descriptions as the system controller’s operating instructions are not mentioned here. Refer to them.
Notes:
•Before the use, it is necessary to install the Multiplexer board in the matrix switcher, connect the matrix switcher to the
•The
■Controlling the
1.Enter the recorder mode. (Refer to p. 141.)
2.Press the SHIFT button to activate the FUNCTION buttons.
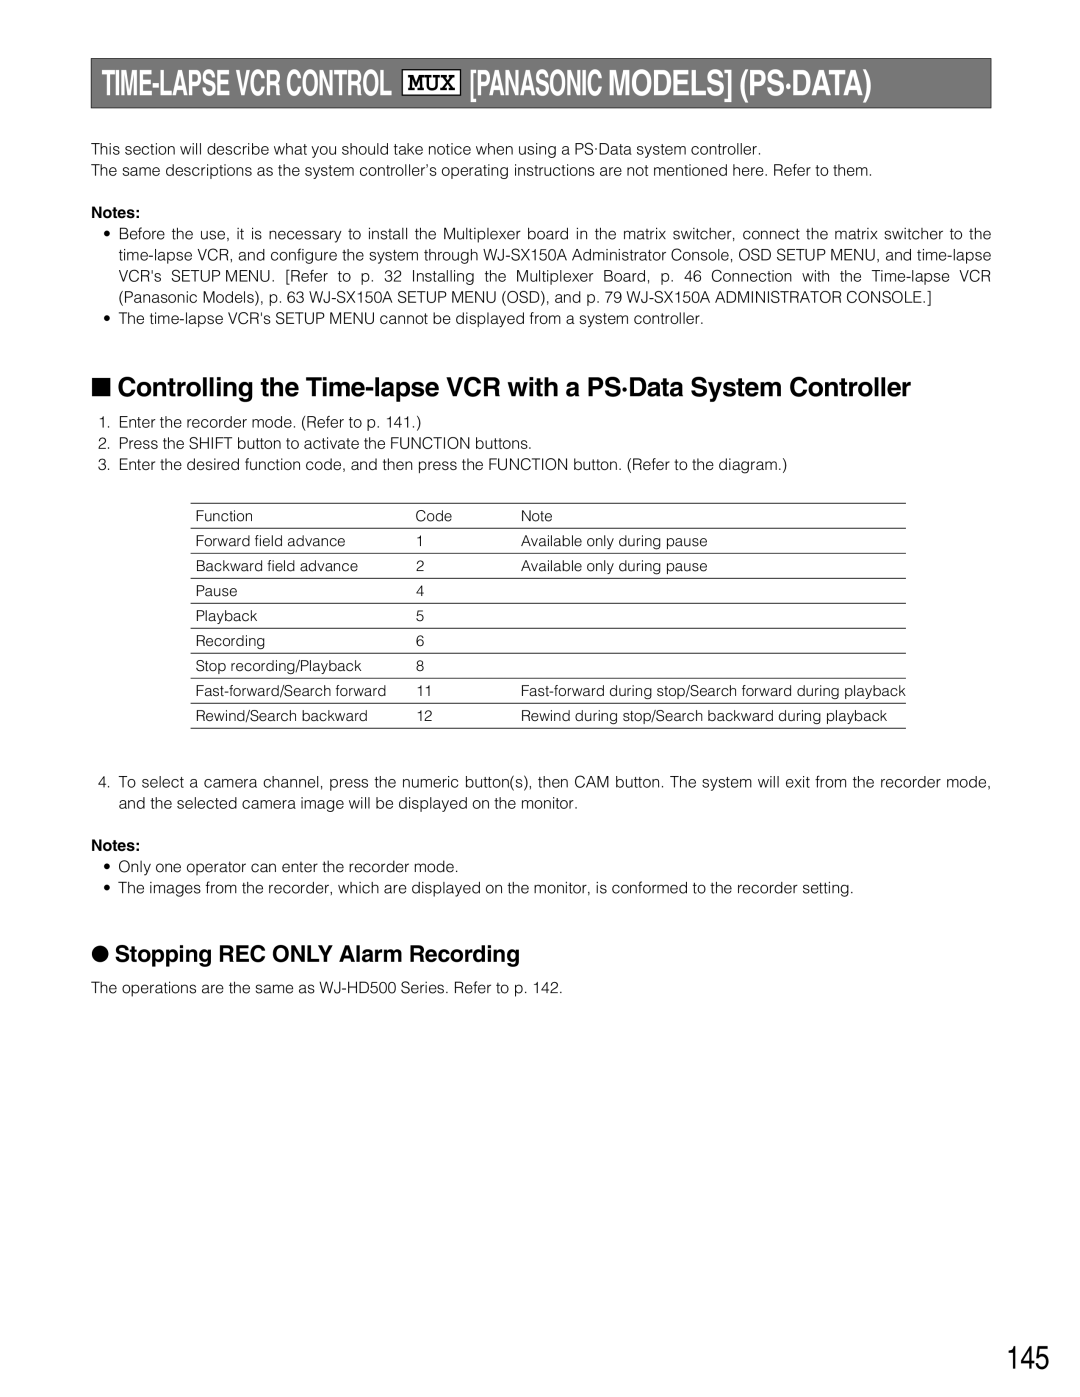
3.Enter the desired function code, and then press the FUNCTION button. (Refer to the diagram.)
Function | Code | Note |
Forward field advance | 1 | Available only during pause |
|
|
|
Backward field advance | 2 | Available only during pause |
|
|
|
Pause | 4 |
|
|
|
|
Playback | 5 |
|
|
|
|
Recording | 6 |
|
|
|
|
Stop recording/Playback | 8 |
|
|
|
|
11 | ||
|
|
|
Rewind/Search backward | 12 | Rewind during stop/Search backward during playback |
|
|
|
4.To select a camera channel, press the numeric button(s), then CAM button. The system will exit from the recorder mode, and the selected camera image will be displayed on the monitor.
Notes:
•Only one operator can enter the recorder mode.
•The images from the recorder, which are displayed on the monitor, is conformed to the recorder setting.
