•Year
Press the numeric button to enter the correct year.
•TIME
Press the numeric button to enter the correct time.
•MINUTE
Press the numeric button to enter the correct minute.
•AM/PM
Press the NEXT or PREV button to select the correct time. After the configuration, press the SETUP button while hold- ing down the SHIFT button. The configuration will be updat- ed when closing SETUP MENU.
Notes:
•Adjust the time and date when the clock display is differ- ent from the current one.
•The clock display pattern is changeable with the setting in
•The clock is automatically adjusted to 0 second of the set- ting time and date when closing SETUP MENU.
•Hour system (12- hours or 24- hours) is changeable through
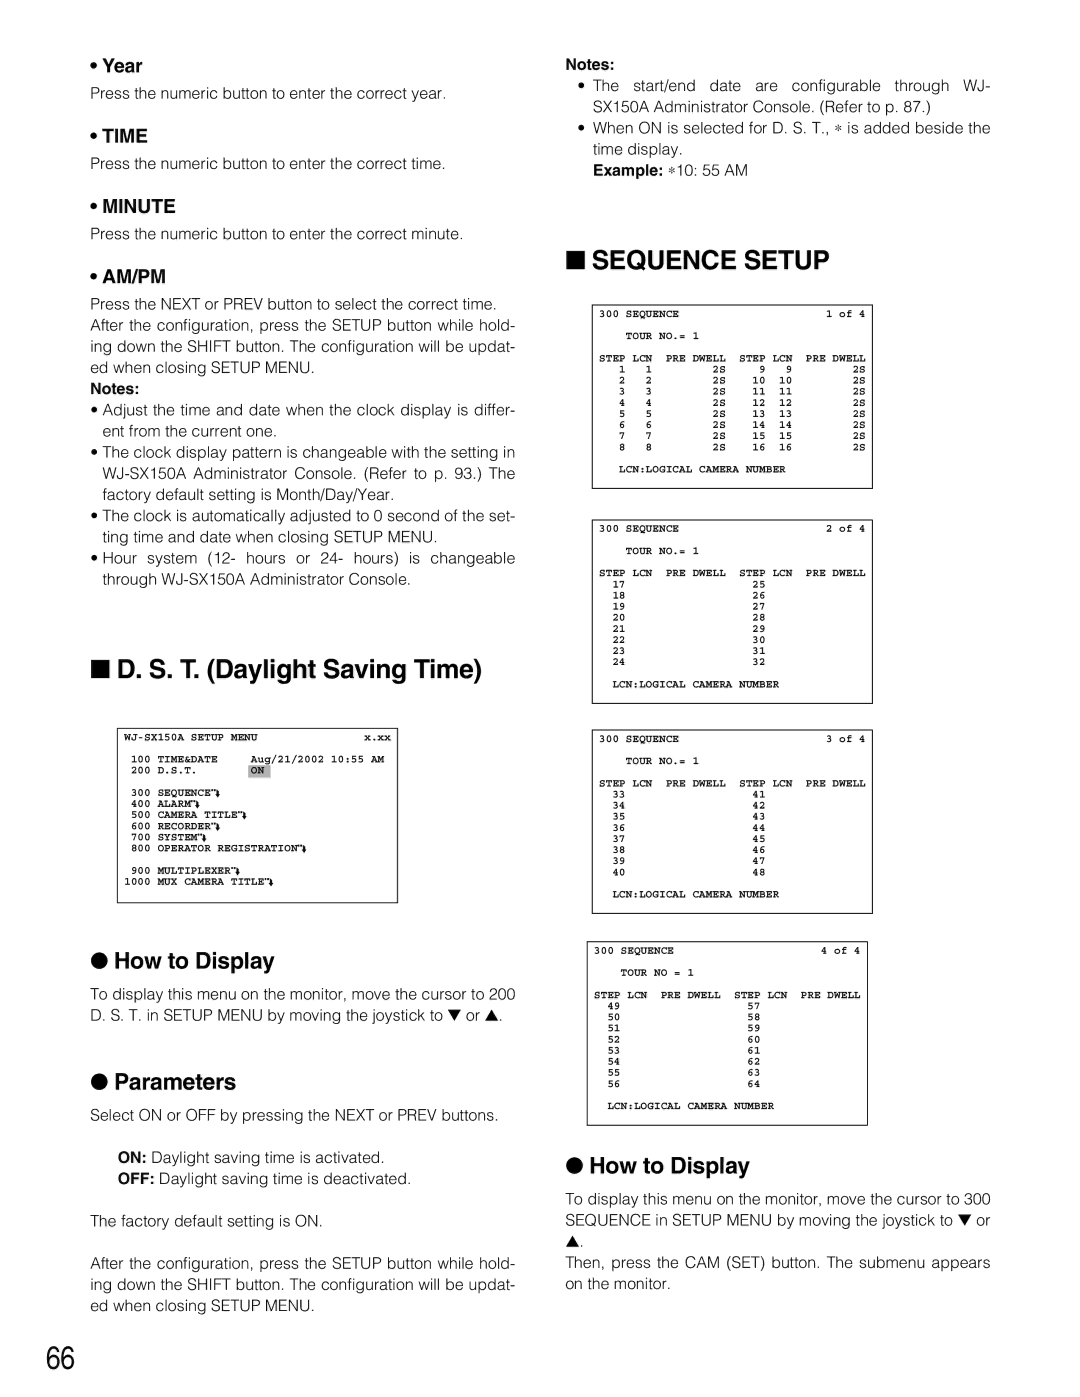
■D. S. T. (Daylight Saving Time)
x.xx | ||||
100 | TIME&DATE | Aug/21/2002 10:55 AM | ||
200 | D.S.T. | ON |
|
|
300 | SEQUENCEO |
|
|
|
400 | ALARMO |
|
|
|
500 | CAMERA TITLEO |
|
|
|
600 | RECORDERO |
|
|
|
700 | SYSTEMO |
|
|
|
800 | OPERATOR REGISTRATIONO |
| ||
900 | MULTIPLEXERO |
|
|
|
1000 | MUX CAMERA TITLEO |
| ||
|
|
|
|
|
●How to Display
To display this menu on the monitor, move the cursor to 200 D. S. T. in SETUP MENU by moving the joystick to ▼ or ▲.
●Parameters
Select ON or OFF by pressing the NEXT or PREV buttons.
ON: Daylight saving time is activated.
OFF: Daylight saving time is deactivated.
The factory default setting is ON.
After the configuration, press the SETUP button while hold- ing down the SHIFT button. The configuration will be updat- ed when closing SETUP MENU.
Notes:
•The start/end date are configurable through WJ- SX150A Administrator Console. (Refer to p. 87.)
•When ON is selected for D. S. T., ∗ is added beside the
time display. Example: ∗10: 55 AM
■SEQUENCE SETUP
| 300 SEQUENCE |
|
| 1 of 4 | |||
|
| TOUR NO.= 1 |
|
|
|
| |
| STEP LCN | PRE DWELL | STEP LCN | PRE DWELL | |||
| 1 | 1 | 2S | 9 | 9 | 2S | |
| 2 | 2 | 2S | 10 | 10 | 2S | |
| 3 | 3 | 2S | 11 | 11 | 2S | |
| 4 | 4 | 2S | 12 | 12 | 2S | |
| 5 | 5 | 2S | 13 | 13 | 2S | |
| 6 | 6 | 2S | 14 | 14 | 2S | |
| 7 | 7 | 2S | 15 | 15 | 2S | |
| 8 | 8 | 2S | 16 | 16 | 2S | |
| LCN:LOGICAL CAMERA NUMBER |
|
| ||||
|
|
|
|
|
| ||
|
|
|
|
|
| ||
| 300 SEQUENCE |
|
| 2 of 4 | |||
|
| TOUR NO.= 1 |
|
|
|
| |
| STEP LCN | PRE DWELL | STEP LCN | PRE DWELL | |||
| 17 |
|
| 25 |
|
|
|
| 18 |
|
| 26 |
|
|
|
| 19 |
|
| 27 |
|
|
|
| 20 |
|
| 28 |
|
|
|
| 21 |
|
| 29 |
|
|
|
| 22 |
|
| 30 |
|
|
|
| 23 |
|
| 31 |
|
|
|
| 24 |
|
| 32 |
|
|
|
| LCN:LOGICAL CAMERA NUMBER |
|
|
| |||
|
|
|
|
|
| ||
|
|
|
|
|
| ||
| 300 SEQUENCE |
|
| 3 of 4 | |||
|
| TOUR NO.= 1 |
|
|
|
| |
| STEP LCN | PRE DWELL | STEP LCN | PRE DWELL | |||
| 33 |
|
| 41 |
|
|
|
| 34 |
|
| 42 |
|
|
|
| 35 |
|
| 43 |
|
|
|
| 36 |
|
| 44 |
|
|
|
| 37 |
|
| 45 |
|
|
|
| 38 |
|
| 46 |
|
|
|
| 39 |
|
| 47 |
|
|
|
| 40 |
|
| 48 |
|
|
|
| LCN:LOGICAL CAMERA NUMBER |
|
|
| |||
|
|
|
|
|
| ||
|
|
|
|
|
| ||
| 300 SEQUENCE |
|
| 4 of 4 | |||
| TOUR NO = 1 |
|
|
|
| ||
| STEP LCN | PRE DWELL | STEP LCN | PRE DWELL | |||
| 49 |
|
| 57 |
|
|
|
| 50 |
|
| 58 |
|
|
|
| 51 |
|
| 59 |
|
|
|
| 52 |
|
| 60 |
|
|
|
| 53 |
|
| 61 |
|
|
|
| 54 |
|
| 62 |
|
|
|
| 55 |
|
| 63 |
|
|
|
| 56 |
|
| 64 |
|
|
|
LCN:LOGICAL CAMERA NUMBER
●How to Display
To display this menu on the monitor, move the cursor to 300 SEQUENCE in SETUP MENU by moving the joystick to ▼ or
▲.
Then, press the CAM (SET) button. The submenu appears on the monitor.
66
