SECTION 4. PROGRAMMING THE MACHINE
4. Edit the number ; use | ← |
| and | → |
| ||
to move the cursor, and |
|
|
|
|
|
|
|
use |
| Clear |
| to | |||
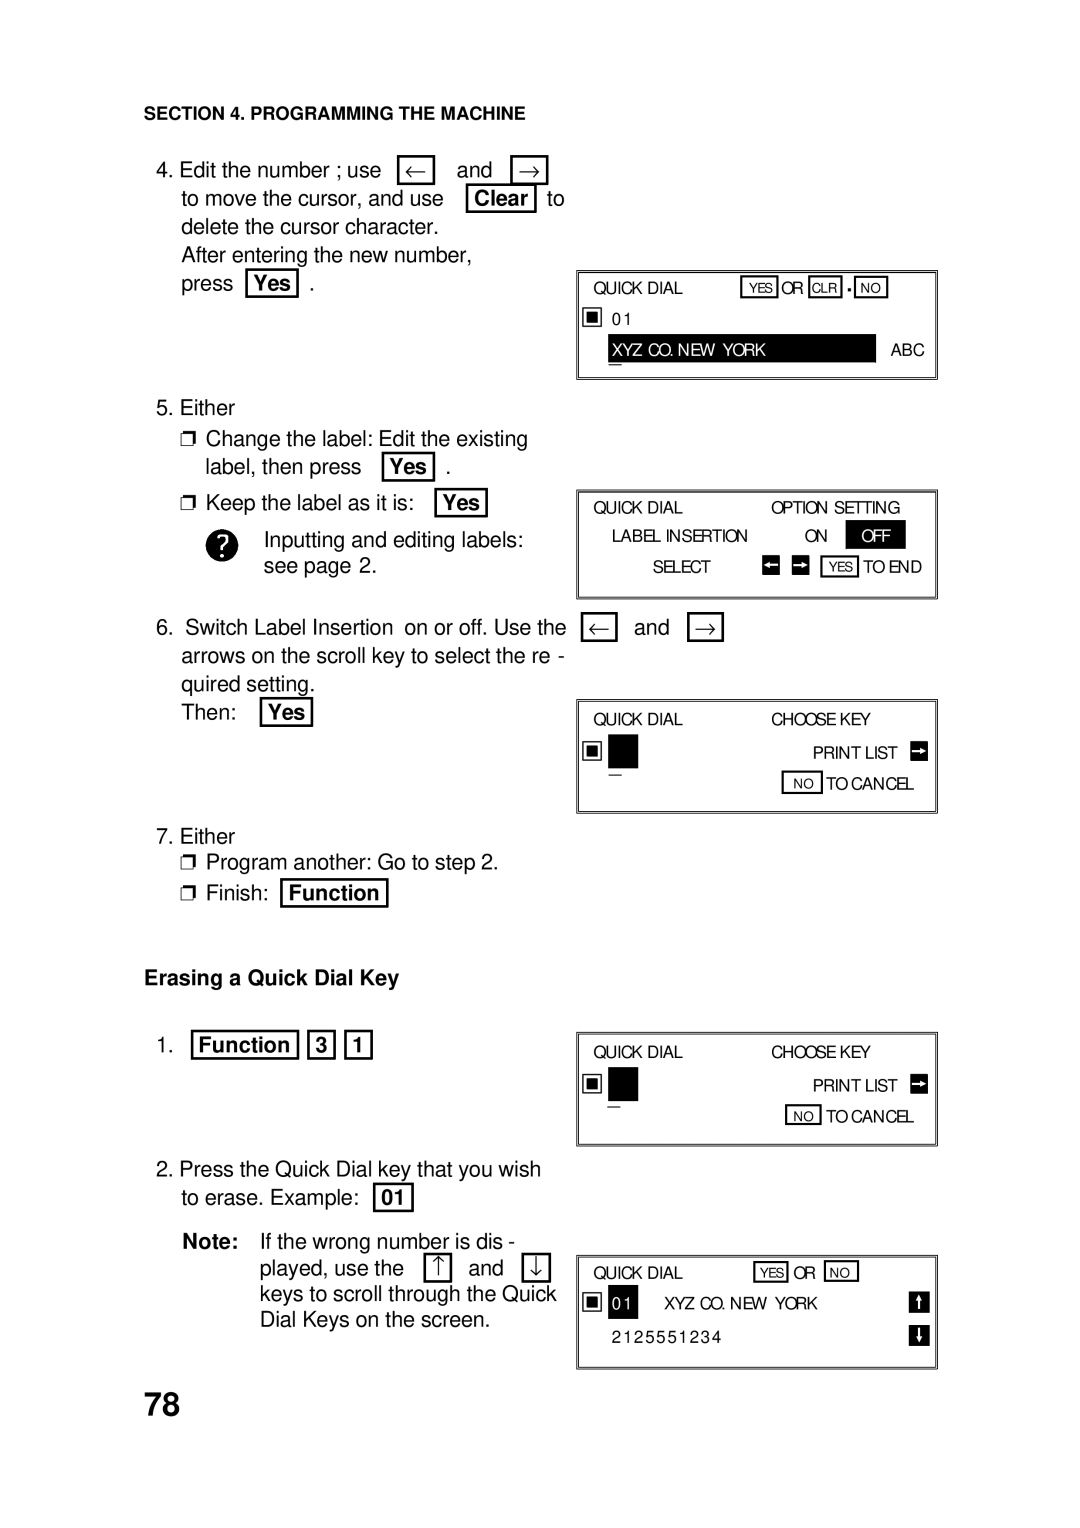
delete the cursor character. After entering the new number, press Yes .
|
|
|
|
|
|
| ||
QUICK DIAL | YES | OR | CLR | . | NO |
| ||
01 |
|
|
|
|
|
|
| |
|
|
|
|
|
|
|
|
|
| XYZ CO. NEW YORK |
| ABC | |||||
| _ |
|
|
|
|
|
|
|
|
|
|
|
|
|
|
|
|
5.Either
❐ Change the label: Edit the existing
label, then press Yes .
❐Keep the label as it is: Yes
Inputting and editing labels: see page 2.
QUICK DIAL LABEL INSERTION
SELECT
OPTION SETTING
ON OFF
YES TO END
6.Switch Label Insertion on or off. Use the arrows on the scroll key to select the re - quired setting.
Then: Yes
7.Either
❐Program another: Go to step 2.
❐Finish: Function
Erasing a Quick Dial Key
←and →
QUICK DIAL | CHOOSE KEY | ||||||
| _ |
|
| PRINT LIST |
|
| |
|
|
|
| ||||
|
|
|
| TO CANCEL | |||
|
|
|
| NO | |||
|
|
|
|
|
|
|
|
1.Function ![]()
![]() 3
3 ![]()
![]() 1
1
2.Press the Quick Dial key that you wish to erase. Example: 01
QUICK DIAL | CHOOSE KEY | ||||||
|
|
|
| PRINT LIST |
|
| |
| _ |
|
|
|
| ||
|
|
|
| ||||
|
|
|
| TO CANCEL | |||
|
|
|
|
| |||
|
|
|
| NO | |||
|
|
|
|
|
|
|
|
Note: If the wrong number is dis | - |
played, use the − and | ↓ |
keys to scroll through the Quick Dial Keys on the screen.
QUICK DIAL | YES | OR |
01 XYZ CO. NEW YORK
2125551234
NO
78