SECTION 4. PROGRAMMING THE MACHINE
1-12. CSI
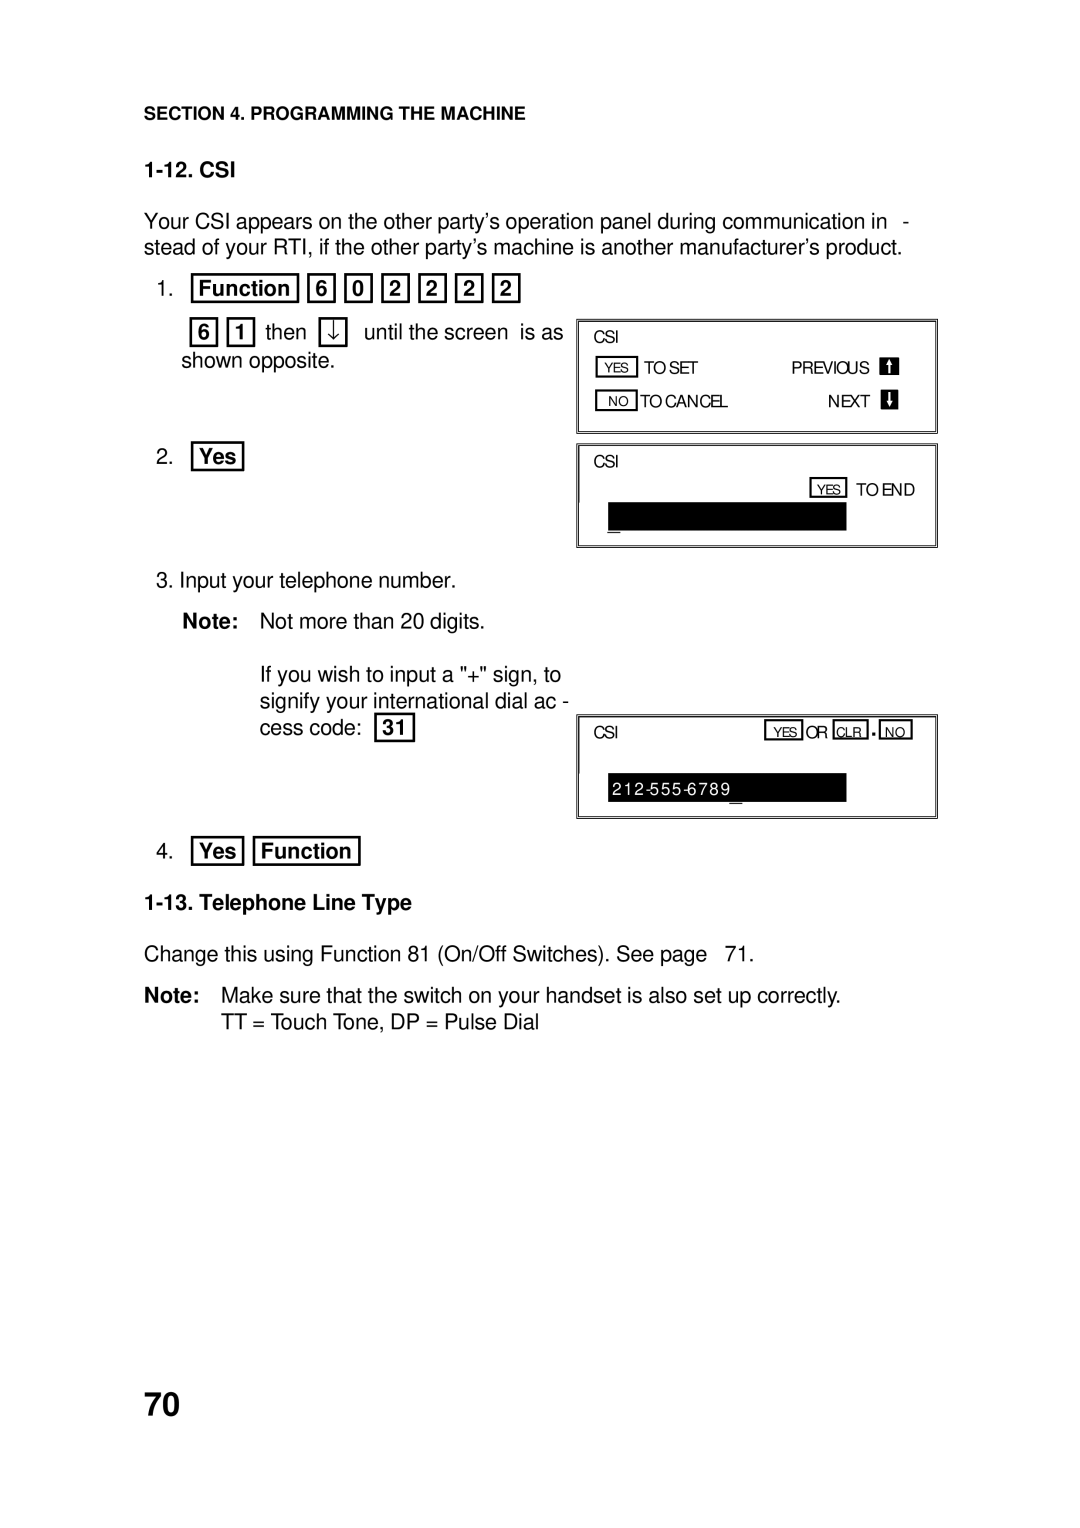
Your CSI appears on the other party’s operation panel during communication in - stead of your RTI, if the other party’s machine is another manufacturer’s product.
1.Function 
 6
6 

6 1 then ↓ shown opposite.
2.Yes
0 ![]()
![]() 2
2 ![]()
![]() 2
2 ![]()
![]() 2
2 ![]()
![]() 2
2
until the screen is as
| CSI |
|
|
|
|
|
|
|
| |
|
|
| TO SET | PREVIOUS |
|
|
|
| ||
|
| YES |
|
|
| |||||
|
|
| TO CANCEL |
| NEXT |
|
| |||
|
| NO |
|
| ||||||
|
|
|
|
|
|
|
|
|
|
|
|
|
|
|
|
|
|
|
|
| |
| CSI |
|
|
|
|
|
|
|
| |
|
|
|
|
|
| TO END | ||||
|
|
|
|
| YES | |||||
|
|
|
|
|
|
|
|
|
|
|
_
3. Input your telephone number.
Note: Not more than 20 digits.
If you wish to input a "+" sign, to signify your international dial ac - cess code: 31
CSI
YES
OR
CLR
.
NO
4.
Yes 
 Function
1-13. Telephone Line Type
Change this using Function 81 (On/Off Switches). See page 71.
Note: Make sure that the switch on your handset is also set up correctly. TT = Touch Tone, DP = Pulse Dial
70