AD68-01227H
VP-D371i/D371Wi D372WHi/D374 D375Wi/D376/D975Wi
Índice Inhalt
Índice
Transferencia de datos Ieee
Resolución de problemas
PictBridgeTM sólo VP-D375Wi/D975Wi
PictBridgeTM nur VP-D375Wi/D975Wi
Hinweise zur Reinigung der Videoköpfe
Notas referentes al giro de la pantalla LCD
Hinweise zum Drehen des Displays
Hinweise zu Display, Sucher und Objektiv
Wartung und Ersatzteile
Notas referentes a la videocámara
Hinweise zum Urheberrecht
Servicio y piezas de repuesto
Leistungsmerkmale
Introducción a la videocámara Überblick über den Camcorder
Características
Hinweise
Accesorios básicos
Standardzubehör
Notas
Pantalla LCD TFT Micrófono incorporado Precaución
VP-D375Wi/D975Wi only
Botón EASY.Q pág Botón de funciones
Taste Player Camera Cam
Vista lateral izquierda Ansicht Linke Seite
Anschlüsse
Ansicht Rechte Seite und Oberseite
Terminales
Sólo VP-D375Wi/D975Wi
Tarjeta de memoria utilizable
Verwendbare Speicherkarten
# VP-D375Wi/D975Wi only
Botón œ / √ Dirección
Control remoto sólo VP-D375Wi/D975Wi
Fernbedienung nur VP-D375Wi/D975Wi
PreparaciónVorbereitung
Lithiumbatterie einsetzen
Instalación de la pila de litio
Iones de litio
Utilización de la batería de iones de litio
Lithium-Ionen-Akku verwenden
Carga de la batería de
Handhabung des Akkus
Indicador de carga de la batería
Akkuladestandanzeige
Gestión de la batería
Hinweise zum Akku
Notas referentes a la batería
Über die Betriebsmodi
Conexión a una fuente de alimentación
Stromversorgung herstellen
Información sobre los modos de funcionamiento
Uso de Quick Menu Quick-Menü verwenden Quick Menu
Bildschirmanzeigen in den Modi Camera Cam und Player
OSD in Camera Mode
OSD in Player Mode
Encendido / apagado de OSD presentación en pantalla
OSD in M.Cam Mode
Bildschirmanzeigen ein-/ausschalten
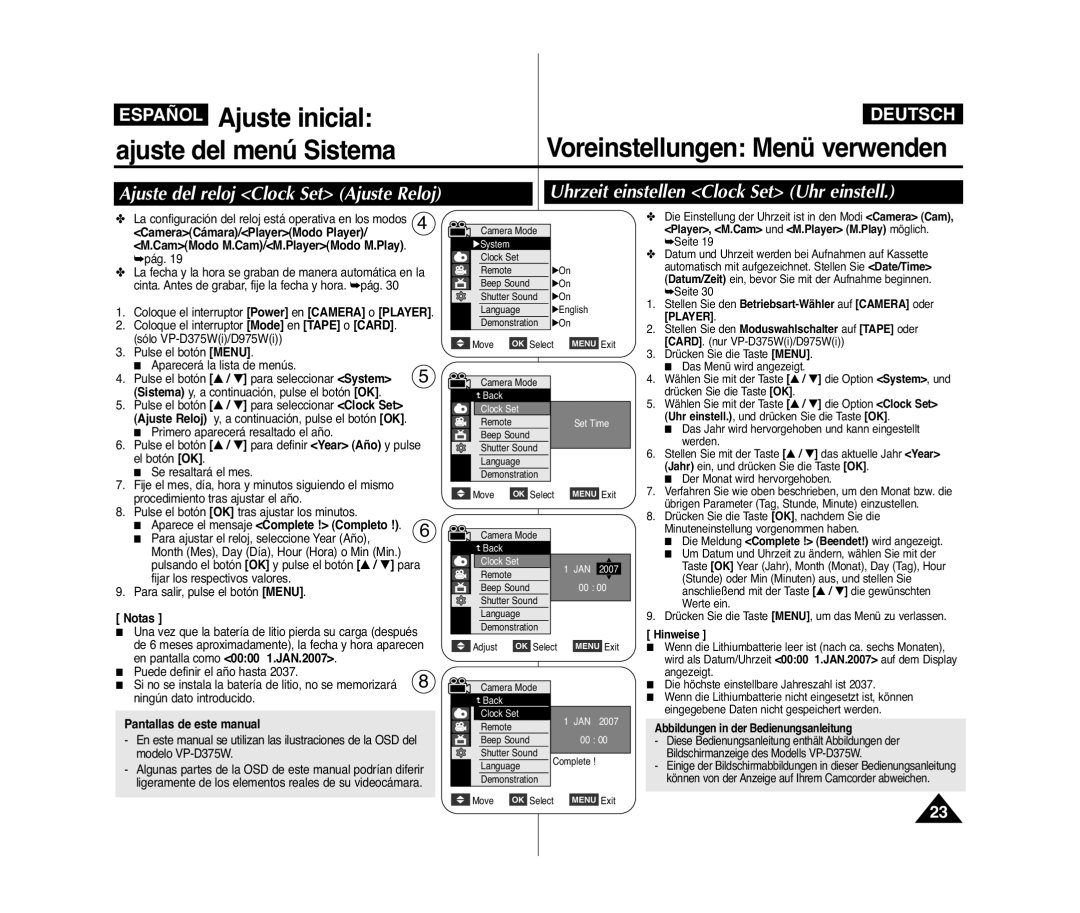
Pantallas de este manual
CameraCámara/PlayerModo Player
CamModo M.Cam/M.PlayerModo M.Play
Aparece el mensaje Complete ! Completo
Remote Fernbedienung, und drücken Sie die
Stellen Sie den Betriebsart-Wähler auf Camera
Oder Player
Stellen Sie den Moduswahlschalter auf Tape
Stellen Sie den Moduswahlschalter auf Tape oder
Signalton einstellen Beep Sound Signalton
Ajuste del Beep Sound Sonido Beep
Sólo VP-D375Wi/D975Wi Foto-Klickton nur VP-D375Wi/D975Wi
Español Ajuste inicial
Ajuste del menú Sistema
Foto-Klickton einstellen Shutter Sound
Sprache der Bildschirmanzeige festlegen Language
Selección del idioma de OSD Language
Demonstration Demostración y, a
Demo-Funktion verwenden Demonstration
Visualización de la demostración Demonstration Demostración
Demonstration Demo-Funktion , und drücken
LCD Colour Color LCD y. a continuación, pulse
LCD Bright LCD-Helligkeit
Option LCD Bright LCD-Helligkeit oder LCD
Que desee ajustar LCD Bright Brillo LCD o
Datum und Uhrzeit anzeigen Date/Time Datum/Zeit
Taste … / † On Ein oder Off Aus aus, und
Ajuste de TV Display Salida TV
TV-Anzeige einstellen TV Display TV-Anzeige
Inserción / expulsión de un casete
Grabación básica
Uso del Visor
Sucher verwenden
Aufnahmen mit Sucher
Normaler Aufnahmewinkel
Selbstaufnahme
Primera grabación Ihre erste Aufnahme
Botones no disponibles durante la operación
Aufnahmen im Easy.Q-Modus EASY.Q
Notas Während des Betriebs nicht verfügbare Tasten
Aufnahmesuchlauf REC Search
Aufnahmesuchlauf REC Search
Revisión y búsqueda de una grabación REC Search
Búsqueda de grabación REC Search
Stellen Sie den Betriebsart-Wähler auf Camera oder Player
PLAYER.1
Notas Hinweise
Timer
Button
Zoomfunktion verwenden
Acercamiento y alejamiento de las imágenes
Aufnahme beenden
Ein- und Ausblenden Fade
Utilización de aparición y desaparición gradual
Aufnahme starten
Funktion Colour Nite verwenden C.NITE
Utilización de Colour Nite
Peligro Vorsicht
Leuchte verwenden nur VP-D372WHi/D375Wi/D975Wi
Seite
Color N /13
Selección del modo de grabación y audio
Aufnahme- und Audiomodus wählen Rec Mode/ Audio Mode
Grabación avanzada
Auto
Camera Cámara y Player Modo Player Mezcla de audio
WindCut Plus Filtro viento y, a
Ein oder Auto Automatisch aus, und drücken
Real-Stereo-Ton auswählen Real Stereo Real-Stereo
Selección de la función Real Stereo
Ajuste de la exposición al grabar
Ajuste de la exposición y la velocidad del obturador
Velocidades del obturador recomendadas al grabar
Für Aufnahmen empfohlene Belichtungszeiten
Enfoque automático
Auto Focus Autofokus
Manual Focus Manueller Fokus
Camera Cámara y M.Cam Modo M.Cam
Modus Sports Sport
Modo Auto a
Se utiliza en condiciones normales
Modus Auto a
Pulse el botón … / † para seleccionar
Ajustes de EA de programa Belichtungsprogramm einstellen
Weißabgleich einstellen White Balance Weissabgleich
Ajuste del balance de blanco
Outdoor Aussenaufn. oder Custom WB
When the Outdoor option was selected
Que desee entre Auto, Indoor Interior
Outdoor Exterior o Custom WB Custom WB
Visuelle Effekte verwenden Visual Effect Vis. Effekt
Aplicación de Visual Effects Efectos visuales
Effect Efectos visuales y, a continuación
Selección de efectos visuales Visuellen Effekt auswählen
Modo Camera Cámara . pág
Grabación avanzada
Off Aus Macro en Off
CamModo M.Cam. pág
En Off
Digitale Bildstabilisierung einstellen DIS
Ajuste del Estabilizador digital de la imagen DIS
Fondo BLC Compensación contraluz
Gegenlichtausgleich verwenden BLC
Utilización del modo de compensación de la luz de
Desee Off, 100x, 200x, 400x o 1200x y, a
Digitalen Zoom verwenden Digital Zoom Digitaler Zoom
Selección del zoom digital
Digitalen Zoom aktivieren
Modo Player. pág
Grabación de imágenes fijas Fotos aufnehmen
Búsqueda de una imagen fija
Foto suchen
Stop
Ajuste del volumen
ReproducciónWiedergabe
Lautstärke einstellen
Búsqueda de imágenes adelante/atrás
Diferentes funciones en el modo Player
Funktionen im Wiedergabemodus Player-Modus
Pausa en la reproducción
Wiedergabe rückwärts nur VP-D375Wi/D975Wi
Reproducción X2 Adelante/Atrás sólo VP-D375Wi/ D975Wi
Reproducción hacia atrás sólo VP-D375Wi/D975Wi
X2-Wiedergabe vorwärts/rückwärts nur VP-D375Wi/D975Wi
Stellen Sie den Betriebsart-Wähler auf Player
El modo Player Modo Player. pág
Reproducción Wiedergabe
Anschluss an ein Fernsehgerät mit AV-Eingang
Reproducción de cintas en la pantalla de TV
Reproducción en un monitor de
Conexión a un TV que dispone de conectores de audio/video
Reproducción
D372WHi/D374/D376 VP-D375Wi/D975Wi
Función Voice + Funktion VOICE+ verwenden
Voice Sprache Hebt Stimmen im
Efectos de audio Klangeffekt verwenden
Modo Player. pág
Audio Effect Klangeffekt, und drücken Sie die
In/Out Ent/Sal AV y, a continuación, pulse el
Defina TV Display Pantalla TV en
Conexión Anschluss an andere Geräte
Una vez finalizada la copia
Wenn der Kopiervorgang abgeschlossen ist
Nur VP-D371i/D371Wi/D372WHi/D375Wi/D975Wi
Conexión
Nur VP-D375Wi/D975Wi
Digitalkamera-Modus
Bildformat
Ordner- und Dateistruktur auf der Speicherkarte
Formato de imágenes
Bildspeicherkapazität von Speicherkarten
Selección de la calidad de la foto
Bildqualität auswählen Photo Quality Fotoqualität
Selección de la calidad de imagen Bildqualität einstellen
Photo Size Fotoformat, und drücken Sie die
Fotoformat für die Aufnahme wählen nur VP-D975Wi
Modo M.Cam Modo M.Cam. Pág
Stellen Sie den Moduswahlschalter auf Card
Dateinummerierung festlegen File No. Datei-Nr
Ajuste de File Number Número de archivao
Captura de imagen fotográfica Jpeg en la tarjeta de memoria
Fotos Jpeg auf der Speicherkarte aufnehmen Photo
Visionado de imágenes fotográficas Jpeg
Fotos Jpeg ansehen
Imagen
Protección contra borrado accidental
Sind, wird No image! Kein Bild! angezeigt
Memoria, aparece No image! ¡ No hay
Do you want to delete?
Delete? ¿Quiere borrar?
Die Meldung Do you want to delete all?
Die Meldung Memory Card Error ! Speicherkartenfehler
Delete All Alle löschen , und drücken Sie die
Aparece el mensaje Do you want to delete all?
Achtung
Formateo de la tarjeta de memoria
Speicherkarte formatieren Format Formatieren
Atención
Mit der Speicherkarte verfügbare Aufnahmezeit
Videoclips Mpeg auf der Speicherkarte aufzeichnen
Tiempo de grabación disponible en la tarjeta de memoria
Videoclips auf der Speicherkarte speichern
Digitalkamera-Modus
Während der Aufnahme von Videoclips sind die Tasten
Botones œœ/√√ REV/FWD
STILL, œœ/√√ REV/FWD und Stop steuern
Hinweise Notas
Grabación de imágenes fijas desde una cinta
Disponible en modo Player Modo Player
Eliminación de la marca de impresión Druckmarke entfernen
Bilder für den Druck markieren Print Mark Druckmarke
Conexión a una impresora
An einen Drucker anschließen
Bilder auswählen
Cancelación de la impresión
Selección de imágenes
Ajuste del número de copias
Transferencia de datos Ieee
Datenübertragung über
PC no está disponible en el modo M.Player Modo M.Play
Aparece Pause Pausa
Pulse el botón Iniciar/Detener para comenzar la grabación
Drücken Sie die Taste STOP, um die Aufnahme zu beenden
Requisitos del sistema
Utilización de la interfaz USB
USB-Schnittstelle verwenden
Velocidad de la conexión USB según el sistema
Computer Ordenador u Printer
USB-Gerät auswählen USB Connect USB-Verbind
Selección del dispositivo USB USB Connect Conexión USB
USB Connect Conexión USB y, a
Instalación del programa
DV Media Pro Software installieren
Programminstallation
Instalación del programa DV Media PRO
USB-Kabel entfernen
Conexión a un PC
Anschluss an einen PC
Desconexión del cable USB
PC-Kamerafunktion verwenden
Interruptores Power, Mode y Zoom
Utilización de la función PC Camera
USB-Streaming-Funktion verwenden
Utilización de la función USB Streaming
Utilización de la función de disco extraíble
Als Wechseldatenträger verwenden
Cintas de casete utilizables
Mantenimiento Wartung und Pflege
Tras finalizar una grabación
Nach Beenden einer Aufzeichnung
Videoköpfe reinigen
Limpieza y mantenimiento de la videocámara
Camcorder reinigen und warten
Limpieza de los cabezales de video
Camcorder im Ausland verwenden
Utilización de la videocámara en el extranjero
Condensación de humedad
Resolución de problemas Fehlerbehebung
Pantalla de autodiagnósticos
Fehleranzeigen
Anzeige Blinkt Erklärung Maßnahme
Síntoma Explicación/Solución
Symptom Erklärung/Abhilfe
Untermenü Funktionen
Ajustes del menú
Menüoptionen einstellen
Betriebsmodus Submenú Funciones
Haupt Betriebsmodus Menü Untermenü Funktionen
Resolución de problemas
Submenú Funciones
Display
System
Especificaciones Technische Daten
Sistema
Modelle VP-D371i/D371Wi/D372WHi/D374/D375Wi/D376/D975Wi
Índice alfabético Index
España Spain
Nota Informativa
Deutschland
Schweiz
Österreich
Kontakt zu Samsung
Region Country Customer Care Centre Web Site
Contacte con Samsung World Wide
RoHS-konform
Compatibilidad RoHS