Managing Bookmarks![]()
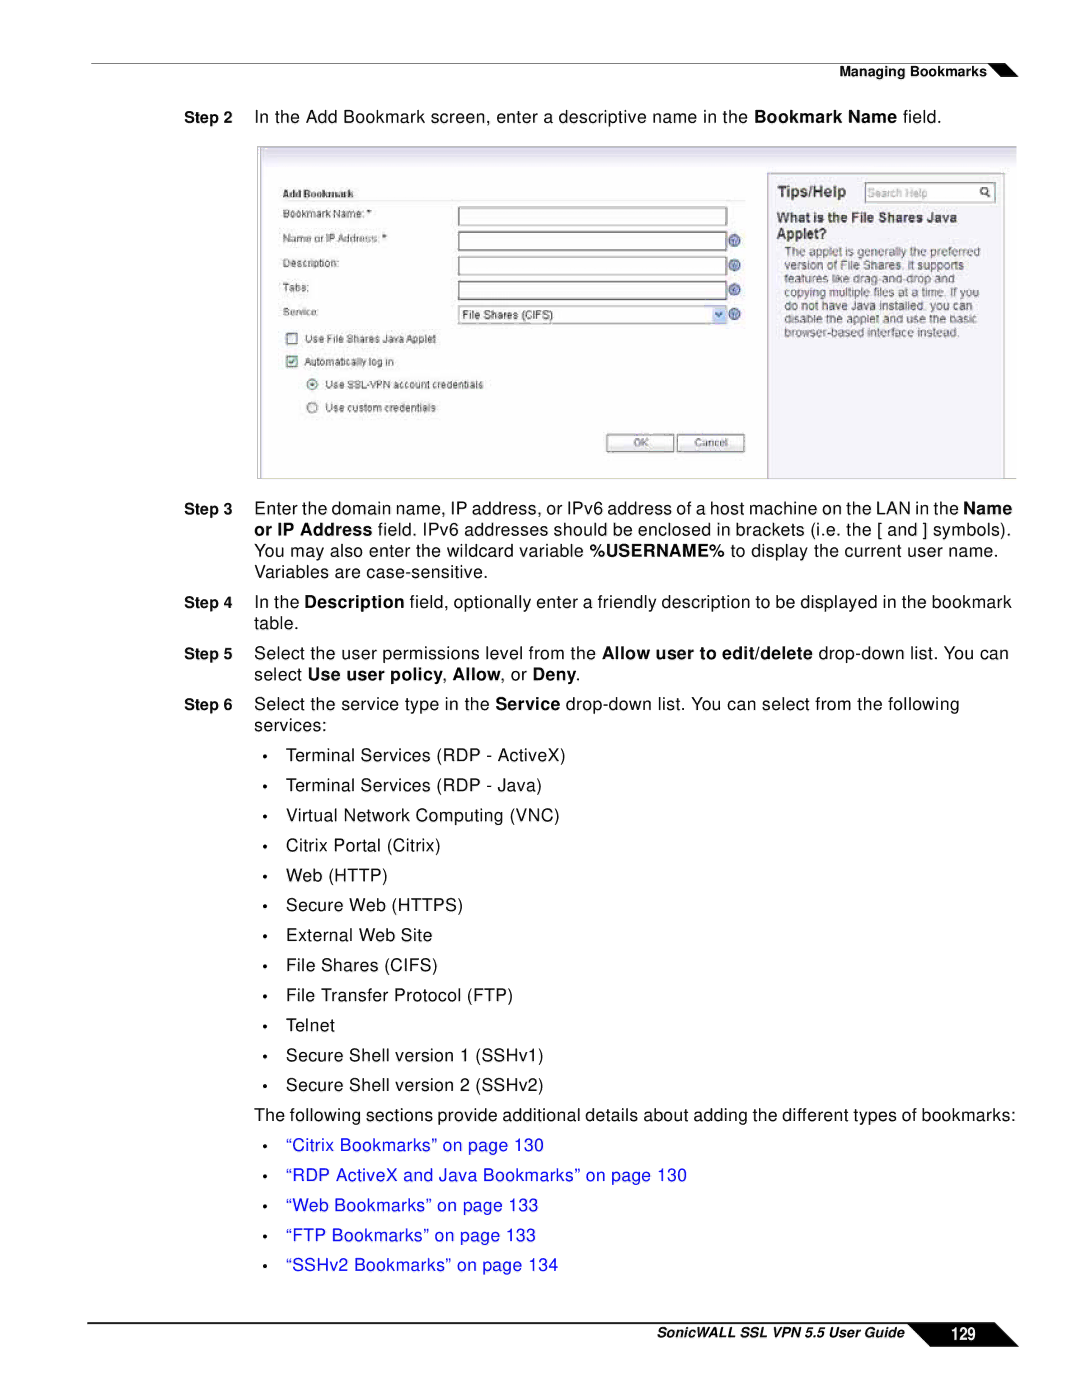
Step 2 In the Add Bookmark screen, enter a descriptive name in the Bookmark Name field.
Step 3 Enter the domain name, IP address, or IPv6 address of a host machine on the LAN in the Name or IP Address field. IPv6 addresses should be enclosed in brackets (i.e. the [ and ] symbols). You may also enter the wildcard variable %USERNAME% to display the current user name.
Variables are
Step 4 In the Description field, optionally enter a friendly description to be displayed in the bookmark table.
Step 5 Select the user permissions level from the Allow user to edit/delete
Step 6 Select the service type in the Service
•Terminal Services (RDP - ActiveX)
•Terminal Services (RDP - Java)
•Virtual Network Computing (VNC)
•Citrix Portal (Citrix)
•Web (HTTP)
•Secure Web (HTTPS)
•External Web Site
•File Shares (CIFS)
•File Transfer Protocol (FTP)
•Telnet
•Secure Shell version 1 (SSHv1)
•Secure Shell version 2 (SSHv2)
The following sections provide additional details about adding the different types of bookmarks:
•“Citrix Bookmarks” on page 130
•“RDP ActiveX and Java Bookmarks” on page 130
•“Web Bookmarks” on page 133
•“FTP Bookmarks” on page 133
•“SSHv2 Bookmarks” on page 134
SonicWALL SSL VPN 5.5 User Guide | 129 |