12. INITIAL SETTINGS
Be sure to perform the following settings before using the Digital Video Recorder. Failure to do so may lead to incorrect operation of each function.
•
Note: When
•Clock settings
•Hard disk initialization
•
12.1. Setting the DVR-ID
When
(Refer to p. 21; Digital Video Recorder's Expansion system.)
1.Press the Digital Video Recorder’s Power key while holding down the Sequence key in standby mode. Camera Selection keys 1 – 8 flashes for about 1minute.
2.Press the desired
The selected number flashes three times, then the number is programmed as
Note: It is impossible to operate the Digital Video Recorder when the main power is set to OFF. Operate the Digital Video Recorder after placing it in standby mode.
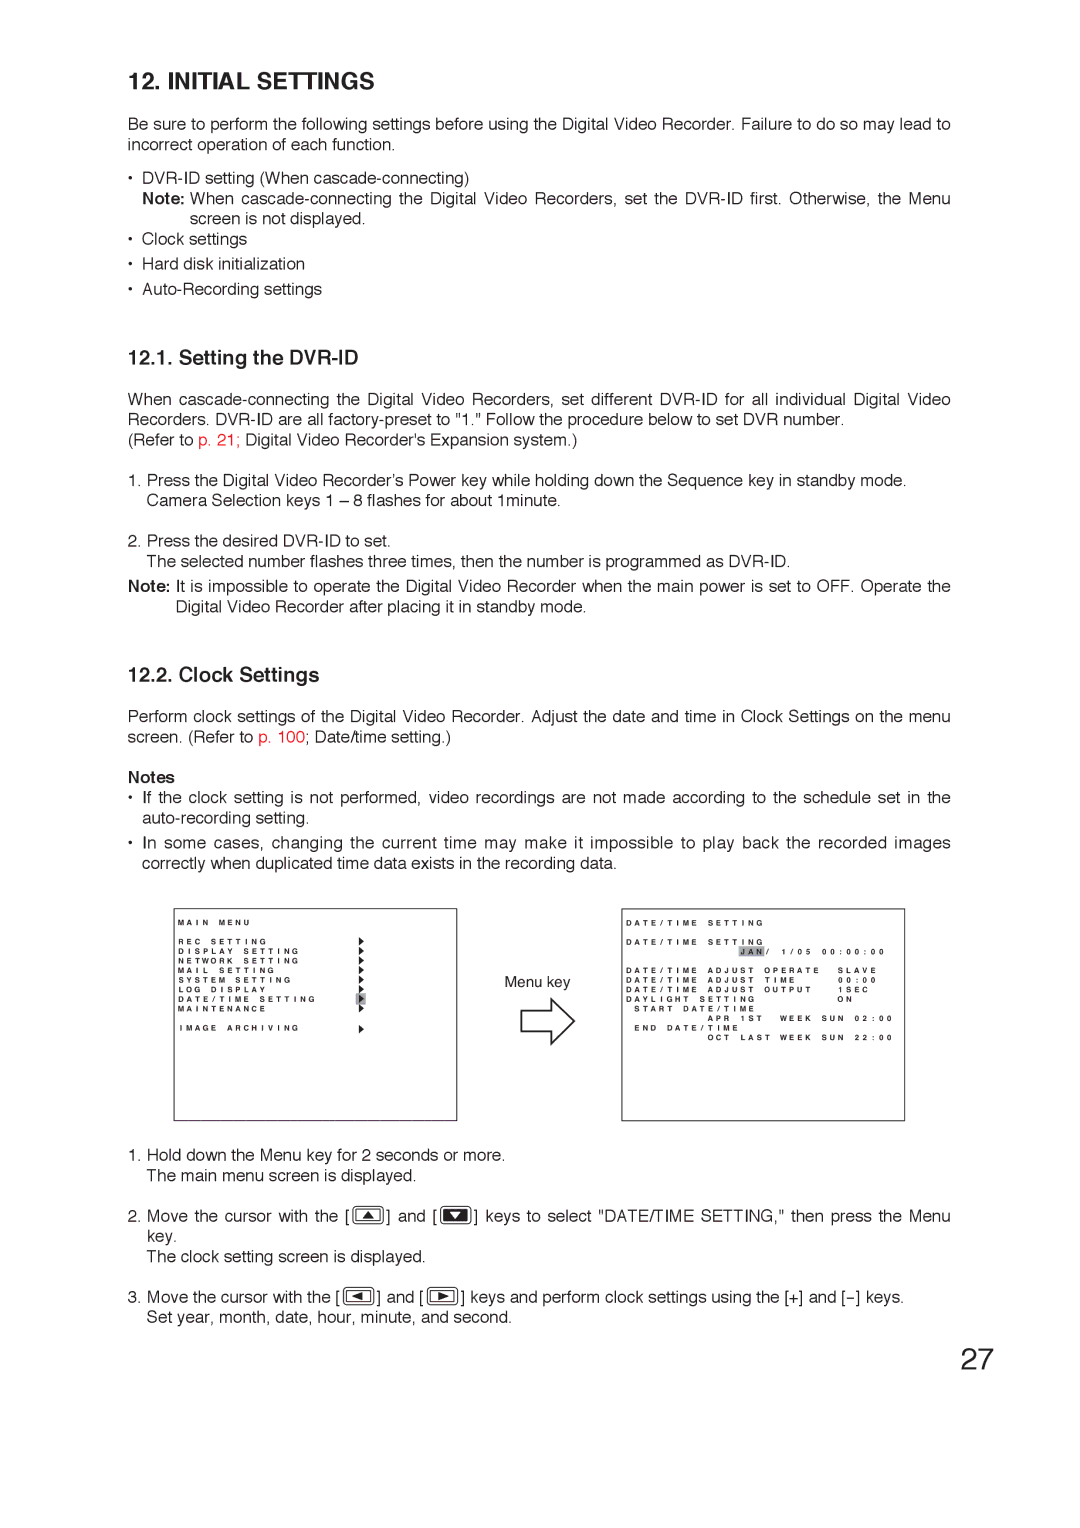
12.2. Clock Settings
Perform clock settings of the Digital Video Recorder. Adjust the date and time in Clock Settings on the menu screen. (Refer to p. 100; Date/time setting.)
Notes
•If the clock setting is not performed, video recordings are not made according to the schedule set in the
•In some cases, changing the current time may make it impossible to play back the recorded images correctly when duplicated time data exists in the recording data.
M A I N M E N U
R E C S E T T I N G
D I S P L A Y S E T T I N G N E T W O R K S E T T I N G M A I L S E T T I N G
S Y S T E M S E T T I N G L O G D I S P L A Y
D A T E / T I M E S E T T I N G M A I N T E N A N C E
I M A G E A R C H I V I N G
Menu key
D A T E / T I M E S E T T I N G |
|
| |
D A T E / T I M E S E T T I N G |
|
| |
J A N / | 1 / 0 5 | 0 0 : 0 0 : 0 0 | |
D A T E / T I M E A D J U S T | O P E R A T E | S L A V E | |
D A T E / T I M E A D J U S T T I M E | 0 0 : 0 0 | ||
D A T E / T I M E A D J U S T O U T P U T | 1 S E C | ||
D A Y L I G H T S E T T I N G |
|
| O N |
S T A R T D A T E / T I M E |
|
|
|
A P R 1 S T | W E E K S U N 0 2 : 0 0 | ||
E N D D A T E / T I M E
O C T L A S T W E E K S U N 2 2 : 0 0
1.Hold down the Menu key for 2 seconds or more. The main menu screen is displayed.
2.Move the cursor with the [ ![]() ] and [
] and [ ![]() ] keys to select "DATE/TIME SETTING," then press the Menu key.
] keys to select "DATE/TIME SETTING," then press the Menu key.
The clock setting screen is displayed.
3.Move the cursor with the [ ![]() ] and [
] and [ ![]() ] keys and perform clock settings using the [+] and
] keys and perform clock settings using the [+] and
27