12.4. Auto-Recording Settings
Recordings are normally performed according to the preprogrammed schedule. Therefore, perform schedule or group settings when making
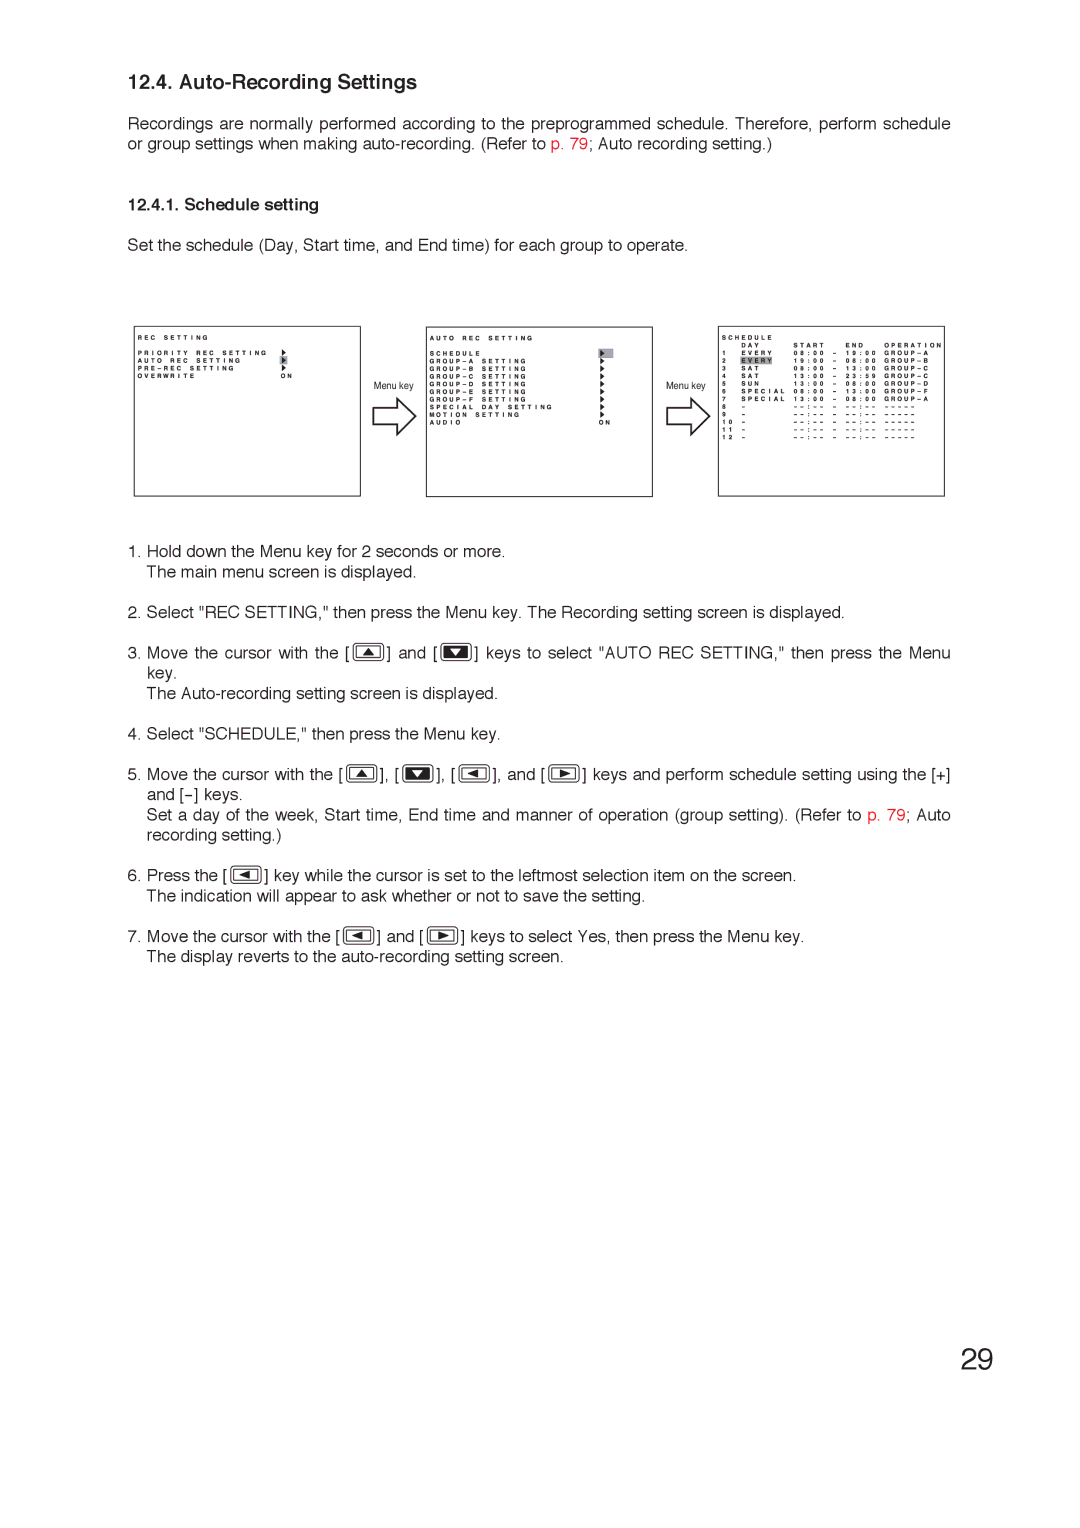
12.4.1. Schedule setting
Set the schedule (Day, Start time, and End time) for each group to operate.
Menu key | Menu key |
1.Hold down the Menu key for 2 seconds or more. The main menu screen is displayed.
2.Select "REC SETTING," then press the Menu key. The Recording setting screen is displayed.
3.Move the cursor with the [ ![]() ] and [
] and [ ![]() ] keys to select "AUTO REC SETTING," then press the Menu key.
] keys to select "AUTO REC SETTING," then press the Menu key.
The
4.Select "SCHEDULE," then press the Menu key.
5.Move the cursor with the [ ![]() ], [
], [ ![]() ], [
], [ ![]() ], and [
], and [ ![]() ] keys and perform schedule setting using the [+] and
] keys and perform schedule setting using the [+] and
Set a day of the week, Start time, End time and manner of operation (group setting). (Refer to p. 79; Auto recording setting.)
6.Press the [ ![]() ] key while the cursor is set to the leftmost selection item on the screen. The indication will appear to ask whether or not to save the setting.
] key while the cursor is set to the leftmost selection item on the screen. The indication will appear to ask whether or not to save the setting.
7.Move the cursor with the [ ![]() ] and [
] and [ ![]() ] keys to select Yes, then press the Menu key. The display reverts to the
] keys to select Yes, then press the Menu key. The display reverts to the
29