Setting System Options | User Guide |
|
|
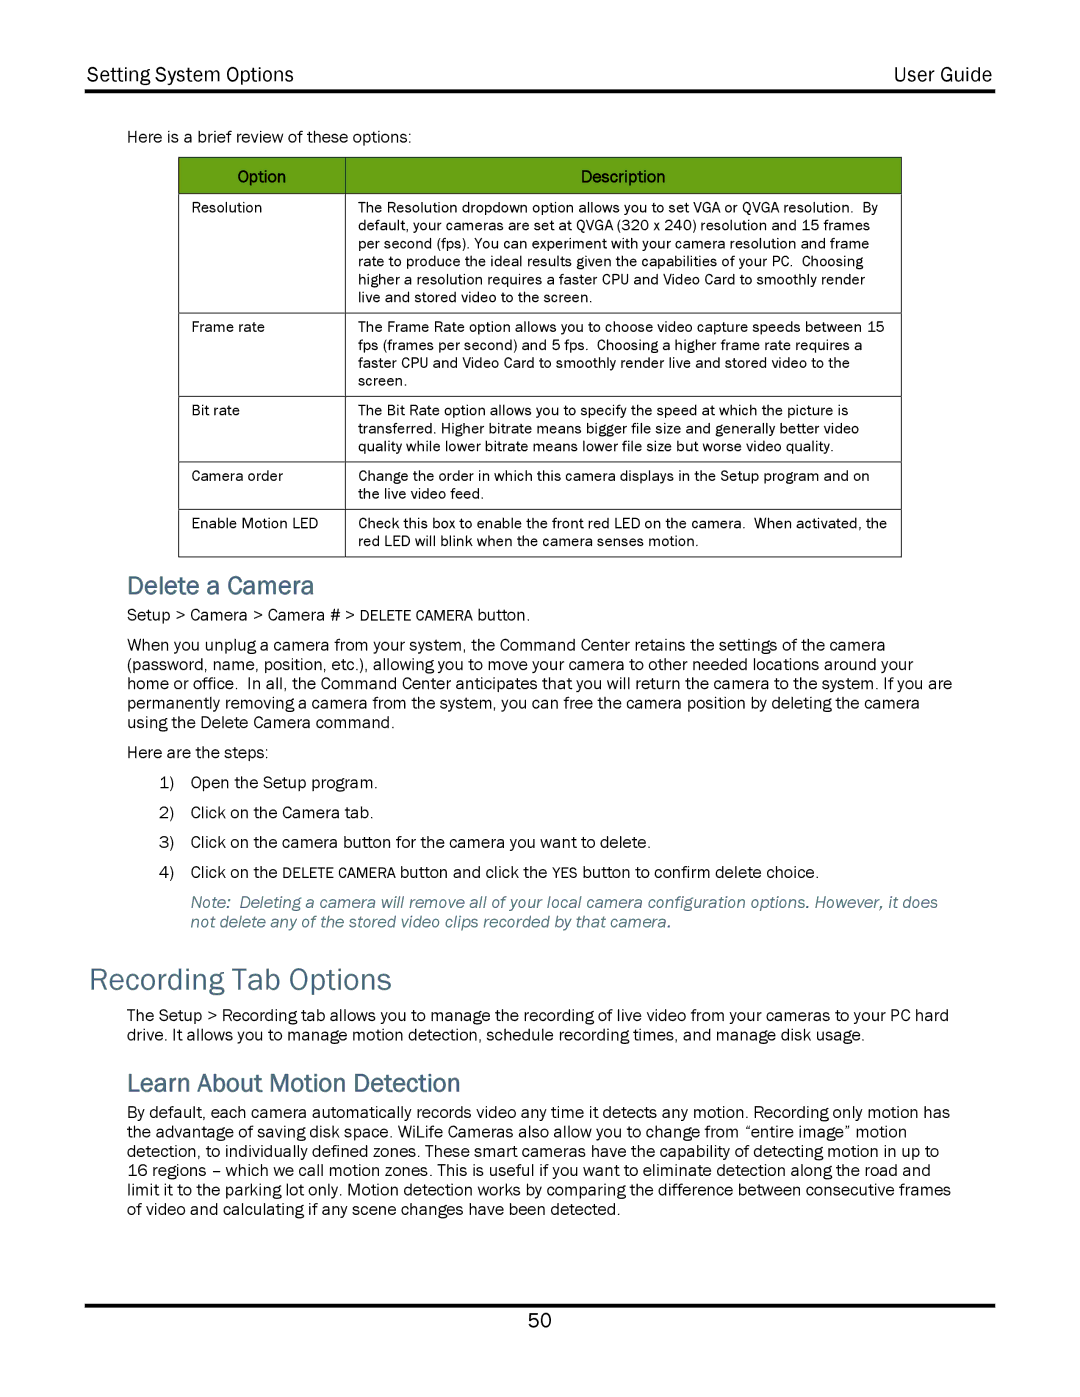
Here is a brief review of these options:
Option | Description |
|
|
Resolution | The Resolution dropdown option allows you to set VGA or QVGA resolution. By |
| default, your cameras are set at QVGA (320 x 240) resolution and 15 frames |
| per second (fps). You can experiment with your camera resolution and frame |
| rate to produce the ideal results given the capabilities of your PC. Choosing |
| higher a resolution requires a faster CPU and Video Card to smoothly render |
| live and stored video to the screen. |
|
|
Frame rate | The Frame Rate option allows you to choose video capture speeds between 15 |
| fps (frames per second) and 5 fps. Choosing a higher frame rate requires a |
| faster CPU and Video Card to smoothly render live and stored video to the |
| screen. |
|
|
Bit rate | The Bit Rate option allows you to specify the speed at which the picture is |
| transferred. Higher bitrate means bigger file size and generally better video |
| quality while lower bitrate means lower file size but worse video quality. |
|
|
Camera order | Change the order in which this camera displays in the Setup program and on |
| the live video feed. |
|
|
Enable Motion LED | Check this box to enable the front red LED on the camera. When activated, the |
| red LED will blink when the camera senses motion. |
|
|
Delete a Camera
Setup > Camera > Camera # > DELETE CAMERA button.
When you unplug a camera from your system, the Command Center retains the settings of the camera (password, name, position, etc.), allowing you to move your camera to other needed locations around your home or office. In all, the Command Center anticipates that you will return the camera to the system. If you are permanently removing a camera from the system, you can free the camera position by deleting the camera using the Delete Camera command.
Here are the steps:
1)Open the Setup program.
2)Click on the Camera tab.
3)Click on the camera button for the camera you want to delete.
4)Click on the DELETE CAMERA button and click the YES button to confirm delete choice.
Note: Deleting a camera will remove all of your local camera configuration options. However, it does not delete any of the stored video clips recorded by that camera.
Recording Tab Options
The Setup > Recording tab allows you to manage the recording of live video from your cameras to your PC hard drive. It allows you to manage motion detection, schedule recording times, and manage disk usage.
Learn About Motion Detection
By default, each camera automatically records video any time it detects any motion. Recording only motion has the advantage of saving disk space. WiLife Cameras also allow you to change from “entire image” motion detection, to individually defined zones. These smart cameras have the capability of detecting motion in up to 16 regions – which we call motion zones. This is useful if you want to eliminate detection along the road and limit it to the parking lot only. Motion detection works by comparing the difference between consecutive frames of video and calculating if any scene changes have been detected.
50