User Guide
5)Specify the camera(s) you want involved with this event and set camera alert properties for each participating camera by
6)Click OK to save your new "No Motion" alert event. The Recording and Alerts Schedule Screen will display the new event. Its color is gray.
Set Manual Alert Properties
Setup > Alerts > Set Manual Alert Properties
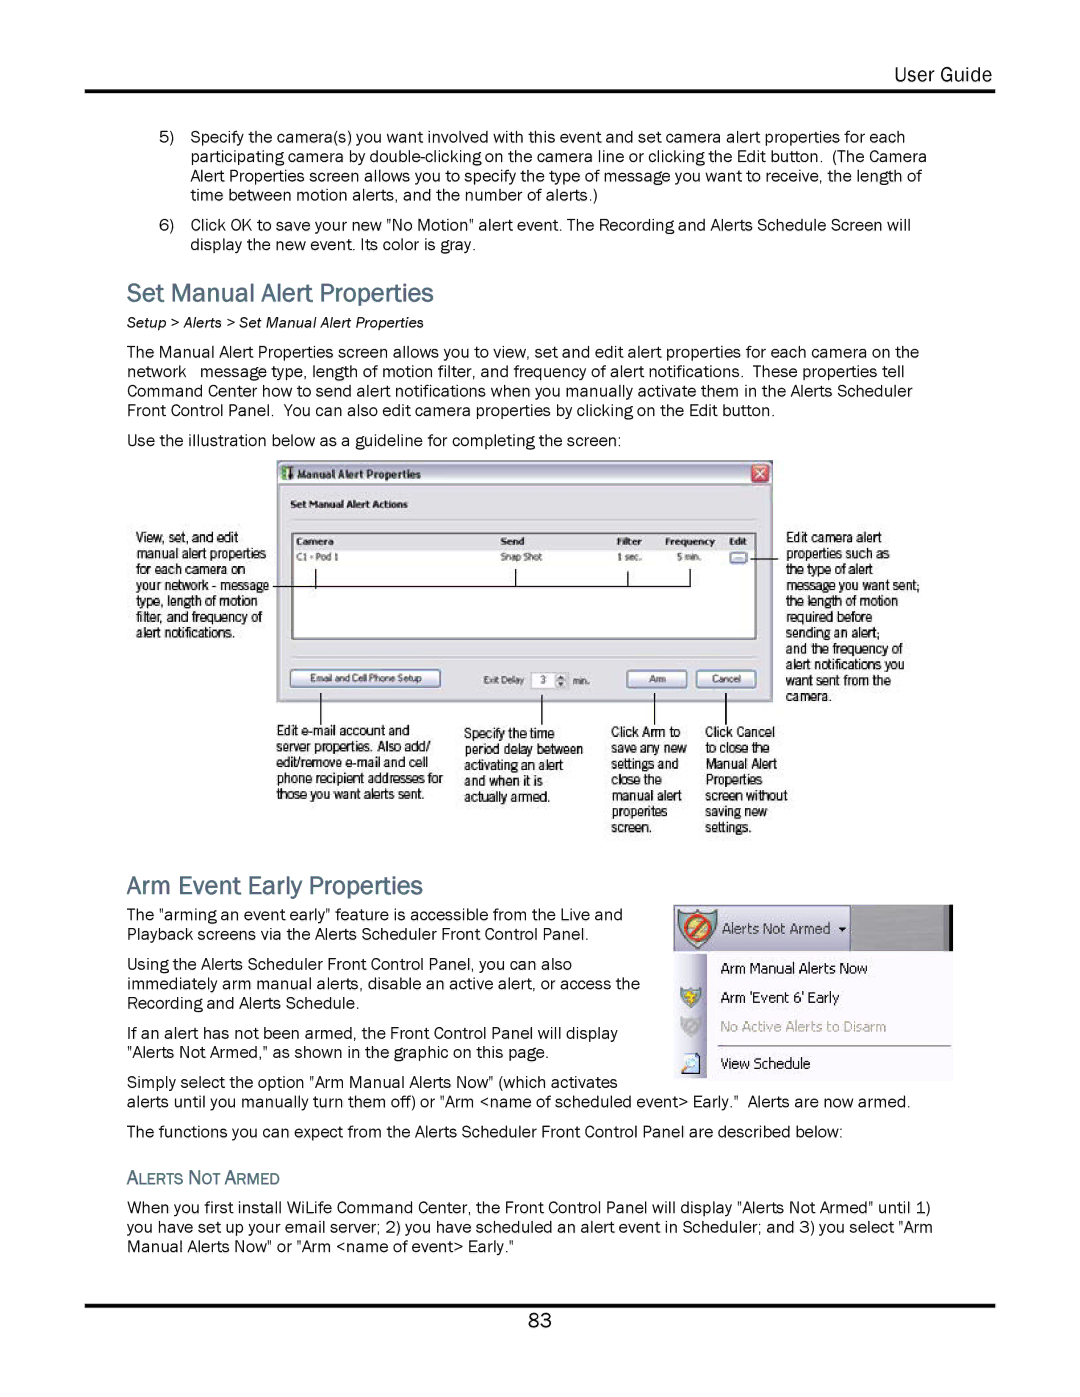
The Manual Alert Properties screen allows you to view, set and edit alert properties for each camera on the network message type, length of motion filter, and frequency of alert notifications. These properties tell Command Center how to send alert notifications when you manually activate them in the Alerts Scheduler Front Control Panel. You can also edit camera properties by clicking on the Edit button.
Use the illustration below as a guideline for completing the screen:
Arm Event Early Properties
The "arming an event early" feature is accessible from the Live and Playback screens via the Alerts Scheduler Front Control Panel.
Using the Alerts Scheduler Front Control Panel, you can also immediately arm manual alerts, disable an active alert, or access the Recording and Alerts Schedule.
If an alert has not been armed, the Front Control Panel will display "Alerts Not Armed," as shown in the graphic on this page.
Simply select the option "Arm Manual Alerts Now" (which activates
alerts until you manually turn them off) or "Arm <name of scheduled event> Early." Alerts are now armed. The functions you can expect from the Alerts Scheduler Front Control Panel are described below:
ALERTS NOT ARMED
When you first install WiLife Command Center, the Front Control Panel will display "Alerts Not Armed" until 1) you have set up your email server; 2) you have scheduled an alert event in Scheduler; and 3) you select "Arm Manual Alerts Now" or "Arm <name of event> Early."
83