|
|
| 1 4 | 2 |
|
|
|
| 6 |
| FADER | TRACK NO. |
|
|
| WRITE |
|
| |
| REPEAT |
|
|
|
6 | 1 | 2 | 3 |
|
|
| |||
| 4 | 5 | 6 |
|
1 |
| OPEN/ |
|
|
CLOSE |
|
| ||
|
|
|
| |
2 | INPUT SELECTOR |
| ||
DIGITAL | XLR | ANALOG |
| |
|
|
|
| |
| COAX | +4dBu | XLR |
|
|
|
| ||
| OPT |
|
| |
|
| LINE |
| |
|
|
|
| |
| AES/ |
|
|
|
| EBU |
|
|
|
4 | DIGITAL |
|
| |
SYNCHRO |
|
| ||
Blinks |
|
|
|
|
Clignote |
|
|
|
|
Parpadea |
|
|
|
|
6 |
|
|
|
|
58 |
|
|
|
|
<PRE1282> |
|
|
|
|
En |
|
|
|
|
RECORDING (2) – AUTOMATIC DIGITAL- SOURCE SYNCHRO RECORDING
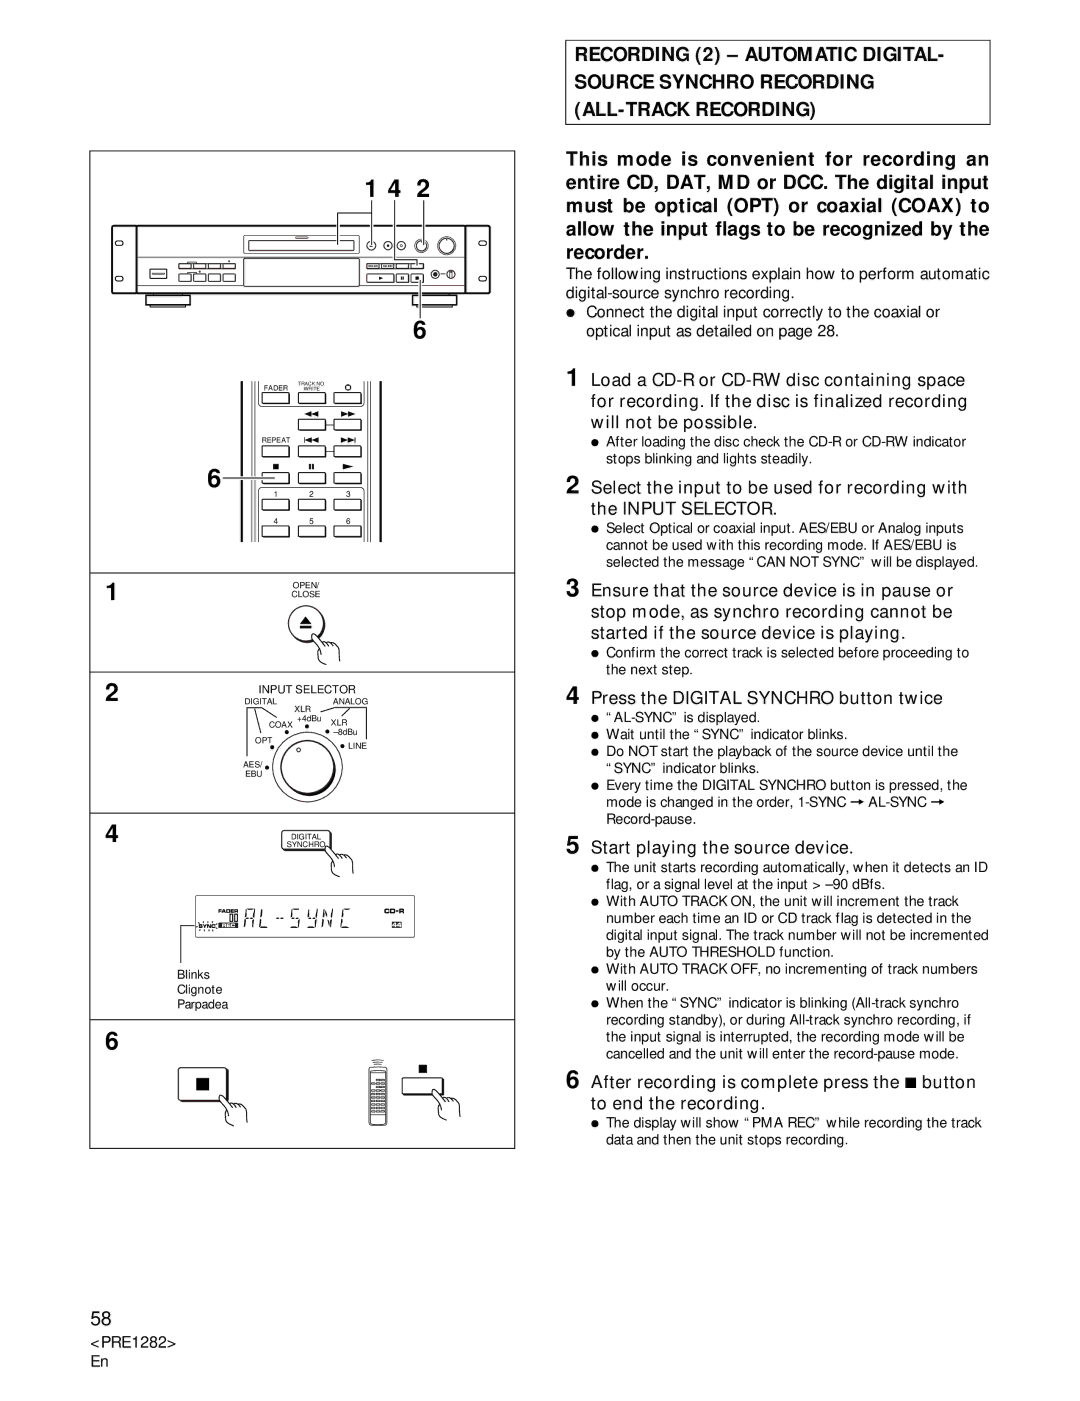
This mode is convenient for recording an entire CD, DAT, MD or DCC. The digital input must be optical (OPT) or coaxial (COAX) to allow the input flags to be recognized by the recorder.
The following instructions explain how to perform automatic
ÖConnect the digital input correctly to the coaxial or optical input as detailed on page 28.
1 Load a
ÖAfter loading the disc check the
2 Select the input to be used for recording with the INPUT SELECTOR.
ÖSelect Optical or coaxial input. AES/EBU or Analog inputs cannot be used with this recording mode. If AES/EBU is selected the message “CAN NOT SYNC” will be displayed.
3 Ensure that the source device is in pause or stop mode, as synchro recording cannot be started if the source device is playing.
ÖConfirm the correct track is selected before proceeding to the next step.
4 Press the DIGITAL SYNCHRO button twice
Ö
ÖWait until the “SYNC” indicator blinks.
ÖDo NOT start the playback of the source device until the “SYNC” indicator blinks.
ÖEvery time the DIGITAL SYNCHRO button is pressed, the mode is changed in the order,
5 Start playing the source device.
ÖThe unit starts recording automatically, when it detects an ID flag, or a signal level at the input >
ÖWith AUTO TRACK ON, the unit will increment the track number each time an ID or CD track flag is detected in the digital input signal. The track number will not be incremented by the AUTO THRESHOLD function.
ÖWith AUTO TRACK OFF, no incrementing of track numbers will occur.
ÖWhen the “SYNC” indicator is blinking
6 After recording is complete press the 7 button to end the recording.
ÖThe display will show “PMA REC” while recording the track data and then the unit stops recording.
