1 2 |
|
|
|
|
| ||
|
|
| |
|
| REC |
|
| FADER | TRACK NO. |
|
| WRITE |
| |
1 |
|
|
|
| REPEAT |
|
|
1 |
| Lights. |
|
|
| Allumage. | |
|
| Se enciende. | |
| TRACK NO. |
| |
| AUTO/ | WRITE |
|
| MANUAL | [MANUAL] |
|
2 |
|
|
|
TRACK NO. |
| TRACK NO. | |
|
|
| WRITE |
AUTO/ | WRITE |
|
|
MANUAL | [MANUAL] |
|
|
A | TRACK NO. |
| |
| Goes off. | ||
|
|
| |
| AUTO/ | WRITE | Extinction. |
| MANUAL | [MANUAL] | Se apaga. |
Lights. |
|
|
|
Allumage. |
|
|
|
Se enciende. |
|
| |
CONVENIENT FUNCTIONS FOR RECORDING
7Manual writing of track numbers
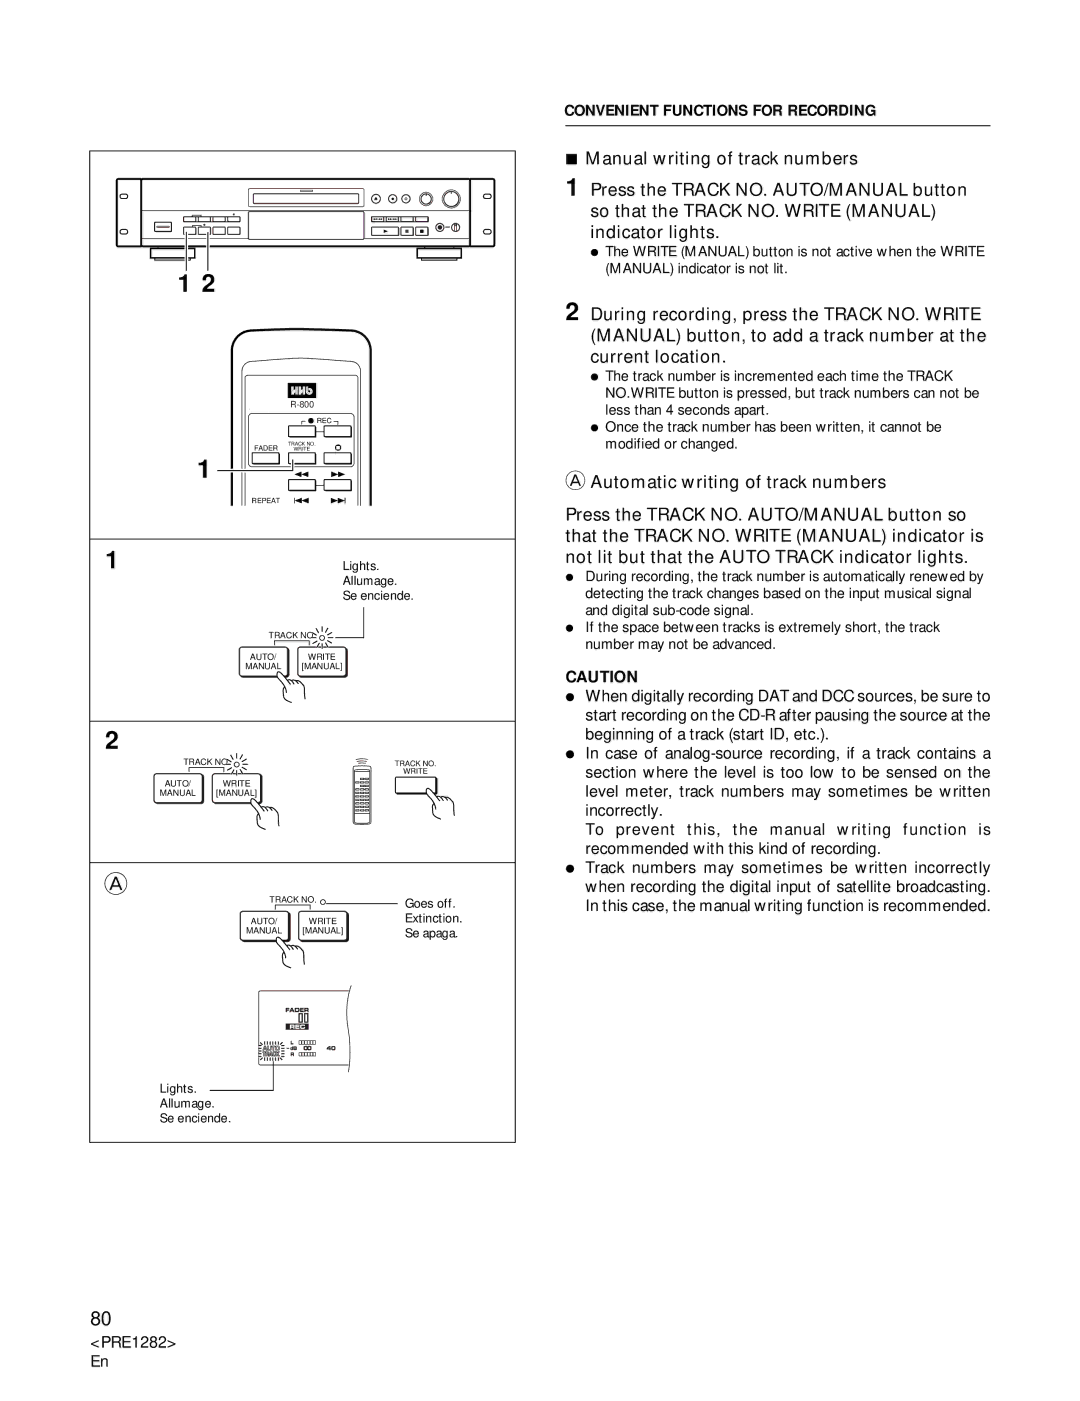
1 Press the TRACK NO. AUTO/MANUAL button so that the TRACK NO. WRITE (MANUAL) indicator lights.
ÖThe WRITE (MANUAL) button is not active when the WRITE (MANUAL) indicator is not lit.
2 During recording, press the TRACK NO. WRITE (MANUAL) button, to add a track number at the current location.
ÖThe track number is incremented each time the TRACK NO.WRITE button is pressed, but track numbers can not be less than 4 seconds apart.
ÖOnce the track number has been written, it cannot be modified or changed.
AAutomatic writing of track numbers
Press the TRACK NO. AUTO/MANUAL button so that the TRACK NO. WRITE (MANUAL) indicator is not lit but that the AUTO TRACK indicator lights.
ÖDuring recording, the track number is automatically renewed by detecting the track changes based on the input musical signal and digital
ÖIf the space between tracks is extremely short, the track number may not be advanced.
CAUTION
ÖWhen digitally recording DAT and DCC sources, be sure to start recording on the
ÖIn case of
To prevent this, the manual writing function is recommended with this kind of recording.
ÖTrack numbers may sometimes be written incorrectly when recording the digital input of satellite broadcasting. In this case, the manual writing function is recommended.
80
