A | Cap |
| Capuchon |
| Tapa |
Turn and remove
Tournez et retirez
Gire y quite
B | Cap |
| |
| Capuchon |
| Tapa |
Pull out.
Tirez.
Saque.
CWall outlet Prise murale Toma de corriente
Power plug
Fiche d’alimentation
Clavija de alimentación
Figure is for U.S.A. model.
La figure illustre le modèle de l’appareil conçu pour les Etats-Unis. La figura pertenece al modelo de los EE.UU.
30
CONNECTION WITH OTHER EQUIPMENT
7Caution in the use of fibre optic cables.
ÖDo not bend an optical cable at too sharp an angle (minimum radius 7.5 cm [3 inches]). Be especially careful when mounting the unit in a rack if the optical cables are already connected. When an optical cable is stored in the form of a loop, the loop should have a diameter larger than 15 cm [6 inches].
ÖAn optical cable must be inserted completely into the socket, loss of signal could occur with the cable not fully inserted.
ÖUse optical cables with a length of no more than 3 meters [10 feet].
ÖBe careful not to leave dust on or scratch the ends of optical cables. If the plugs are dirty wipe gently with soft lint free cloth before connection.
ÖWhen the optical sockets on the unit are not being used protect the sockets with the supplied dust caps.
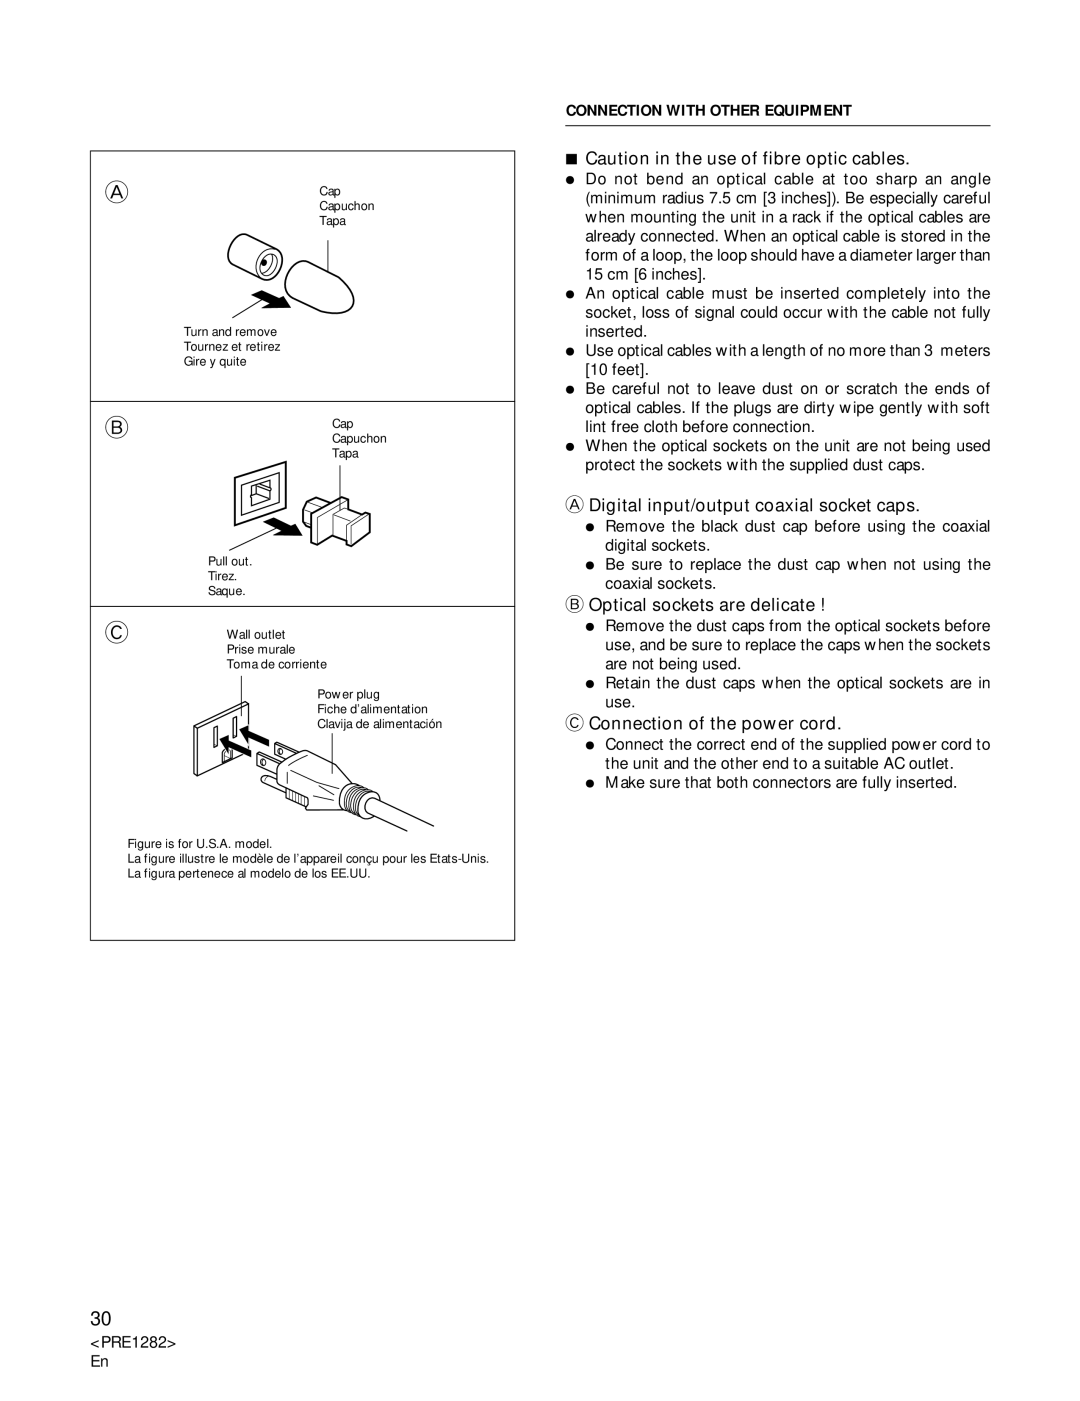
ADigital input/output coaxial socket caps.
ÖRemove the black dust cap before using the coaxial digital sockets.
ÖBe sure to replace the dust cap when not using the coaxial sockets.
BOptical sockets are delicate !
ÖRemove the dust caps from the optical sockets before use, and be sure to replace the caps when the sockets are not being used.
ÖRetain the dust caps when the optical sockets are in use.
CConnection of the power cord.
ÖConnect the correct end of the supplied power cord to the unit and the other end to a suitable AC outlet.
ÖMake sure that both connectors are fully inserted.
