|
|
|
| 1 4 | 2 |
|
|
|
| 5 | 6 |
|
|
| 4 | ||
|
|
|
| ||
|
|
|
| REC | |
|
|
|
|
| |
|
| FADER | TRACK NO. |
| |
|
| WRITE |
|
| |
|
| REPEAT |
|
| |
| 6 |
|
|
| 5 |
| 1 | 2 | 3 |
| |
|
|
| |||
1 |
| OPEN/ |
|
| |
| CLOSE |
|
| ||
|
|
|
|
| |
2 |
| INPUT SELECTOR |
| ||
| DIGITAL |
| ANALOG |
| |
|
| XLR |
|
| |
|
| COAX | +4dBu | XLR |
|
|
|
|
| ||
|
| OPT |
|
| |
|
|
| LINE |
| |
|
|
|
|
| |
|
| AES/ |
|
|
|
|
| EBU |
|
|
|
4 | RECORD |
|
|
|
|
|
|
|
| REC | |
5 |
|
|
|
|
|
|
| or / ou / o |
| ||
6 |
|
|
|
|
|
62 |
|
|
|
|
|
<PRE1282> |
|
|
|
| |
En |
|
|
|
|
|
RECORDING (4) – MANUAL DIGITAL- SOURCE RECORDING
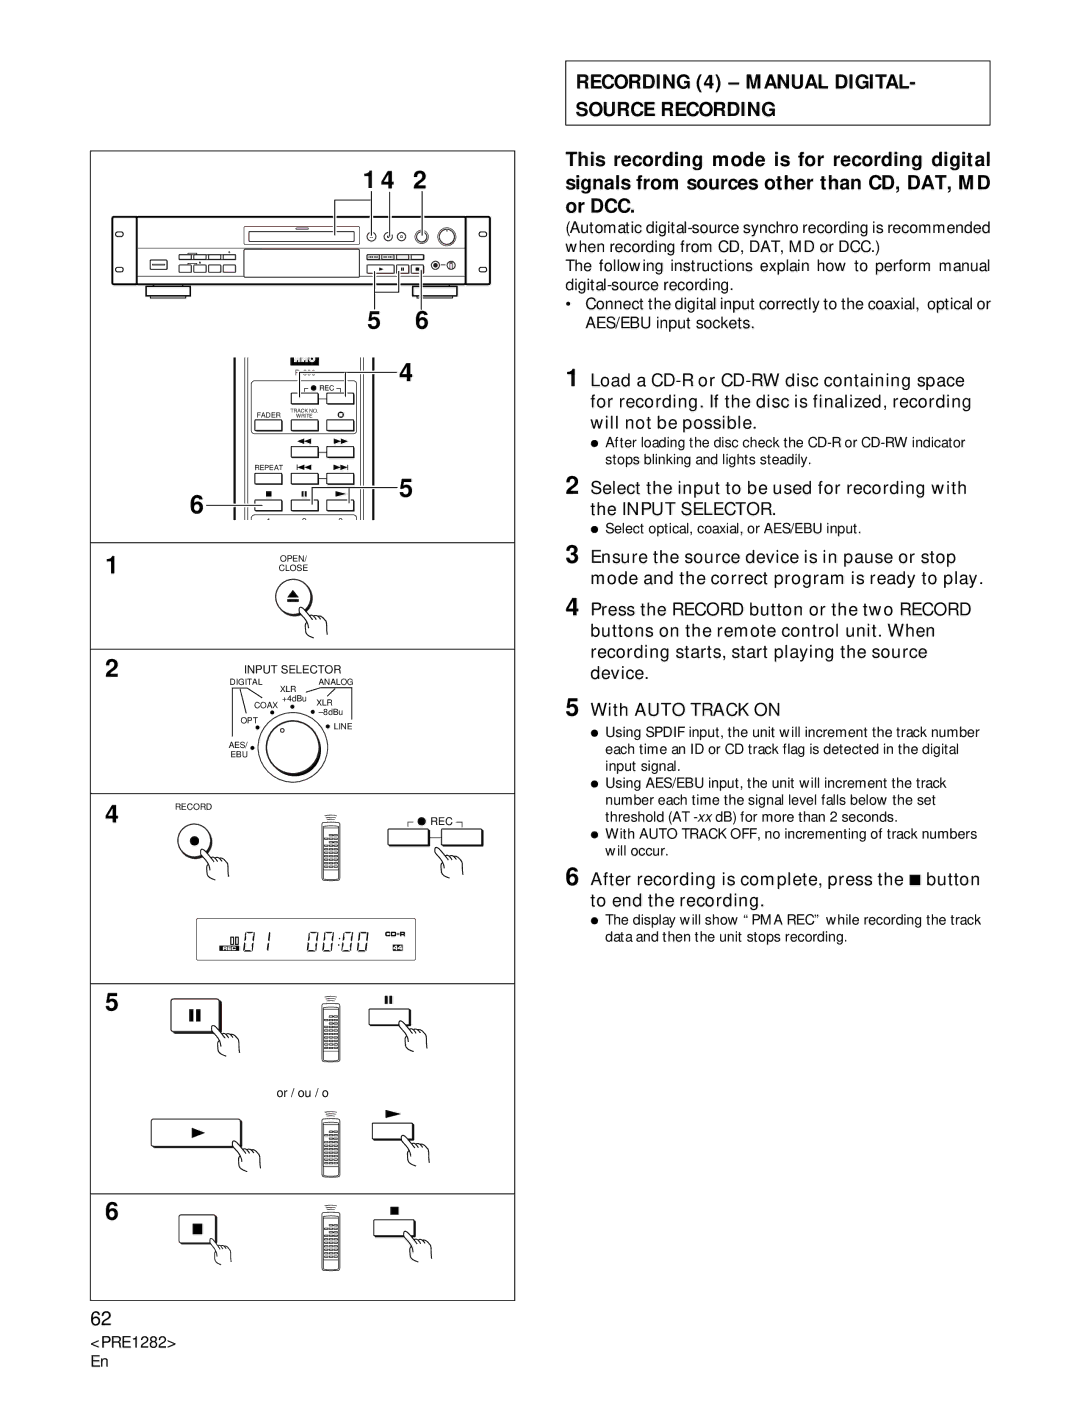
This recording mode is for recording digital signals from sources other than CD, DAT, MD or DCC.
(Automatic
The following instructions explain how to perform manual
•Connect the digital input correctly to the coaxial, optical or AES/EBU input sockets.
1 Load a
ÖAfter loading the disc check the
2 Select the input to be used for recording with the INPUT SELECTOR.
ÖSelect optical, coaxial, or AES/EBU input.
3 Ensure the source device is in pause or stop mode and the correct program is ready to play.
4 Press the RECORD button or the two RECORD buttons on the remote control unit. When recording starts, start playing the source device.
5 With AUTO TRACK ON
ÖUsing SPDIF input, the unit will increment the track number each time an ID or CD track flag is detected in the digital input signal.
ÖUsing AES/EBU input, the unit will increment the track number each time the signal level falls below the set threshold (AT
ÖWith AUTO TRACK OFF, no incrementing of track numbers will occur.
6 After recording is complete, press the 7 button to end the recording.
ÖThe display will show “PMA REC” while recording the track data and then the unit stops recording.
