`K==réÖê~ÇáåÖ=pçÑíï~êÉ
Ethernet Upgrade Method
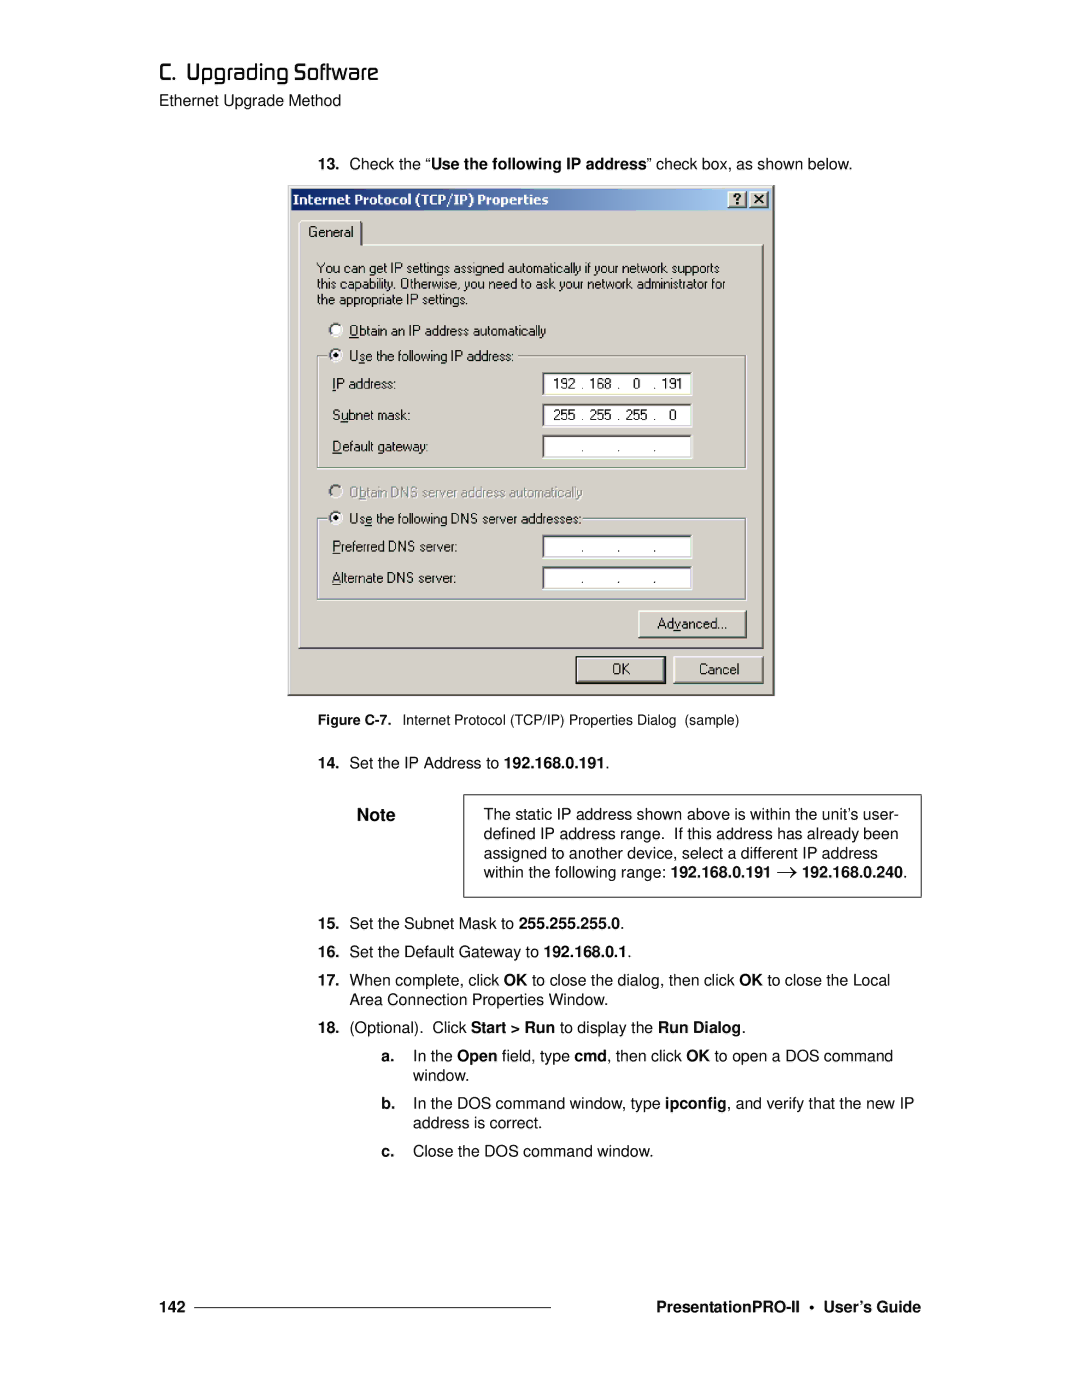
13.Check the “Use the following IP address” check box, as shown below.
Figure C-7. Internet Protocol (TCP/IP) Properties Dialog (sample)
14.Set the IP Address to 192.168.0.191.
Note
The static IP address shown above is within the unit’s user- defined IP address range. If this address has already been assigned to another device, select a different IP address within the following range: 192.168.0.191 → 192.168.0.240.
15.Set the Subnet Mask to 255.255.255.0.
16.Set the Default Gateway to 192.168.0.1.
17.When complete, click OK to close the dialog, then click OK to close the Local Area Connection Properties Window.
18.(Optional). Click Start > Run to display the Run Dialog.
a.In the Open field, type cmd, then click OK to open a DOS command window.
b.In the DOS command window, type ipconfig, and verify that the new IP address is correct.
c.Close the DOS command window.
142 |
|
|
|