Installation Manual for DiBos Video System
Configuration (continued)
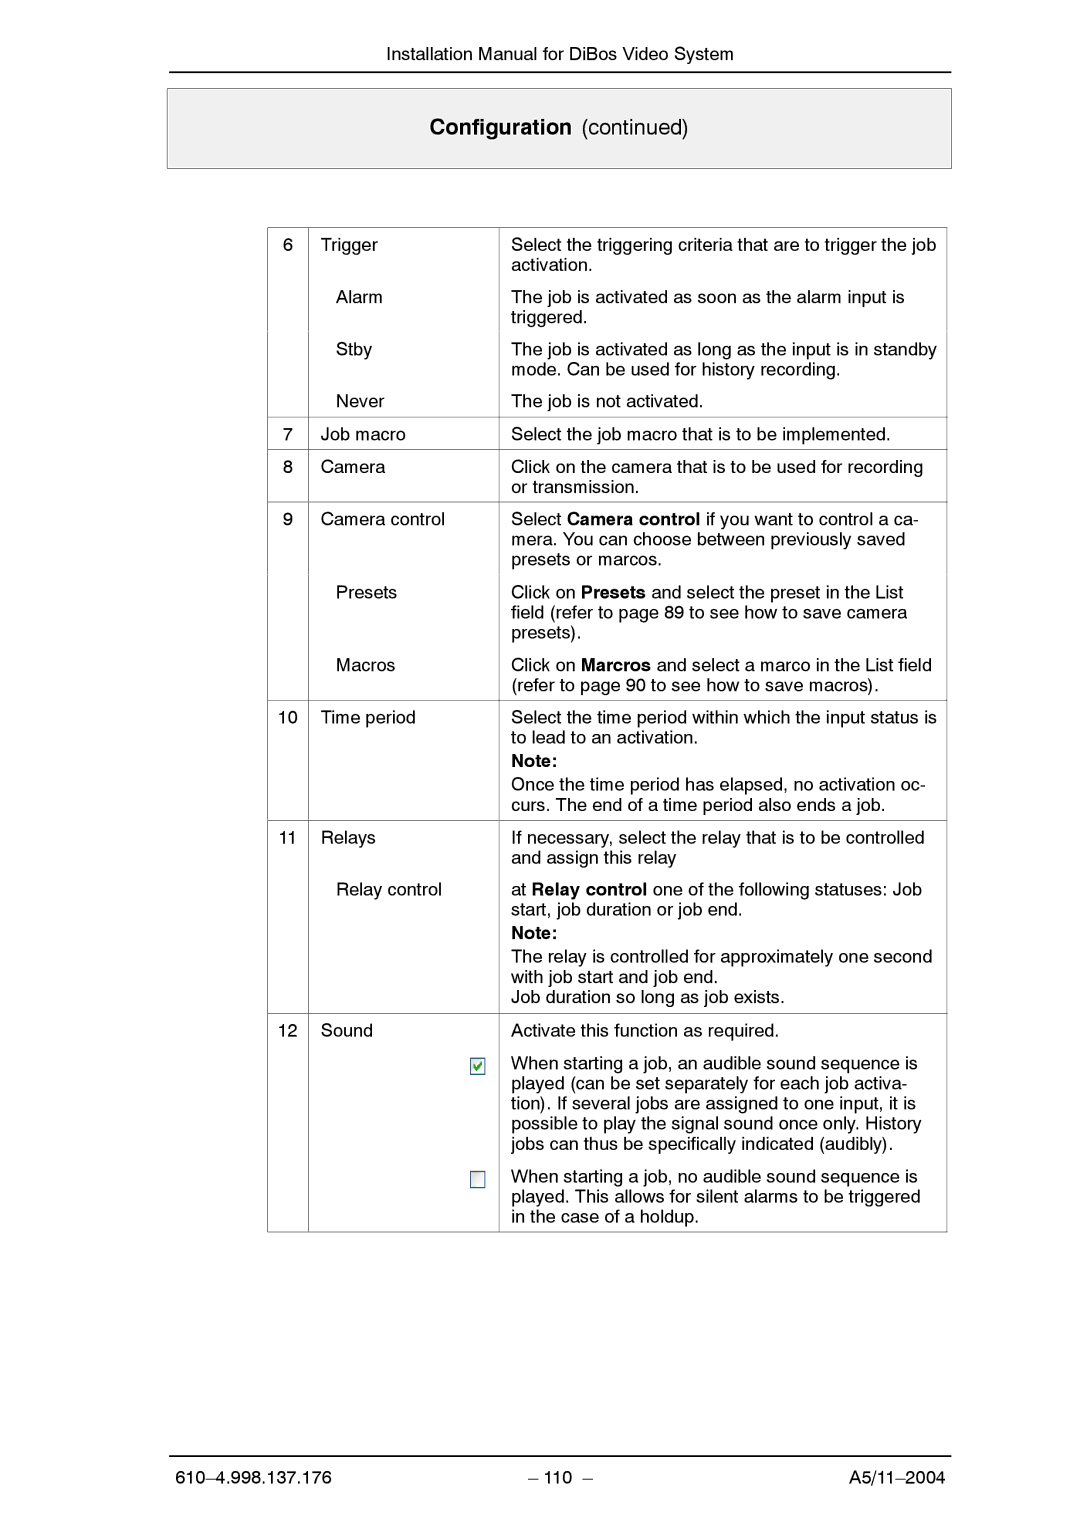
6Trigger Alarm
Select the triggering criteria that are to trigger the job activation.
The job is activated as soon as the alarm input is triggered.
| Stby | The job is activated as long as the input is in standby |
|
| mode. Can be used for history recording. |
| Never | The job is not activated. |
|
|
|
7 | Job macro | Select the job macro that is to be implemented. |
|
|
|
8 | Camera | Click on the camera that is to be used for recording |
|
| or transmission. |
|
|
|
9 | Camera control | Select Camera control if you want to control a ca- |
|
| mera. You can choose between previously saved |
|
| presets or marcos. |
| Presets | Click on Presets and select the preset in the List |
| ||
|
| field (refer to page 89 to see how to save camera |
|
| presets). |
| Macros | Click on Marcros and select a marco in the List field |
|
| (refer to page 90 to see how to save macros). |
|
|
|
10 | Time period | Select the time period within which the input status is |
|
| to lead to an activation. |
|
| Note: |
|
| Once the time period has elapsed, no activation oc- |
|
| curs. The end of a time period also ends a job. |
|
|
|
11 | Relays | If necessary, select the relay that is to be controlled |
|
| and assign this relay |
| Relay control | at Relay control one of the following statuses: Job |
|
| start, job duration or job end. |
|
| Note: |
|
| The relay is controlled for approximately one second |
|
| with job start and job end. |
|
| Job duration so long as job exists. |
|
|
|
12 | Sound | Activate this function as required. |
|
| When starting a job, an audible sound sequence is |
|
| played (can be set separately for each job activa- |
|
| tion). If several jobs are assigned to one input, it is |
|
| possible to play the signal sound once only. History |
|
| jobs can thus be specifically indicated (audibly). |
|
| When starting a job, no audible sound sequence is |
|
| played. This allows for silent alarms to be triggered |
|
| in the case of a holdup. |
|
|
|
– 110 – |