Installation Manual for DiBos Video System
3 Quick installation
For information about the device connections, please see Chapter 2.
1.Connect the mouse and keyboard (put ferrite on the cables).
2.Plug the
3.Connect the cameras to the grabber cable. On each cable there is a plastic ring with a printed number. This number stands for the video input, e.g. “1” for video input 1.
4.Connect the contact inputs (alarm inputs) and relay outputs to the grabber cable.
5.Switch all connected devices on.
6.Plug the network cable into the video system.
7.Switch the video system on. The switch is on the back side. The system will then boot up automatically and stop at the setup assistant.
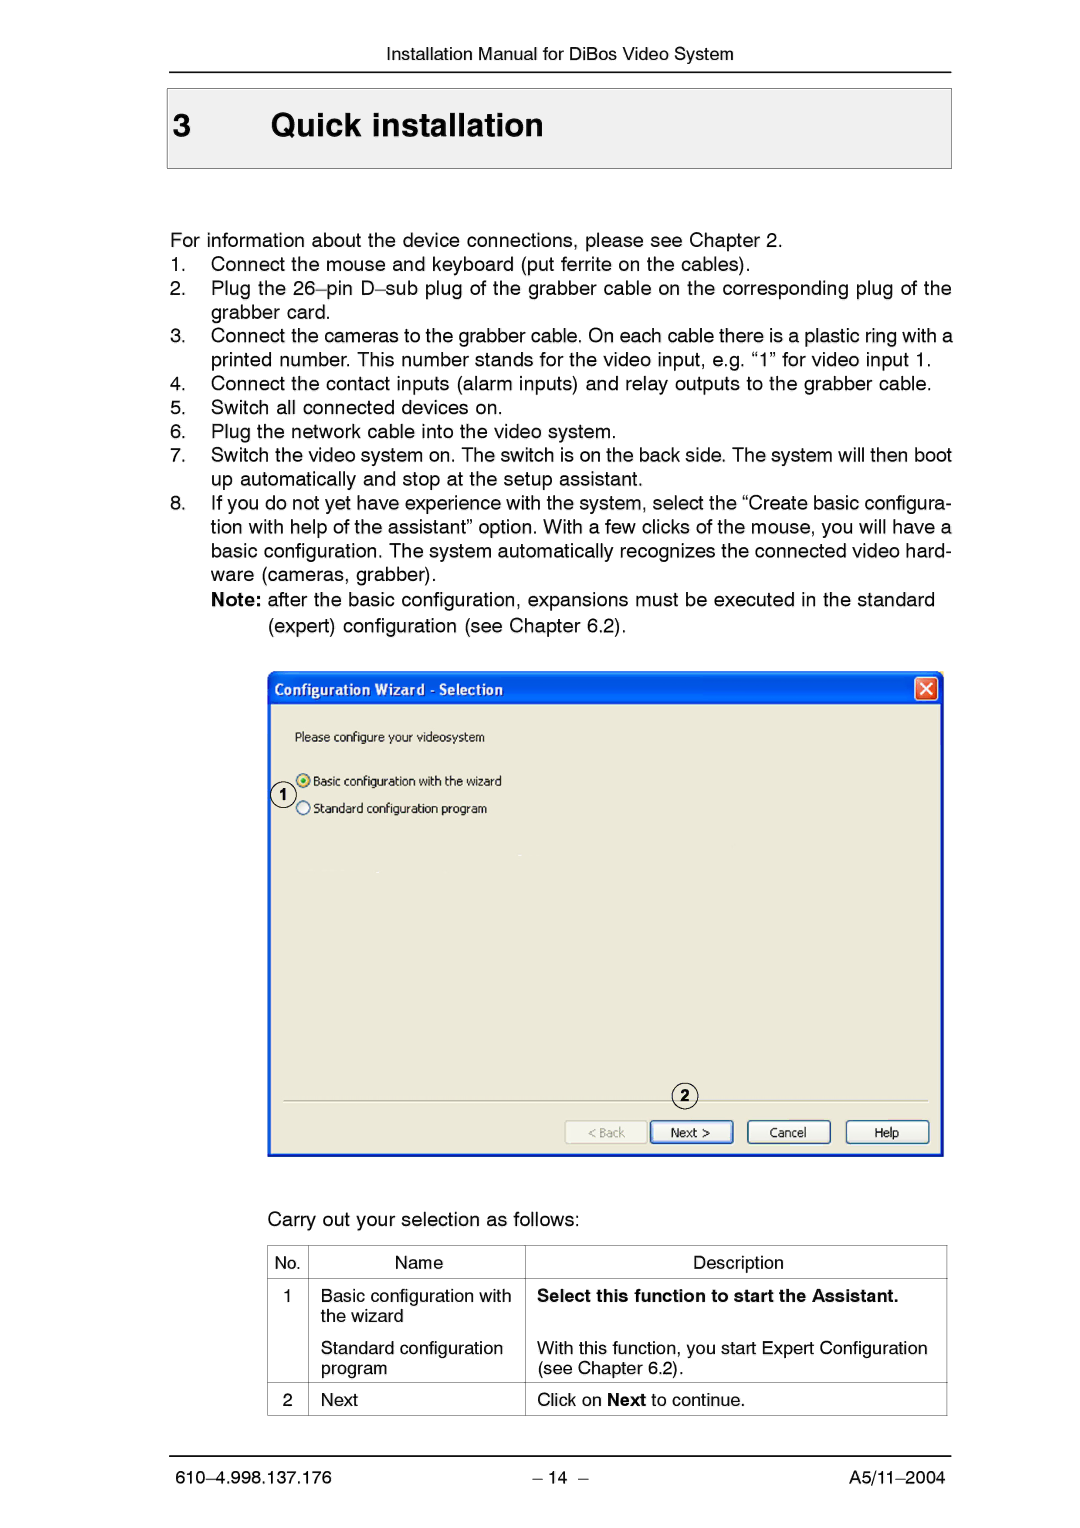
8.If you do not yet have experience with the system, select the “Create basic configura- tion with help of the assistant” option. With a few clicks of the mouse, you will have a basic configuration. The system automatically recognizes the connected video hard- ware (cameras, grabber).
Note: after the basic configuration, expansions must be executed in the standard (expert) configuration (see Chapter 6.2).
Carry out your selection as follows:
No. | Name | Description |
|
|
|
1 | Basic configuration with | Select this function to start the Assistant. |
| the wizard |
|
| Standard configuration | With this function, you start Expert Configuration |
| program | (see Chapter 6.2). |
|
|
|
2 | Next | Click on Next to continue. |
|
|
|
– 14 – |