Chapter 8 Reporting Tool
1.In the Reporting tool, on the report toolbar, click Create, or if you want to create a new custom report based on an existing report, open the existing report, and then click Save As.
2.In Report Name box, type a name for the custom report.
3.Do one of the following:
•To add the report to an existing folder, in Create in or Save in, click the down arrow to choose an existing folder, and then click OK.
•To create a new folder to store the report, click the Click to add folder icon, in Folder Name, type the name of the folder, and in Create in, specify where you want the new folder to reside in the hierarchy, and then click OK.
Note: You can create up to 128 folders.
To delete a custom report
1.In the left pane of the Reporting tool, next to Custom Reports, click the Click to manage custom reports icon.
2.Select the check box that corresponds with the report you want to delete, and then click Delete.
Note: When you delete a folder, all the contents of that folder are deleted.
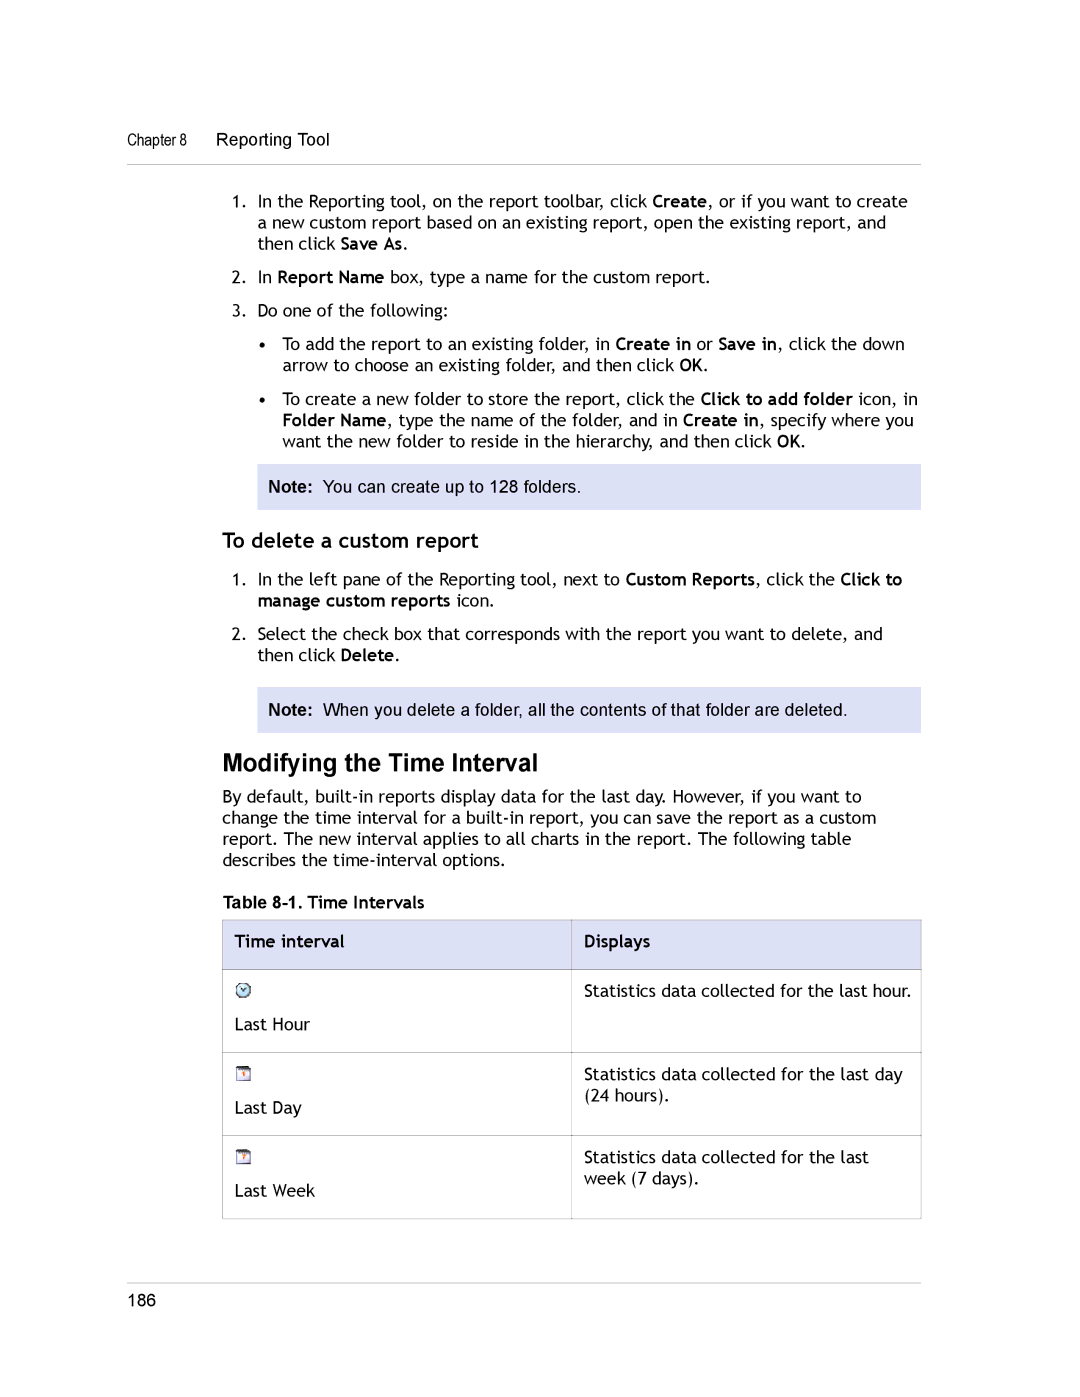
Modifying the Time Interval
By default,
Table 8-1. Time Intervals
Time interval | Displays | |
|
|
|
| Statistics data collected for the last hour. | |
Last Hour |
|
|
|
|
|
| Statistics data collected for the last day | |
Last Day | (24 hours). | |
|
| |
|
|
|
| Statistics data collected for the last | |
Last Week | week (7 days). | |
|
| |
|
|
|
|
|
|
186