| Setting Up the Analyzer |
| To Insert or Remove an Interface Pod |
Caution | You must always have two interface pods inserted in the analyzer while |
| it is operating. If your operations require only a single interface pod, |
| insert the blank interface pod (provided with the analyzer) into the |
| other port. |
| The two interface pods are necessary to maintain a balanced airflow for |
| cooling of internal components and to comply with EMC emission |
| standards. |
|
|
|
|
| Note Before you use an optical interface pod, you should clean the optical connectors and |
| test cables. See the appropriate Setting Up the Interface Pod guide. |
|
|
|
|
|
|
| Note To avoid any possibility of eye damage, the laser is automatically turned off when you |
| insert or remove an optical interface pod. |
|
|
1 Setting Up the Analyzer
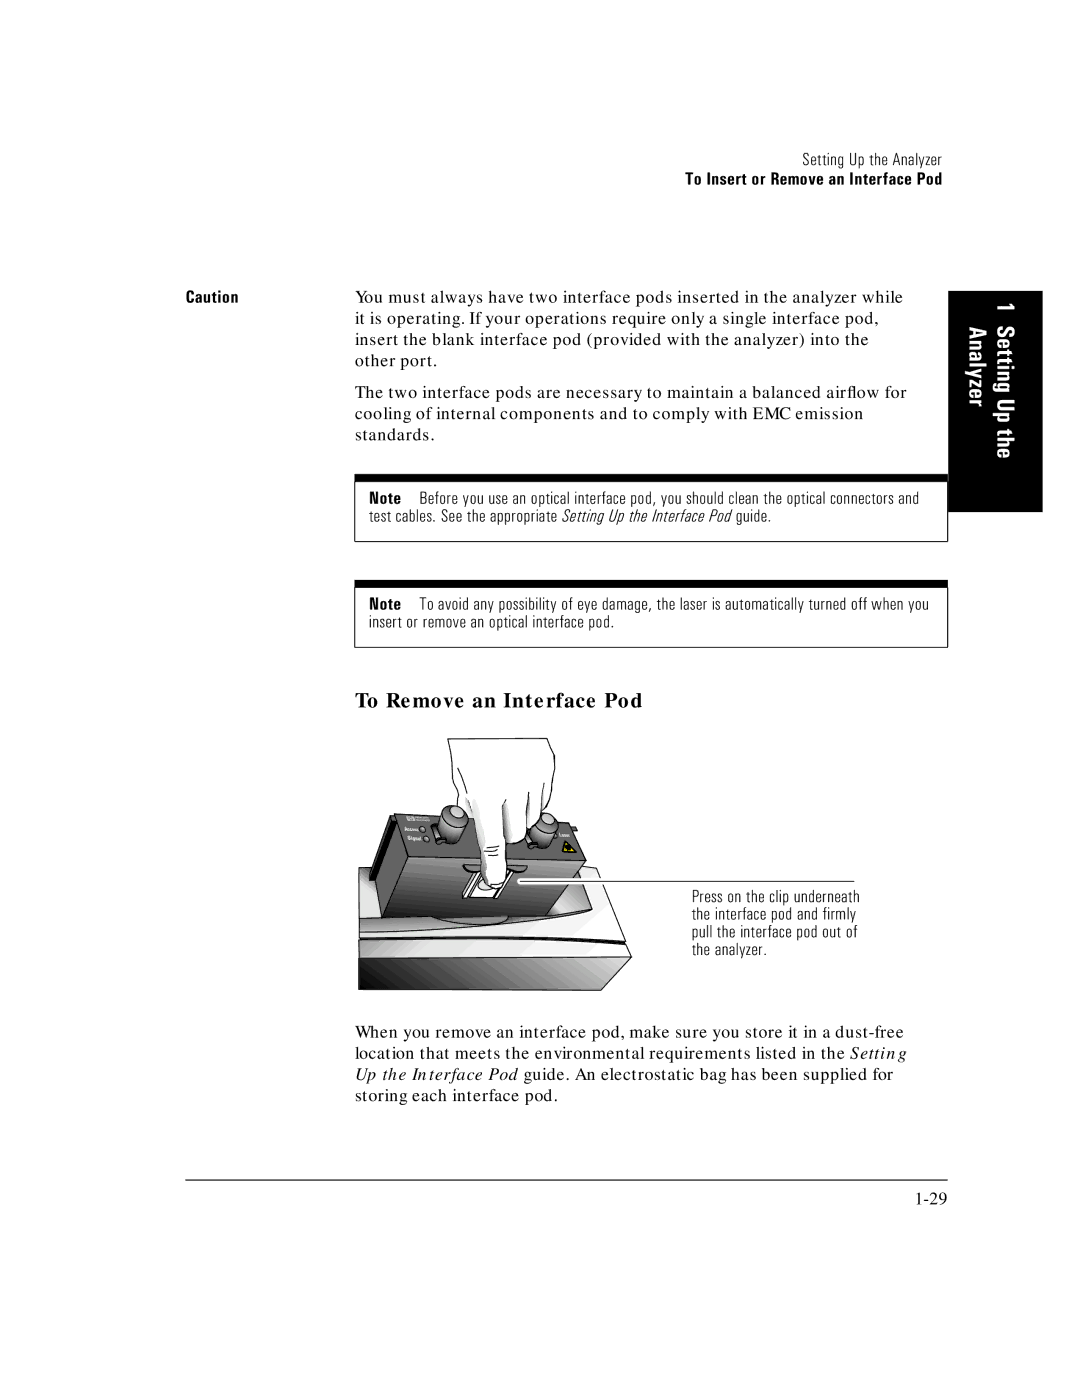
To Remove an Interface Pod
Press on the clip underneath the interface pod and firmly pull the interface pod out of the analyzer.
When you remove an interface pod, make sure you store it in a
