2.Turn on power to the node. Watch the screen carefully during the
The BIOS Setup Utility displays the following information about the node:
BIOS ROM ID: BIOS Version: BIOS Build Date:
Record this information for future reference.
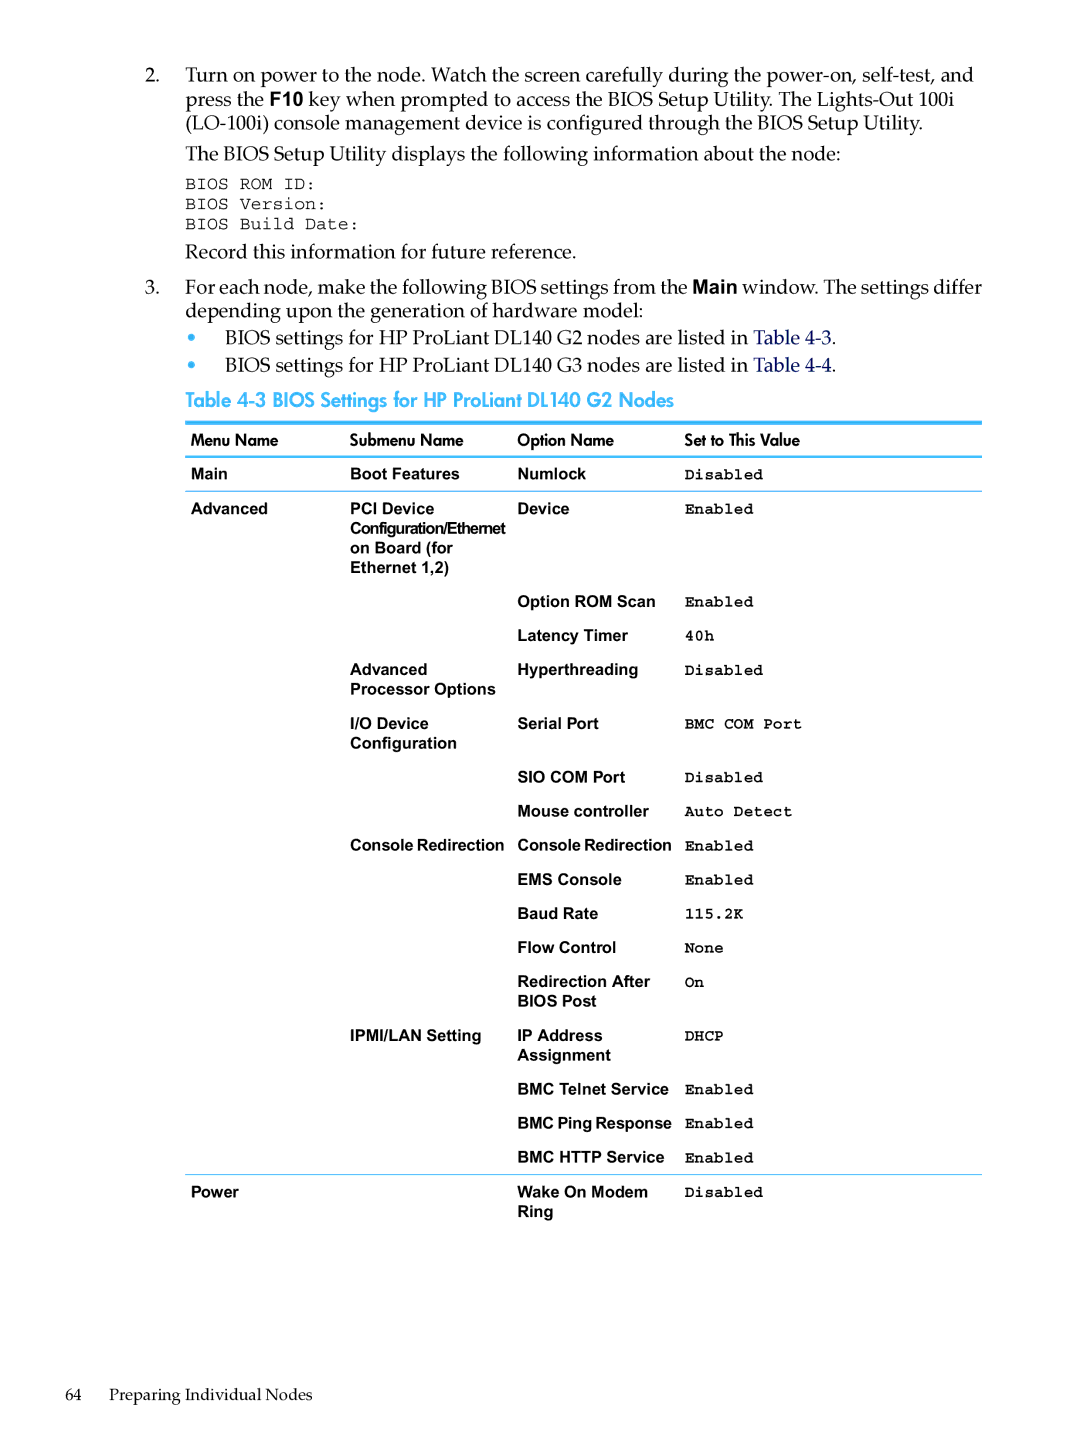
3.For each node, make the following BIOS settings from the Main window. The settings differ depending upon the generation of hardware model:
•BIOS settings for HP ProLiant DL140 G2 nodes are listed in Table
•BIOS settings for HP ProLiant DL140 G3 nodes are listed in Table
Table 4-3 BIOS Settings for HP ProLiant DL140 G2 Nodes
Menu Name | Submenu Name | Option Name | Set to This Value |
Main | Boot Features | Numlock | Disabled |
Advanced | PCI Device | Device | Enabled |
| Configuration/Ethernet |
|
|
| on Board (for |
|
|
| Ethernet 1,2) |
|
|
|
| Option ROM Scan | Enabled |
|
| Latency Timer | 40h |
| Advanced | Hyperthreading | Disabled |
| Processor Options |
|
|
| I/O Device | Serial Port | BMC COM Port |
| Configuration |
|
|
|
| SIO COM Port | Disabled |
|
| Mouse controller | Auto Detect |
| Console Redirection | Console Redirection | Enabled |
|
| EMS Console | Enabled |
|
| Baud Rate | 115.2K |
|
| Flow Control | None |
|
| Redirection After | On |
|
| BIOS Post |
|
| IPMI/LAN Setting | IP Address | DHCP |
|
| Assignment |
|
|
| BMC Telnet Service | Enabled |
|
| BMC Ping Response | Enabled |
|
| BMC HTTP Service | Enabled |
Power |
| Wake On Modem | Disabled |
|
| Ring |
|
64 Preparing Individual Nodes