13.Perform this step on all nodes except the head node. From the Boot Configuration menu, select the Edit OS Boot Order option.
Do the following:
a.Use the navigation instructions on the screen to move the Netboot entry you just defined to the top of the boot order.
b.If prompted, press the Enter key to select the position.
c.Enter x to return to the Boot Configuration menu.
14.Perform this step on all nodes, including the head node. Select the Console Configuration option, and set Serial Acpi(HWP0002,PNP0A03,0)/Pci(12) Vt100+ 9600 as the primary console interface.
15.Press the b key to set the baud rate to 115200.
16.Press the Esc key or enter x as many times as necessary to return to the Boot Menu.
17.Turn off power to the node:
a.Press
b.Enter CM to display the Command Menu.
c.Enter PC and enter off to turn off power to the node.
4.9.5Preparing HP Integrity rx4640 Nodes
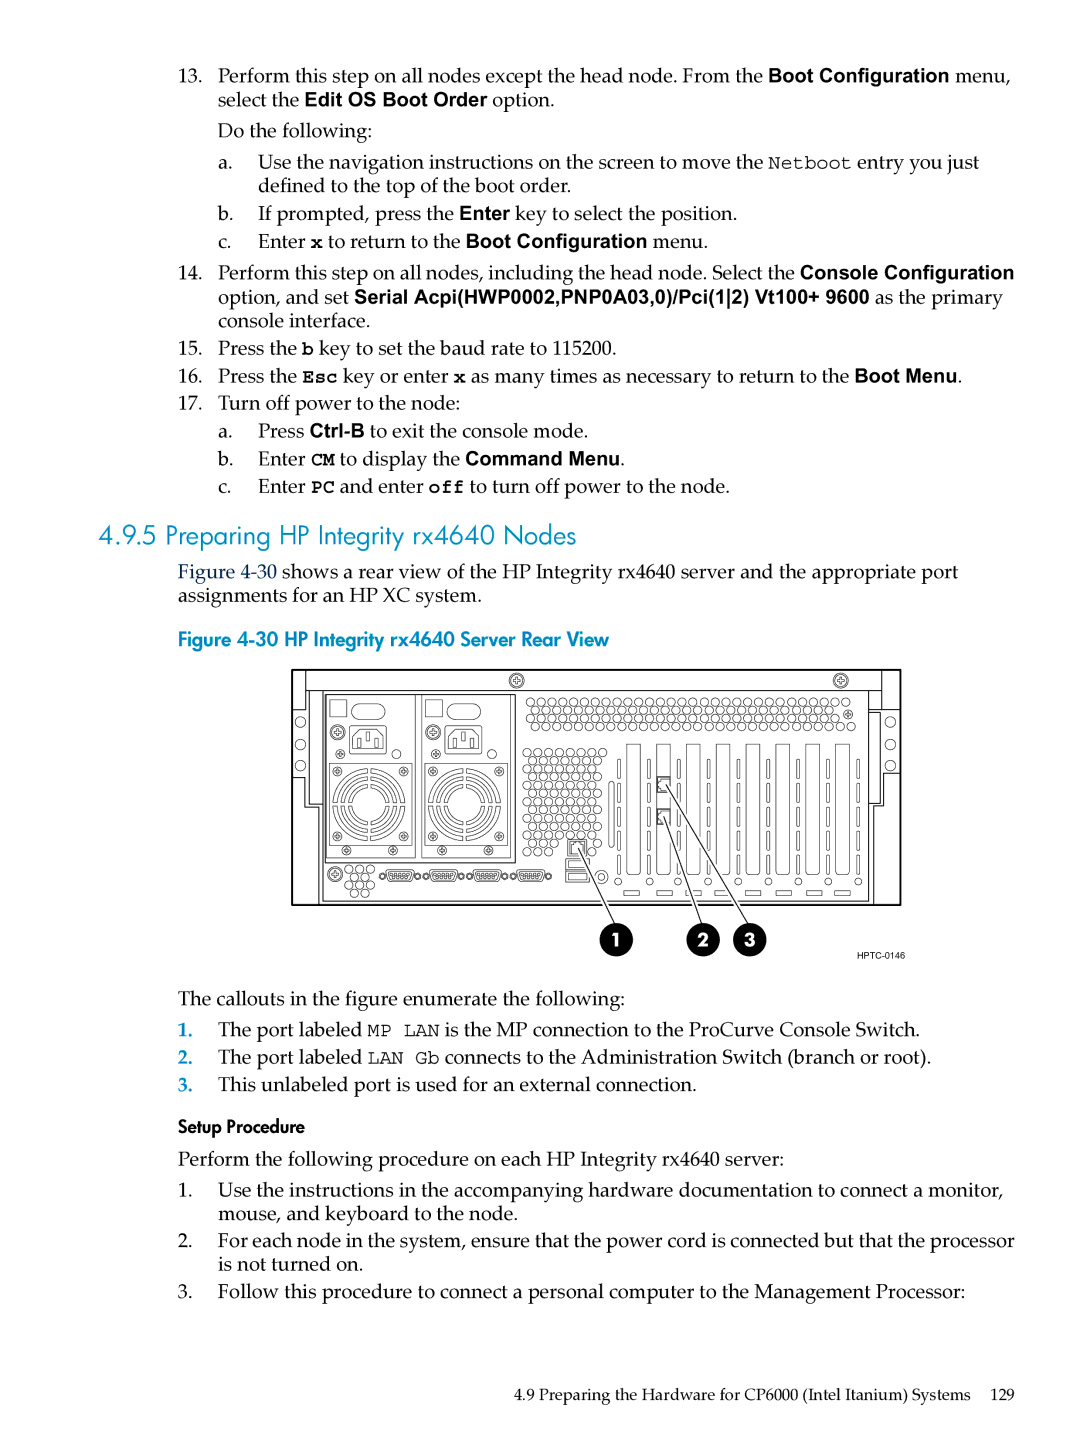
Figure 4-30 shows a rear view of the HP Integrity rx4640 server and the appropriate port assignments for an HP XC system.
Figure 4-30 HP Integrity rx4640 Server Rear View
1 | 2 | 3 |
The callouts in the figure enumerate the following:
1.The port labeled MP LAN is the MP connection to the ProCurve Console Switch.
2.The port labeled LAN Gb connects to the Administration Switch (branch or root).
3.This unlabeled port is used for an external connection.
Setup Procedure
Perform the following procedure on each HP Integrity rx4640 server:
1.Use the instructions in the accompanying hardware documentation to connect a monitor, mouse, and keyboard to the node.
2.For each node in the system, ensure that the power cord is connected but that the processor is not turned on.
3.Follow this procedure to connect a personal computer to the Management Processor:
4.9 Preparing the Hardware for CP6000 (Intel Itanium) Systems 129