1.Make the RBSU settings for the HP ProLiant DL365 nodes, as indicated in Table
Use the navigation aids shown at the bottom of the screen to move through the menus and make selections.
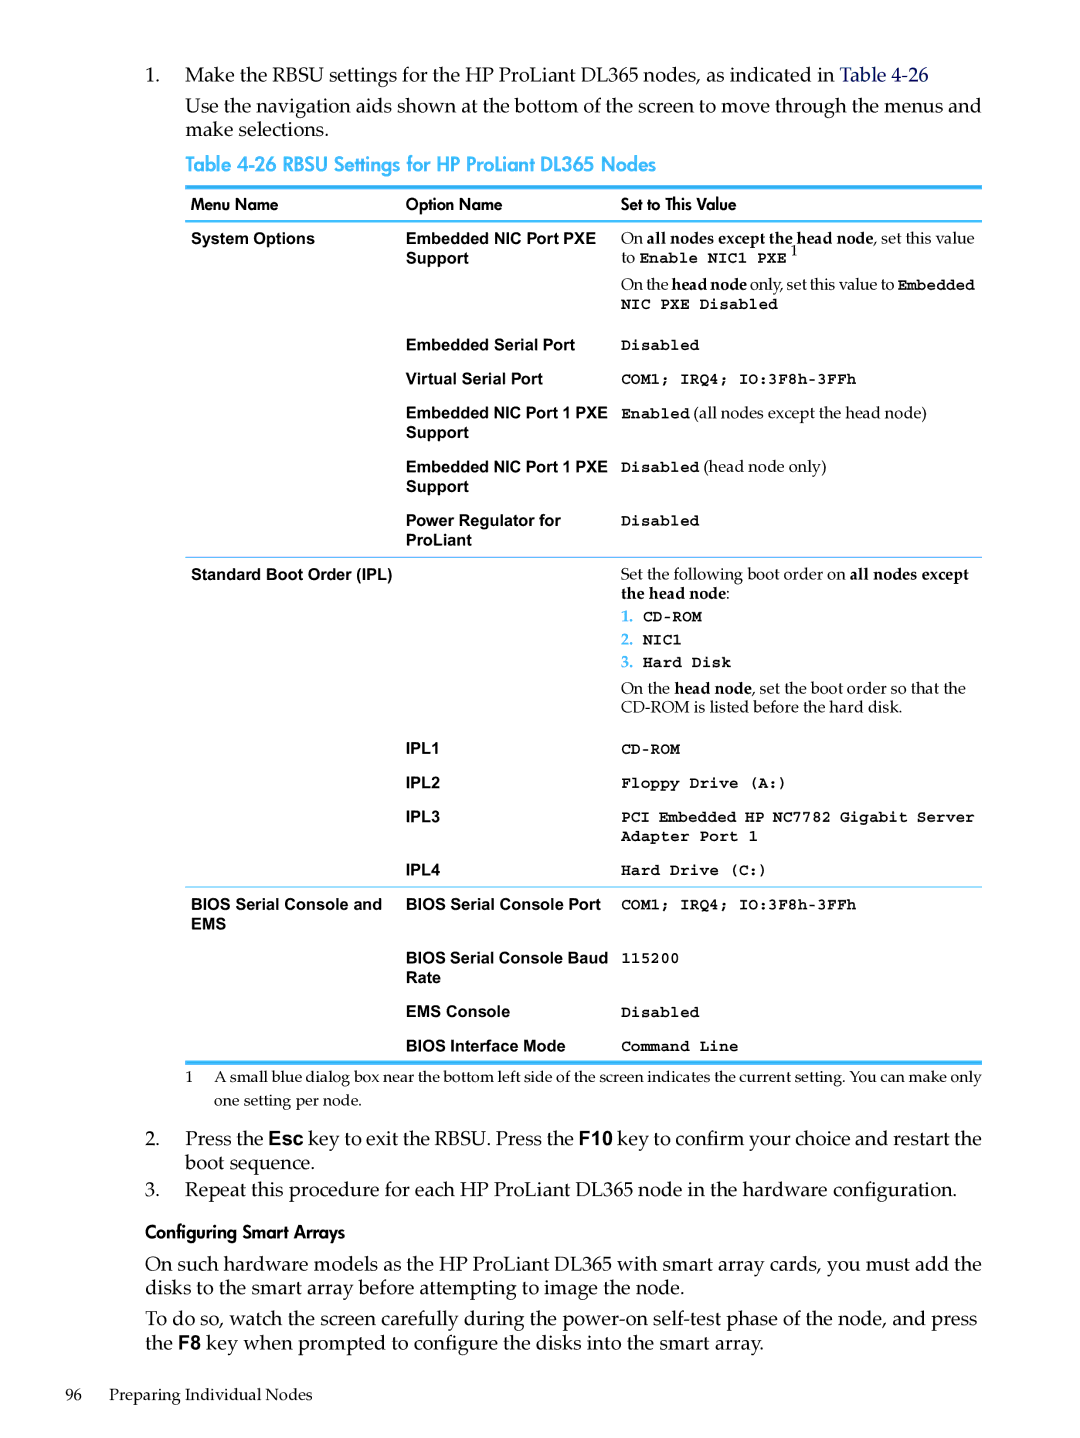
Table 4-26 RBSU Settings for HP ProLiant DL365 Nodes
Menu Name | Option Name | Set to This Value | |
System Options | Embedded NIC Port PXE | On all nodes except the head node, set this value | |
| Support | to Enable NIC1 PXE 1 | |
|
| On the head node only, set this value to Embedded | |
|
| NIC PXE Disabled | |
| Embedded Serial Port | Disabled | |
| Virtual Serial Port | COM1; IRQ4; | |
| Embedded NIC Port 1 PXE | Enabled (all nodes except the head node) | |
| Support |
|
|
| Embedded NIC Port 1 PXE | Disabled (head node only) | |
| Support |
|
|
| Power Regulator for | Disabled | |
| ProLiant |
|
|
Standard Boot Order (IPL) |
| Set the following boot order on all nodes except | |
|
| the head node: | |
|
| 1. | |
|
| 2. | NIC1 |
|
| 3. | Hard Disk |
|
| On the head node, set the boot order so that the | |
|
|
| |
| IPL1 | ||
| IPL2 | Floppy Drive (A:) | |
| IPL3 | PCI Embedded HP NC7782 Gigabit Server | |
|
| Adapter Port 1 | |
| IPL4 | Hard Drive (C:) | |
BIOS Serial Console and | BIOS Serial Console Port | COM1; IRQ4; | |
EMS |
|
|
|
| BIOS Serial Console Baud | 115200 | |
| Rate |
|
|
| EMS Console | Disabled | |
| BIOS Interface Mode | Command Line | |
1A small blue dialog box near the bottom left side of the screen indicates the current setting. You can make only one setting per node.
2.Press the Esc key to exit the RBSU. Press the F10 key to confirm your choice and restart the boot sequence.
3.Repeat this procedure for each HP ProLiant DL365 node in the hardware configuration.
Configuring Smart Arrays
On such hardware models as the HP ProLiant DL365 with smart array cards, you must add the disks to the smart array before attempting to image the node.
To do so, watch the screen carefully during the