Table 4-5 BIOS Settings for HP ProLiant DL160 G5 Nodes (continued)
Menu Name | Submenu Name | Option Name | Set to This Value |
|
| 2nd Boot Device | If this node is the head node, set this |
|
|
| value to: |
|
|
| Embedded NIC1 |
|
|
| Otherwise, set this value to: |
|
|
| Hard Drive |
|
| Embedded NIC1 | Enabled |
|
| PXE |
|
|
| Embedded NIC2 | Disabled |
|
| PXE |
|
4.From the Main window, select Exit→Save Changes and Exit to exit the utility.
5.Repeat this procedure for each HP ProLiant DL160 G5 node in the HP XC system.
4.5.3Preparing HP ProLiant DL360 G4 Nodes
Use the following tools to configure the appropriate settings for HP ProLiant DL360 G4 (including DL360 G4p) servers:
•Integrated Lights Out (iLO) Setup Utility
•
HP ProLiant DL360 G4 servers use the iLO utility; thus, they need certain settings that you cannot make until the iLO has an IP address. The HP XC System Software Installation Guide provides instructions for using a browser to connect to the iLO to enable telnet access.
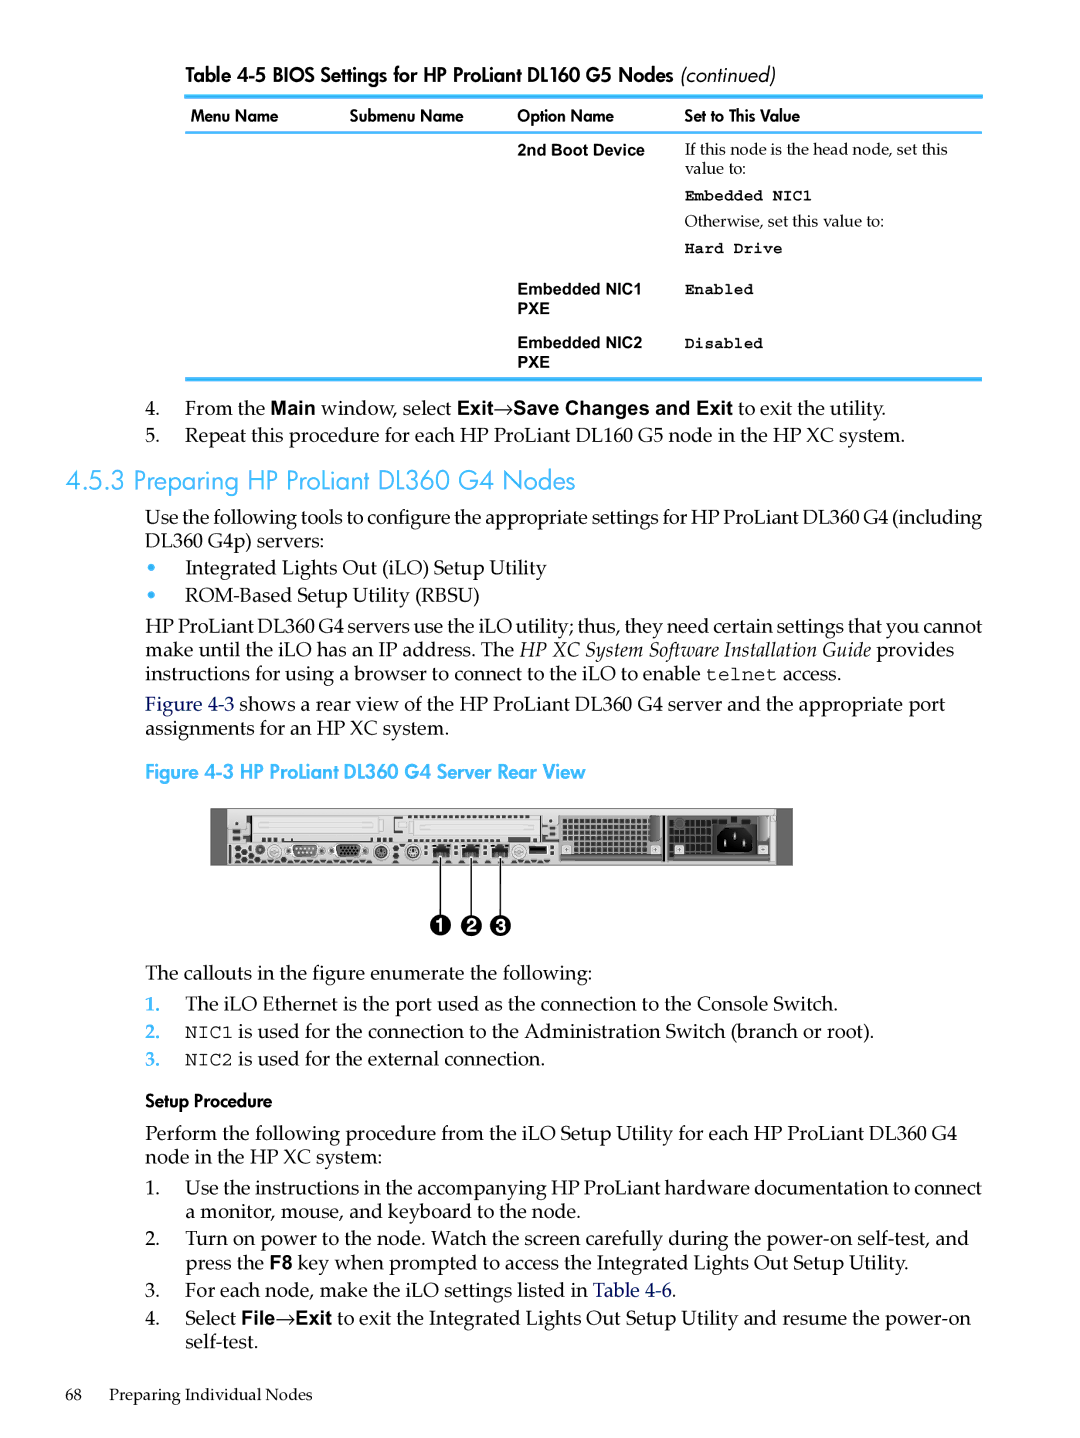
Figure 4-3 shows a rear view of the HP ProLiant DL360 G4 server and the appropriate port assignments for an HP XC system.
Figure 4-3 HP ProLiant DL360 G4 Server Rear View
1
The callouts in the figure enumerate the following:
1.The iLO Ethernet is the port used as the connection to the Console Switch.
2.NIC1 is used for the connection to the Administration Switch (branch or root).
3.NIC2 is used for the external connection.
Setup Procedure
Perform the following procedure from the iLO Setup Utility for each HP ProLiant DL360 G4 node in the HP XC system:
1.Use the instructions in the accompanying HP ProLiant hardware documentation to connect a monitor, mouse, and keyboard to the node.
2.Turn on power to the node. Watch the screen carefully during the
3.For each node, make the iLO settings listed in Table
4.Select File→Exit to exit the Integrated Lights Out Setup Utility and resume the
68 Preparing Individual Nodes