Table 4-18 BIOS Settings for xw8400 Workstations
Menu Name | Submenu Name | Option Name | Set to This Value | |
Storage | Storage Options | SATA Emulation | Separate IDE Controller | |
|
|
| After you make this setting, make sure the Primary | |
|
|
| SATA Controller and Secondary SATA | |
|
|
| Controller settings are set to Enabled. | |
|
| Boot Order | Set the following boot order on all nodes except | |
|
|
| the head node: | |
|
|
| 1. | Optical Drive |
|
|
| 2. | USB device |
|
|
| 3. | Broadcom Ethernet controller |
|
|
| 4. | Hard Drive |
|
|
| 5. | Intel Ethernet controller |
On the head node, set the boot order so that the
Optical Drive is listed before the hard disk.
7.Select File→Save Changes & Exit to exit the Setup Utility.
8.Repeat this procedure for each workstation in the hardware configuration.
9.Turn off power to all nodes except the head node.
10.Follow the software installation instructions in the HP XC System Software Installation Guide to install the HP XC System Software.
4.5.9 Preparing HP xw8600 Workstations
You can integrate HP xw8600 workstations into an HP XC system as a head node, service node, or compute node.
Follow the procedures in this section to prepare each workstation before installing and configuring the HP XC System Software.
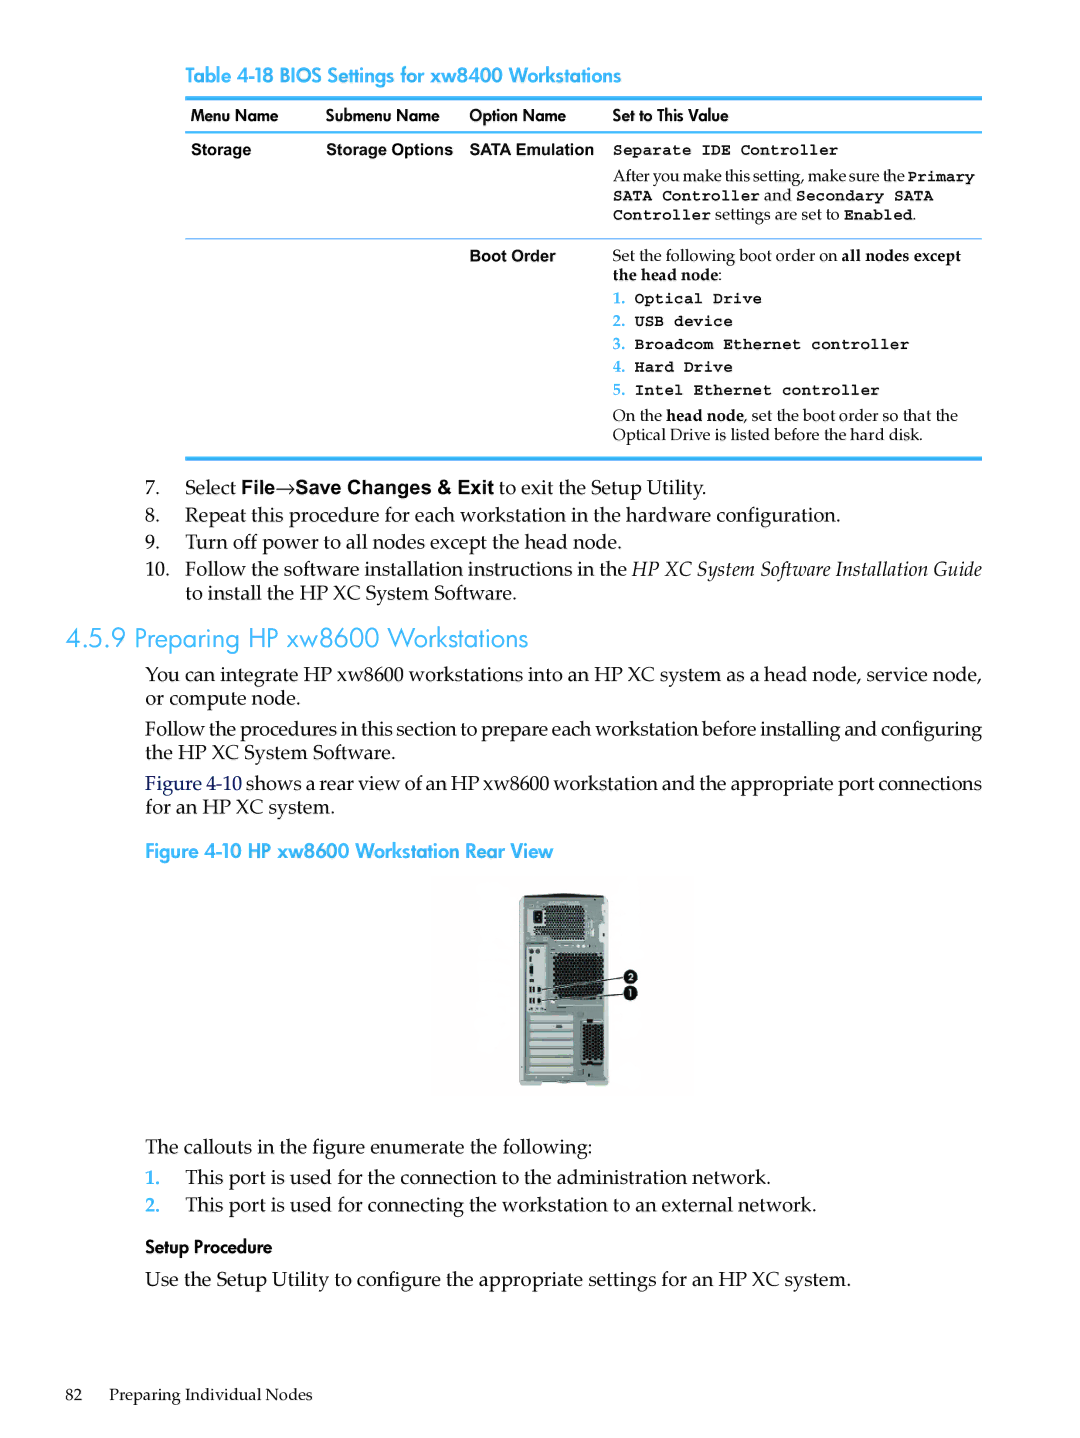
Figure 4-10 shows a rear view of an HP xw8600 workstation and the appropriate port connections for an HP XC system.
Figure 4-10 HP xw8600 Workstation Rear View
The callouts in the figure enumerate the following:
1.This port is used for the connection to the administration network.
2.This port is used for connecting the workstation to an external network.
Setup Procedure
Use the Setup Utility to configure the appropriate settings for an HP XC system.
82 Preparing Individual Nodes