Chapter 4---Maintenance (Removal/Replacement)
4.2 Projector Covers
Prior to removing either cover, review the chapter on Safety and adhere to all warnings and cautions.
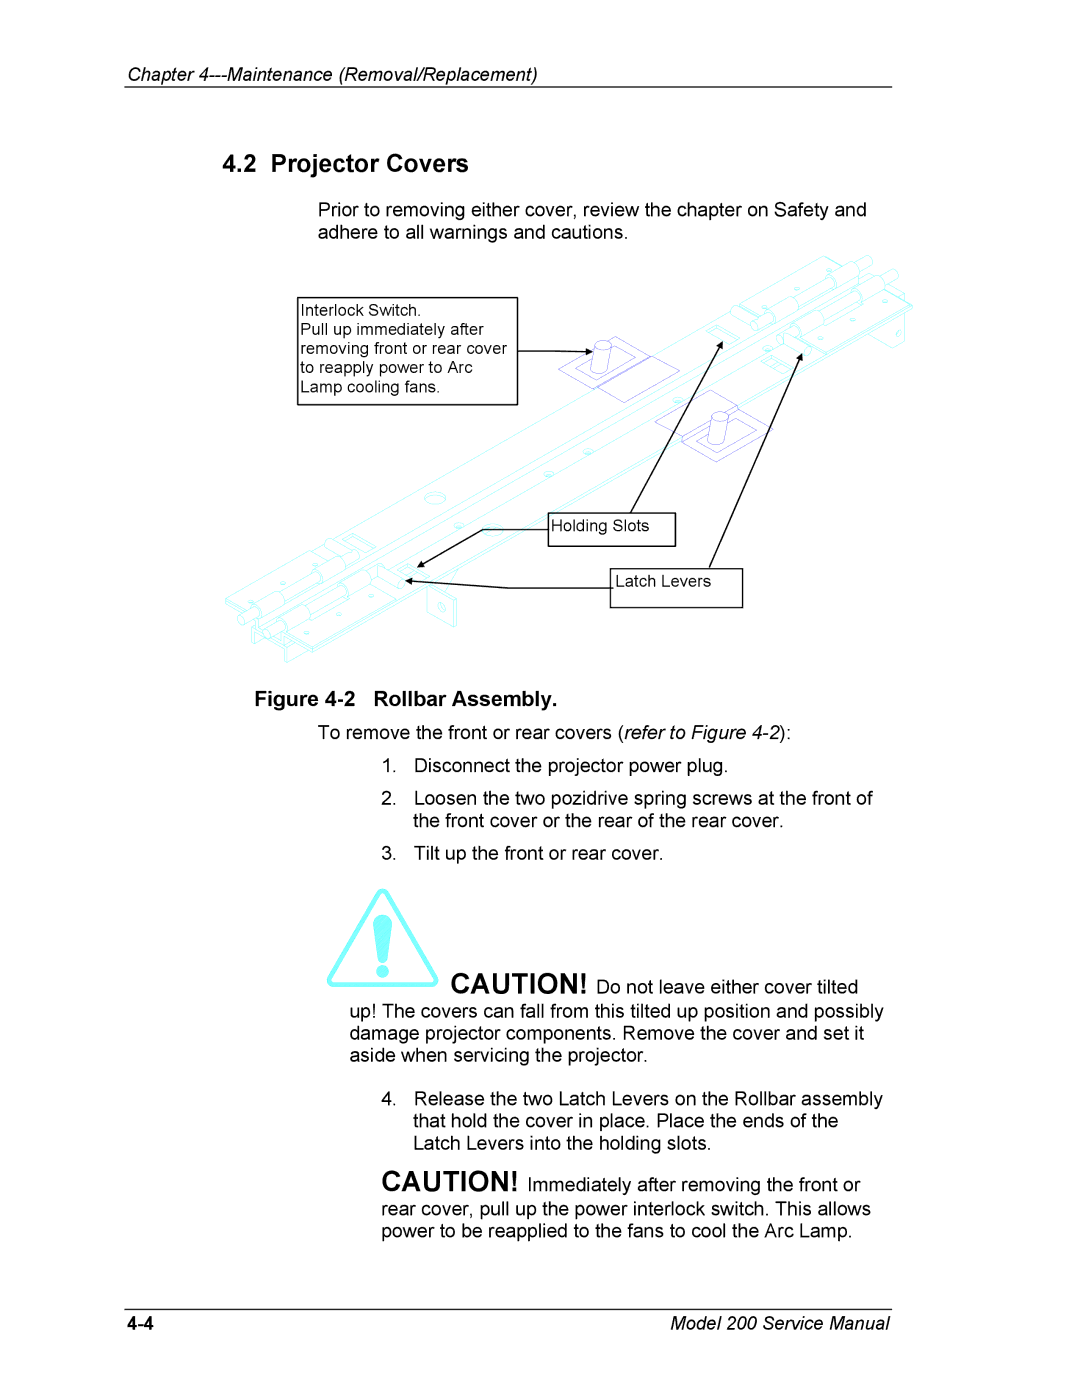
Interlock Switch.
Pull up immediately after
removing front or rear cover ![]() to reapply power to Arc
to reapply power to Arc
Lamp cooling fans.
Holding Slots
![]() Latch Levers
Latch Levers
Figure 4-2 Rollbar Assembly.
To remove the front or rear covers (refer to Figure
1.Disconnect the projector power plug.
2.Loosen the two pozidrive spring screws at the front of the front cover or the rear of the rear cover.
3.Tilt up the front or rear cover.
 CAUTION! Do not leave either cover tilted up! The covers can fall from this tilted up position and possibly damage projector components. Remove the cover and set it aside when servicing the projector.
4.Release the two Latch Levers on the Rollbar assembly that hold the cover in place. Place the ends of the Latch Levers into the holding slots.
CAUTION! Immediately after removing the front or rear cover, pull up the power interlock switch. This allows power to be reapplied to the fans to cool the Arc Lamp.
Model 200 Service Manual |