Chapter 3 Service Adjustments
2.Remove the projector rear cover (Section 4.2).
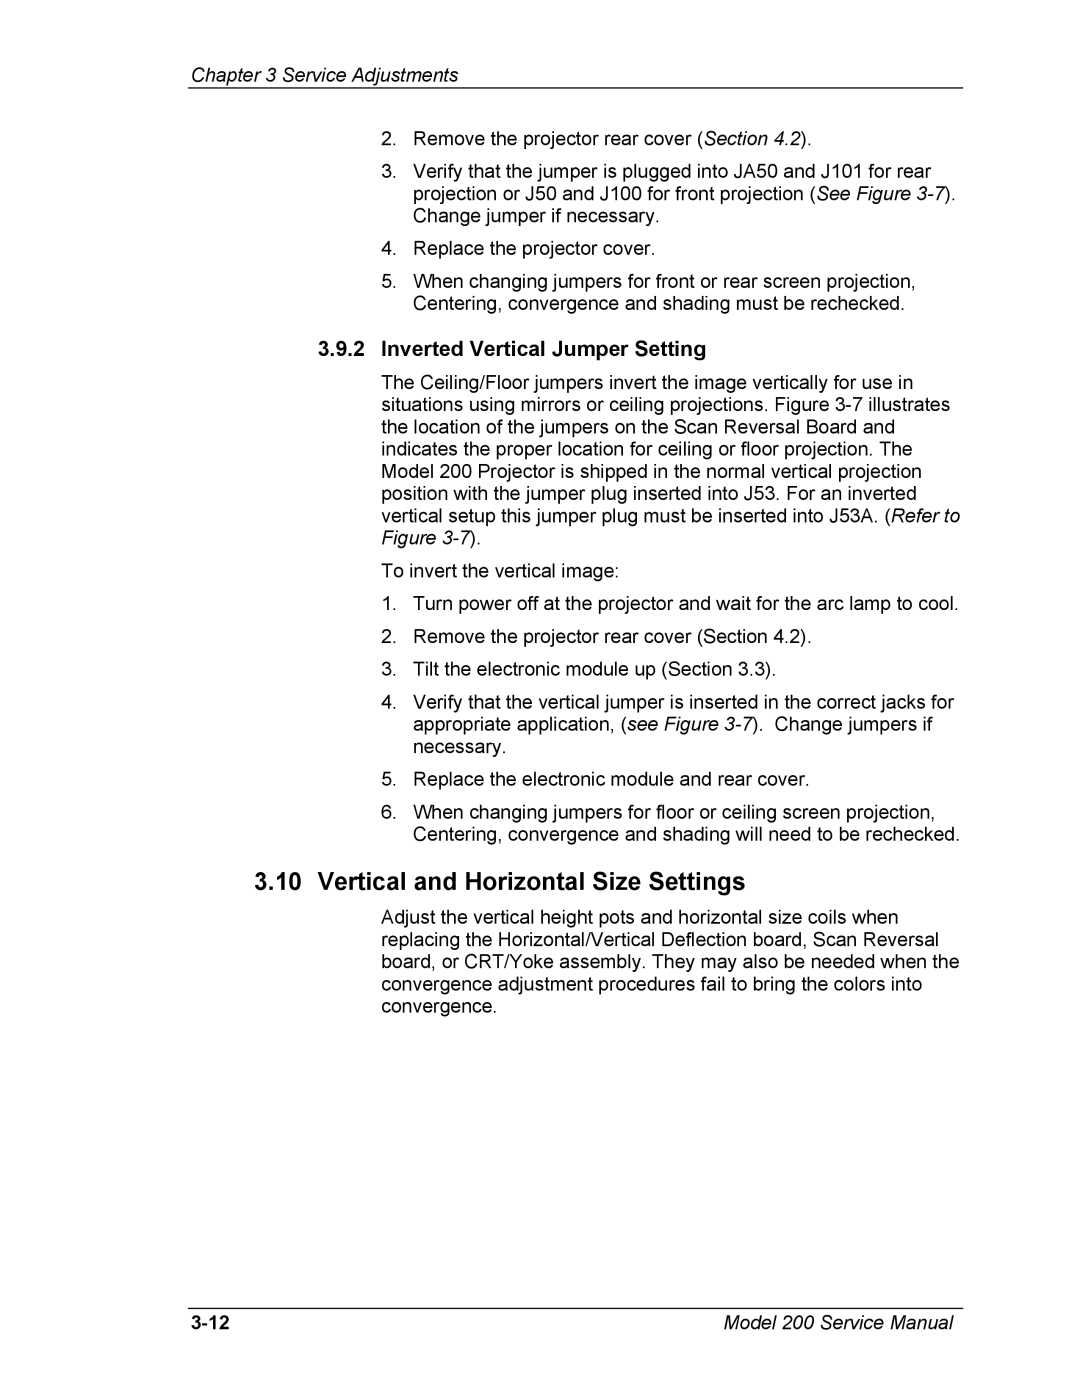
3.Verify that the jumper is plugged into JA50 and J101 for rear projection or J50 and J100 for front projection (See Figure
4.Replace the projector cover.
5.When changing jumpers for front or rear screen projection, Centering, convergence and shading must be rechecked.
3.9.2Inverted Vertical Jumper Setting
The Ceiling/Floor jumpers invert the image vertically for use in situations using mirrors or ceiling projections. Figure
To invert the vertical image:
1.Turn power off at the projector and wait for the arc lamp to cool.
2.Remove the projector rear cover (Section 4.2).
3.Tilt the electronic module up (Section 3.3).
4.Verify that the vertical jumper is inserted in the correct jacks for appropriate application, (see Figure
5.Replace the electronic module and rear cover.
6.When changing jumpers for floor or ceiling screen projection, Centering, convergence and shading will need to be rechecked.
3.10Vertical and Horizontal Size Settings
Adjust the vertical height pots and horizontal size coils when replacing the Horizontal/Vertical Deflection board, Scan Reversal board, or CRT/Yoke assembly. They may also be needed when the convergence adjustment procedures fail to bring the colors into convergence.
Model 200 Service Manual |